Sony VGX-XL1 User Guide - Page 129
Recon RAID, WARNING, I understand, Restore Complete System, Intel Matrix Storage Console
 |
View all Sony VGX-XL1 manuals
Add to My Manuals
Save this manual to your list of manuals |
Page 129 highlights
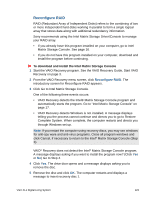
The computer restarts and displays a page with the following VAIO Recovery options: • Restore C: Drive • Restore Complete System • Reconfigure RAID 5 Click Reconfigure RAID. A Reconfigure RAID page displays. Read the information. 6 Click Next. Note: If for any reason a RAID array cannot be deleted, a message displays stating "No RAID Array Detected." Click OK to close the message and then click Back to return to the previous screen. The Reconfigure RAID (Step 1 of 1) screen displays. Read the information on the screen including the WARNING statement. 7 Select the I understand check box and click Next. The VAIO Recovery program automatically deletes all RAID arrays on the hard disk drive. When complete, a message displays with instructions on completing the process. 8 Leave the disc in the optical drive and click OK. The computer restarts and displays a screen with the following options: • Restore C: Drive • Restore Complete System • Reconfigure RAID 9 Click Restore Complete System to restore all original factory-installed software. See Restore Complete System, page 11 for step-by-step instructions to perform this procedure. 10 When complete, start the Intel Matrix Storage Console and configure your RAID array(s), as desired. See Intel Matrix Storage Console, for additional information. 126 VGX-XL1 Digital Living System
-
 1
1 -
2
-
3
-
4
-
5
-
6
-
7
-
8
-
9
-
10
-
11
-
12
-
13
-
14
-
15
-
16
-
17
-
18
-
19
-
20
-
21
-
22
-
23
-
24
-
25
-
26
-
27
-
28
-
29
-
30
-
31
-
32
-
33
-
34
-
35
-
36
-
37
-
38
-
39
-
40
-
41
-
42
-
43
-
44
-
45
-
46
-
47
-
48
-
49
-
50
-
51
-
52
-
53
-
54
-
55
-
56
-
57
-
58
-
59
-
60
-
61
-
62
-
63
-
64
-
65
-
66
-
67
-
68
-
69
-
70
-
71
-
72
-
73
-
74
-
75
-
76
-
77
-
78
-
79
-
80
-
81
-
82
-
83
-
84
-
85
-
86
-
87
-
88
-
89
-
90
-
91
-
92
-
93
-
94
-
95
-
96
-
97
-
98
-
99
-
100
-
101
-
102
-
103
-
104
-
105
-
106
-
107
-
108
-
109
-
110
-
111
-
112
-
113
-
114
-
115
-
116
-
117
-
118
-
119
-
120
-
121
-
122
-
123
-
 124
124 -
 125
125 -
 126
126 -
 127
127 -
 128
128 -
 129
129 -
 130
130 -
 131
131 -
 132
132 -
 133
133 -
 134
134 -
135
-
136
-
137
-
138
-
139
-
140
-
141
-
142
-
143
-
144
-
145
-
146
-
147
-
148
-
149
-
150
-
151
-
152
-
153
-
154
-
155
-
156
-
157
-
158
-
159
-
160
-
161
-
162
-
163
-
164
-
165
-
166
-
167
-
168
-
169
-
170
-
171
-
172
-
173
-
174
-
175
 |
 |