TP-Link 10GE T1700G-28TQUN V1 User Guide - Page 233
RADIUS Server Config
 |
View all TP-Link 10GE manuals
Add to My Manuals
Save this manual to your list of manuals |
Page 233 highlights
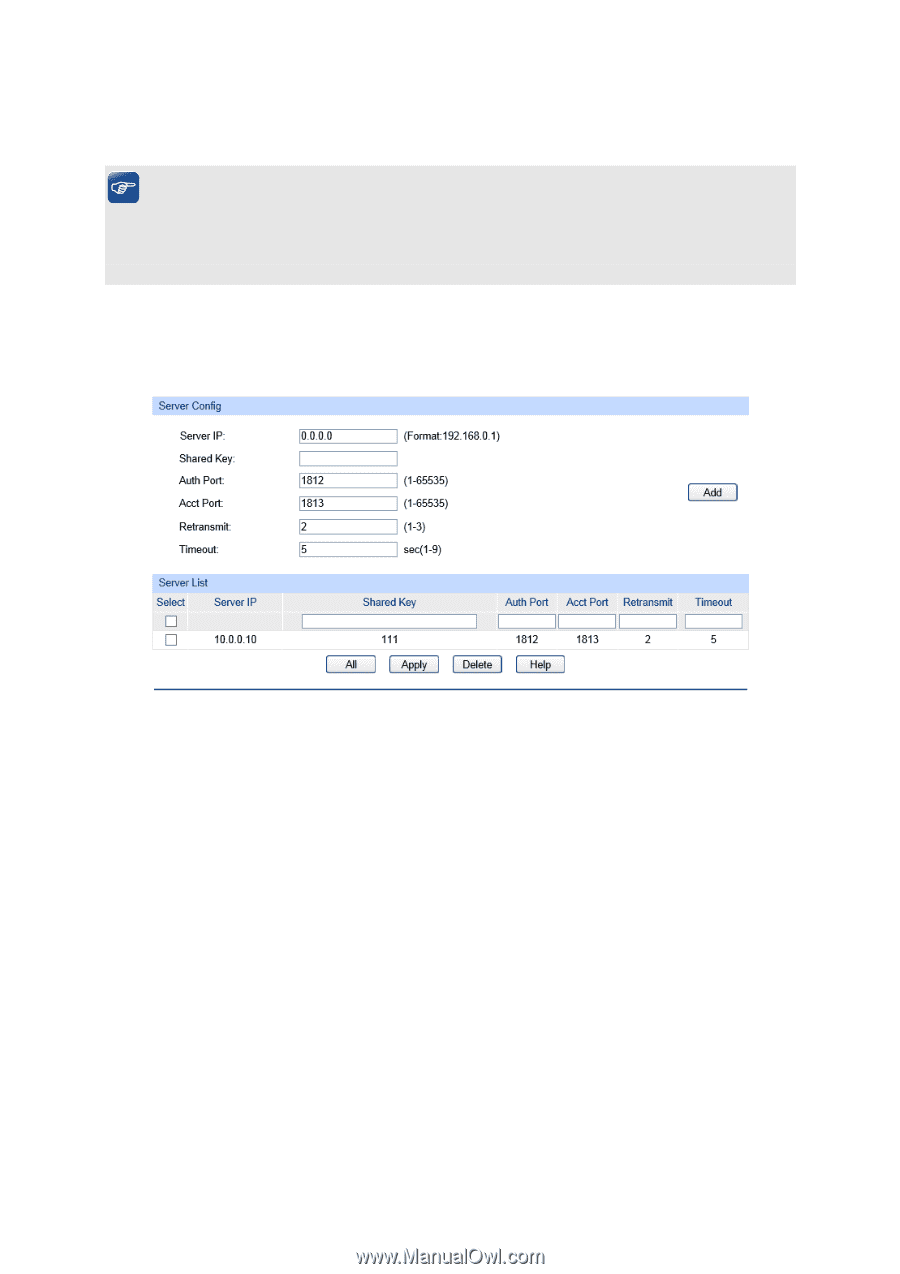
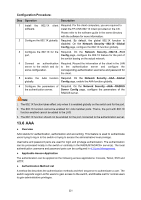
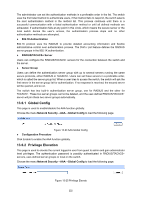
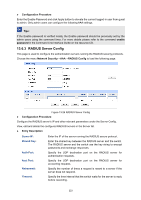
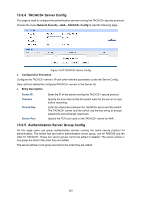
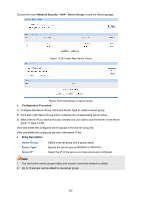
Configuration Procedure Enter the Enable Password and click Apply button to elevate the current logged-in user from guest to admin. Only admin users can configure the following AAA settings. Tips: If the Enable password is verified locally, the Enable password should be previously set by the admin users using the command lines. For more details please refer to the command enable password in the Command Line Interface Guide on the resource CD. 13.6.3 RADIUS Server Config This page is used to configure the authentication servers running the RADIUS security protocols. Choose the menu Network Security→AAA→RADIUS Conifg to load the following page. Figure 13-26 RADIUS Server Config Configuration Procedure Configure the RADIUS server's IP and other relevant parameters under the Server Config. View, edit and delete the configured RADIUS servers in the Server list. Entry Description Server IP: Shared Key: Auth Port: Acct Port: Retransmit: Timeout: Enter the IP of the server running the RADIUS secure protocol. Enter the shared key between the RADIUS server and the switch. The RADIUS server and the switch use the key string to encrypt passwords and exchange responses. Specify the UDP destination port on the RADIUS server for authentication requests. Specify the UDP destination port on the RADIUS server for accounting requests. Specify the number of times a request is resent to a server if the server does not respond. Specify the time interval that the switch waits for the server to reply before resending. 223
-
 1
1 -
2
-
3
-
4
-
5
-
6
-
7
-
8
-
9
-
10
-
11
-
12
-
13
-
14
-
15
-
16
-
17
-
18
-
19
-
20
-
21
-
22
-
23
-
24
-
25
-
26
-
27
-
28
-
29
-
30
-
31
-
32
-
33
-
34
-
35
-
36
-
37
-
38
-
39
-
40
-
41
-
42
-
43
-
44
-
45
-
46
-
47
-
48
-
49
-
50
-
51
-
52
-
53
-
54
-
55
-
56
-
57
-
58
-
59
-
60
-
61
-
62
-
63
-
64
-
65
-
66
-
67
-
68
-
69
-
70
-
71
-
72
-
73
-
74
-
75
-
76
-
77
-
78
-
79
-
80
-
81
-
82
-
83
-
84
-
85
-
86
-
87
-
88
-
89
-
90
-
91
-
92
-
93
-
94
-
95
-
96
-
97
-
98
-
99
-
100
-
101
-
102
-
103
-
104
-
105
-
106
-
107
-
108
-
109
-
110
-
111
-
112
-
113
-
114
-
115
-
116
-
117
-
118
-
119
-
120
-
121
-
122
-
123
-
124
-
125
-
126
-
127
-
128
-
129
-
130
-
131
-
132
-
133
-
134
-
135
-
136
-
137
-
138
-
139
-
140
-
141
-
142
-
143
-
144
-
145
-
146
-
147
-
148
-
149
-
150
-
151
-
152
-
153
-
154
-
155
-
156
-
157
-
158
-
159
-
160
-
161
-
162
-
163
-
164
-
165
-
166
-
167
-
168
-
169
-
170
-
171
-
172
-
173
-
174
-
175
-
176
-
177
-
178
-
179
-
180
-
181
-
182
-
183
-
184
-
185
-
186
-
187
-
188
-
189
-
190
-
191
-
192
-
193
-
194
-
195
-
196
-
197
-
198
-
199
-
200
-
201
-
202
-
203
-
204
-
205
-
206
-
207
-
208
-
209
-
210
-
211
-
212
-
213
-
214
-
215
-
216
-
217
-
218
-
219
-
220
-
221
-
222
-
223
-
224
-
225
-
226
-
227
-
 228
228 -
 229
229 -
 230
230 -
 231
231 -
 232
232 -
 233
233 -
 234
234 -
 235
235 -
 236
236 -
 237
237 -
 238
238 -
239
-
240
-
241
-
242
-
243
-
244
-
245
-
246
-
247
-
248
-
249
-
250
-
251
-
252
-
253
-
254
-
255
-
256
-
257
-
258
-
259
-
260
-
261
-
262
-
263
-
264
-
265
-
266
-
267
-
268
-
269
-
270
-
271
-
272
-
273
-
274
-
275
-
276
-
277
-
278
-
279
-
280
-
281
-
282
-
283
-
284
-
285
 |
 |