Thermador PRD48JDSGU Use and Care Manual - Page 20
Important, Warning, Caution
 |
View all Thermador PRD48JDSGU manuals
Add to My Manuals
Save this manual to your list of manuals |
Page 20 highlights
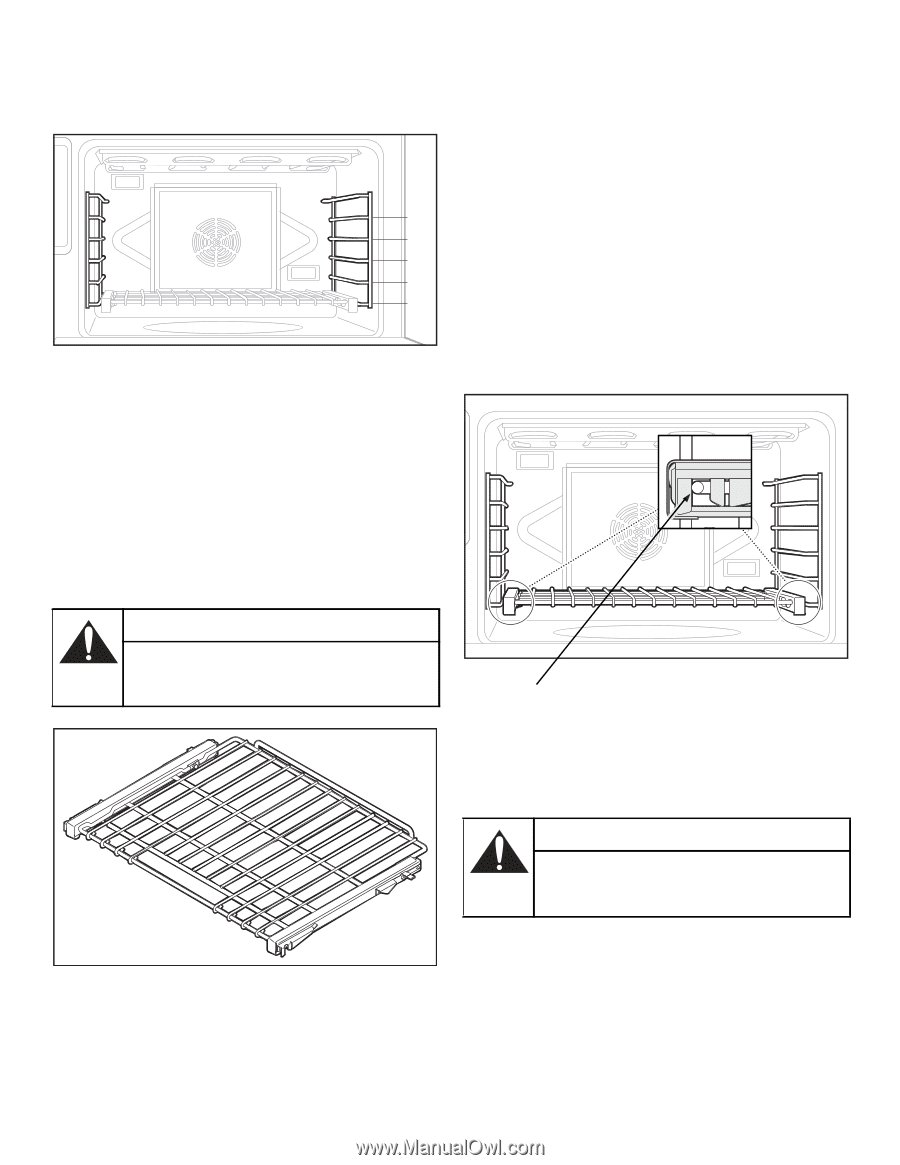
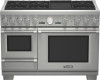
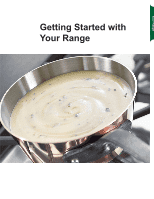
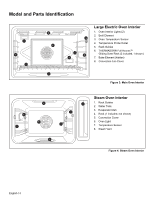
the most frequently used position. Place rack(s) in the proper position before turning on the oven. 5 4 3 2 1 Figure 5: Large Oven Rack Positions Placing Rack in Oven: To insert a rack in the oven, hold the rack with the back rail up toward the back. Place the safety hooks under the front of the rail guides. Push the rack into the oven, lifting the rack stops over the front of the rail guides. Slide the rack into position. When placing food on a rack, pull the rack out to the stop position. The racks are designed to lock and not tilt while in fully-extended position. Removing Rack from Oven: To remove or reposition a rack in the oven, pull the rack toward the front of the oven. Lift up the front of the rack over the safety stops and pull the rack from the oven. 5. THERMADOR® Full Access™ Gliding oven racks are standard on all models. Each gliding oven rack can be pulled out and pushed back into the oven with minimal effort - even while supporting a large turkey or roast. Side View IMPORTANT: ALWAYS remove the gliding oven racks before selfcleaning the oven. If the gliding racks remain in the oven during Self-Clean, lubricants in the glide mechanisms of each rack will be lost and the finish will discolor. WARNING: To help prevent burns, NEVER remove or reposition the oven racks while the oven is ON or while the oven is cooling. Figure 7: View of Rack on the Rack Guide IMPORTANT: When placing the gliding rack in the oven, make sure the front supports on the rack guides rest in the large slots at the front corners of the rack, as shown. This is necessary to keep the rack in the correct position while fully inserted into the oven. Always remove before Self Clean CAUTION: Aluminum foil should NEVER be used to cover the oven racks or to line the oven. DO NOT remove the broiler element in the electric oven. Figure 6: Gliding Oven Rack 6. Ensure that the STAR® burner caps are correctly seated on the STAR® burner bases of the range's cooktop. Turn on each STAR® burner to check for proper flame color. See "Flame Description" on page 25 for details. Note: It is normal for the cooling process to push heated air out into the room when the oven is on. English 16
-
 1
1 -
2
-
3
-
4
-
5
-
6
-
7
-
8
-
9
-
10
-
11
-
12
-
13
-
14
-
 15
15 -
 16
16 -
 17
17 -
 18
18 -
 19
19 -
 20
20 -
 21
21 -
 22
22 -
 23
23 -
 24
24 -
 25
25 -
26
-
27
-
28
-
29
-
30
-
31
-
32
-
33
-
34
-
35
-
36
-
37
-
38
-
39
-
40
-
41
-
42
-
43
-
44
-
45
-
46
-
47
-
48
-
49
-
50
-
51
-
52
-
53
-
54
-
55
-
56
-
57
-
58
-
59
-
60
-
61
-
62
-
63
-
64
-
65
-
66
-
67
-
68
-
69
-
70
-
71
-
72
-
73
-
74
-
75
-
76
-
77
-
78
-
79
-
80
-
81
-
82
-
83
-
84
-
85
-
86
-
87
-
88
-
89
-
90
-
91
-
92
-
93
-
94
-
95
-
96
-
97
 |
 |