Canon MX700 MX700 series Quick Start Guide - Page 39
Scanning Using the Operation Panel of the Machine, Color, Black, Important
 |
UPC - 013803081336
View all Canon MX700 manuals
Add to My Manuals
Save this manual to your list of manuals |
Page 39 highlights
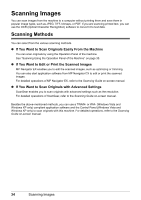
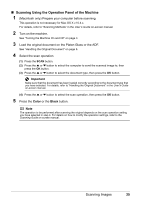
„ Scanning Using the Operation Panel of the Machine 1 (Macintosh only) Prepare your computer before scanning. This operation is not necessary for Mac OS X v.10.4.x. For details, refer to "Scanning Methods" in the User's Guide on-screen manual. 2 Turn on the machine. See "Turning the Machine On and Off" on page 4. 3 Load the original document on the Platen Glass or the ADF. See "Handling the Original Document" on page 6. 4 Select the scan operation. (1) Press the SCAN button. (2) Press the { or } button to select the computer to send the scanned image to, then press the OK button. (3) Press the { or } button to select the document type, then press the OK button. Important Make sure that the document has been loaded correctly according to the document type that you have selected. For details, refer to "Handling the Original Document" in the User's Guide on-screen manual. (4) Press the { or } button to select the scan operation, then press the OK button. 5 Press the Color or the Black button. Note The operation to be performed after scanning the original depends on the scan operation setting you have selected in step 4. For details on how to modify the operation settings, refer to the Scanning Guide on-screen manual. Scanning Images 35
-
 1
1 -
2
-
3
-
4
-
5
-
6
-
7
-
8
-
9
-
10
-
11
-
12
-
13
-
14
-
15
-
16
-
17
-
18
-
19
-
20
-
21
-
22
-
23
-
24
-
25
-
26
-
27
-
28
-
29
-
30
-
31
-
32
-
33
-
 34
34 -
 35
35 -
 36
36 -
 37
37 -
 38
38 -
 39
39 -
 40
40 -
 41
41 -
 42
42 -
 43
43 -
 44
44 -
45
-
46
-
47
-
48
-
49
-
50
-
51
-
52
-
53
-
54
-
55
-
56
-
57
-
58
-
59
-
60
-
61
-
62
-
63
-
64
-
65
-
66
-
67
-
68
-
69
-
70
-
71
-
72
-
73
-
74
-
75
-
76
-
77
-
78
-
79
-
80
-
81
-
82
-
83
-
84
-
85
-
86
-
87
-
88
-
89
-
90
-
91
-
92
-
93
-
94
-
95
-
96
-
97
-
98
-
99
-
100
-
101
-
102
-
103
-
104
-
105
-
106
-
107
-
108
-
109
-
110
-
111
-
112
-
113
-
114
-
115
-
116
-
117
-
118
-
119
-
120
-
121
-
122
-
123
-
124
-
125
-
126
-
127
-
128
-
129
-
130
-
131
-
132
-
133
-
134
-
135
-
136
-
137
-
138
-
139
-
140
-
141
-
142
-
143
-
144
-
145
-
146
-
147
-
148
-
149
-
150
-
151
-
152
 |
 |
