Canon PIXMA iP4200 iP4200 Quick Start Guide - Page 75
In Windows XP and Windows 2000, In Windows Me and Windows 98 - driver for mac
 |
View all Canon PIXMA iP4200 manuals
Add to My Manuals
Save this manual to your list of manuals |
Page 75 highlights
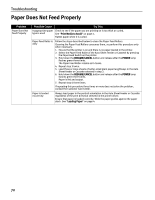
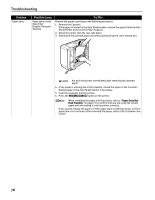
Troubleshooting Problem Printer Does Not Start or Printer Stops During Print Jobs Possible Cause There may be problems with your operating system Try This Restart your computer. It may solve the problem. Delete an undesired print job, if there is any. Use Canon IJ Status Monitor in Windows or Printer Setup Utility (or Print Center) in Macintosh for the deletion. 1. Open the printer properties dialog box. See "Opening the Printer Properties Dialog Box Directly from the Start Menu" on page 35. 2. Click the Maintenance tab and then View Printer Status. 3. Click Display Print Queue. 4. Select Cancel All Documents in the Printer menu. In Windows XP and Windows 2000 The print jobs may not be selected. 5. When the confirmation message is displayed, click Yes. The print job is deleted. In Windows Me and Windows 98 Click to select an undesired document and select Purge Print Documents in the Printer menu. Cannot Print to End of Job 1. Select Applications from the Go menu. 2. Double-click the Printer Setup Utility icon in the Utilities folder. When using Mac OS X v.10.2, double-click the Print Center icon. 3. Double-click the name of your printer displayed under Name in the Printer List. 4. Click to select an undesired document and click . The print job is deleted. Incorrect page size is selected Ensure that the page size setting matches the size of the paper loaded in the printer: z Check the Paper Size setting from within your application to ensure that it matches the size of the paper loaded. z Check Paper Size on the Page Setup tab in the printer properties dialog box of the printer driver (Windows) or the Page Setup dialog box of the printer driver (Macintosh) to ensure that it matches the size of the paper loaded. The size of the print data is too large Check the size of the print data. For Windows XP and Windows 2000, if the size of the data is too large, part of it may be lost. When the spool format is EMF, follow the procedure below. 1. Open the printer properties dialog box. 2. On the Page Setup tab, click Print Options. 3. Select the Reduce spool data size check box, and click OK. When Reduce spool data size is set, the print quality may be degraded. Performing automatic duplex printing Select Use reduced printing in the printer driver. It may solve the problem. Print layout may be altered with the reduced printing function. 1. Open the printer properties dialog box. 2. Click Print Area Setup in the Page Setup tab and select Use reduced printing. 1. In the Print dialog box, select Duplex Printing & Margin from the pop-up menu. 2. Select Automatic Duplex Printing, and select Use reduced printing in Print Area. 71
-
 1
1 -
2
-
3
-
4
-
5
-
6
-
7
-
8
-
9
-
10
-
11
-
12
-
13
-
14
-
15
-
16
-
17
-
18
-
19
-
20
-
21
-
22
-
23
-
24
-
25
-
26
-
27
-
28
-
29
-
30
-
31
-
32
-
33
-
34
-
35
-
36
-
37
-
38
-
39
-
40
-
41
-
42
-
43
-
44
-
45
-
46
-
47
-
48
-
49
-
50
-
51
-
52
-
53
-
54
-
55
-
56
-
57
-
58
-
59
-
60
-
61
-
62
-
63
-
64
-
65
-
66
-
67
-
68
-
69
-
 70
70 -
 71
71 -
 72
72 -
 73
73 -
 74
74 -
 75
75 -
 76
76 -
 77
77 -
 78
78 -
 79
79 -
 80
80 -
81
-
82
-
83
-
84
-
85
-
86
-
87
-
88
-
89
-
90
-
91
-
92
-
93
-
94
-
95
-
96
-
97
-
98
-
99
-
100
-
101
-
102
-
103
-
104
 |
 |