Canon PowerShot A2500 User Guide - Page 11
Open the cover., Insert the battery., Insert the memory card., Close the cover., Check the card's
 |
View all Canon PowerShot A2500 manuals
Add to My Manuals
Save this manual to your list of manuals |
Page 11 highlights
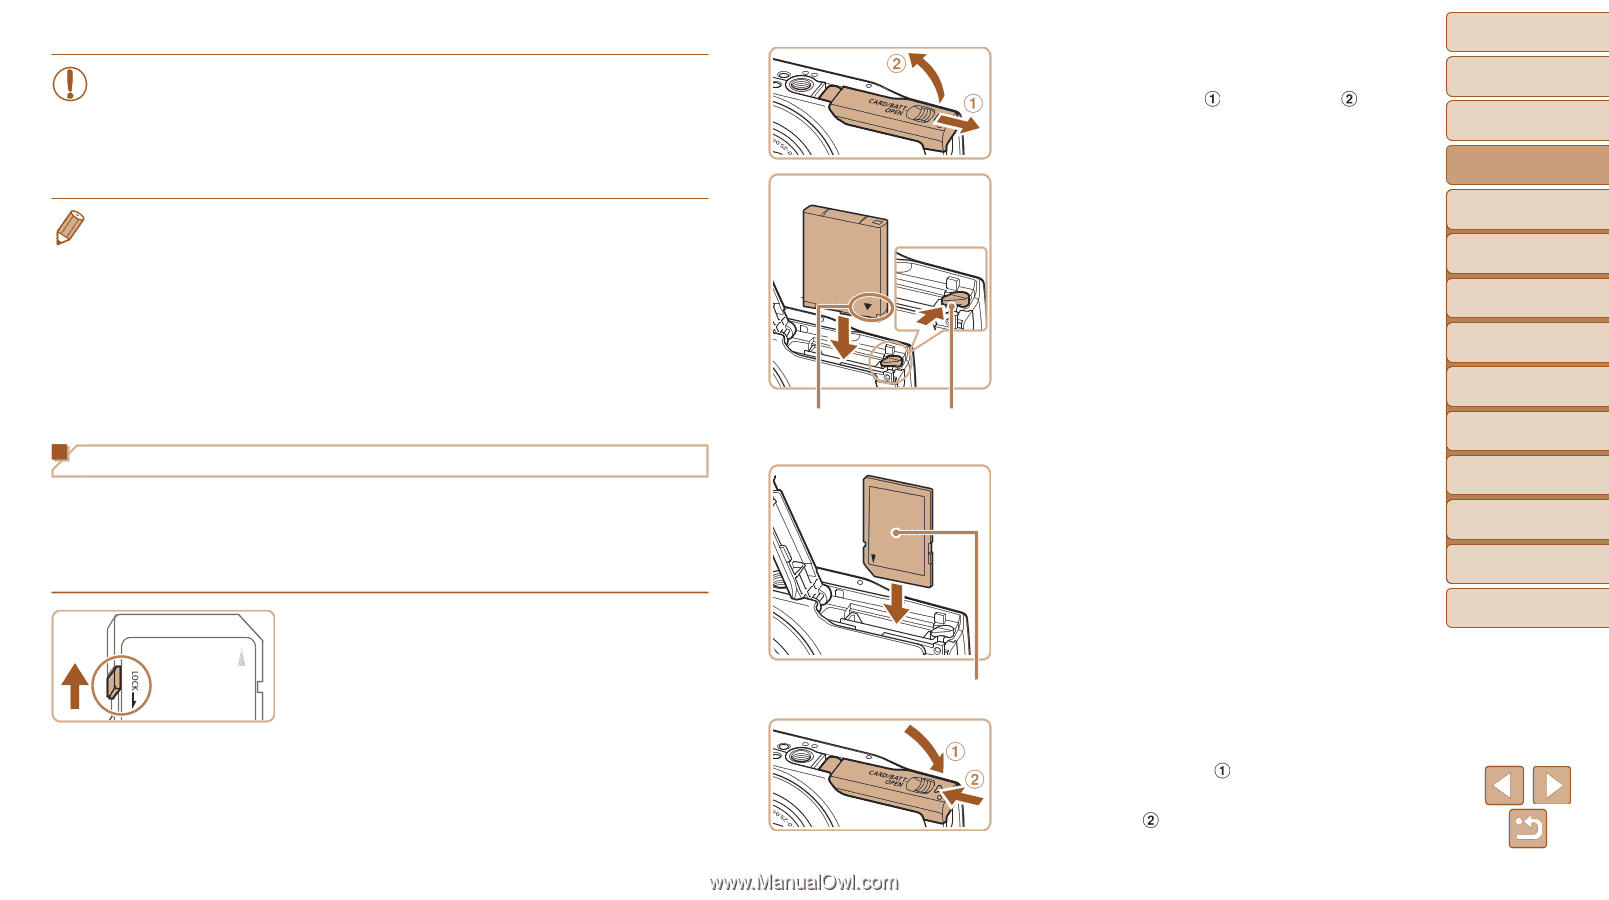
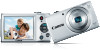
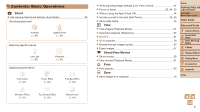
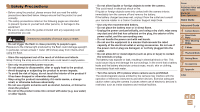
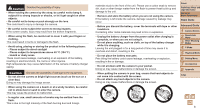
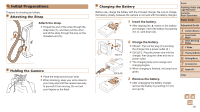
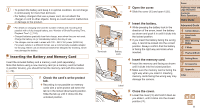
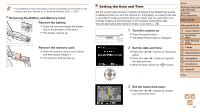
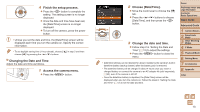
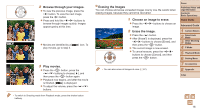
• To protect the battery and keep it in optimal condition, do not charge it continuously for more than 24 hours. • For battery chargers that use a power cord, do not attach the charger or cord to other objects. Doing so could result in malfunction or damage to the product. • For details on charging time and the number of shots and recording time possible with a fully charged battery, see "Number of Shots/Recording Time, Playback Time" (=104). • Charged batteries gradually lose their charge, even when they are not used. Charge the battery on (or immediately before) the day of use. • The charger can be used in areas with 100 - 240 V AC power (50/60 Hz). For power outlets in a different format, use a commercially available adapter for the plug. Never use an electrical transformer designed for traveling, which may damage the battery. Inserting the Battery and Memory Card Insert the included battery and a memory card (sold separately). Note that before using a new memory card (or a memory card formatted in another device), you should format the memory card with this camera (= 74). 1 Check the card's write-protect tab. zzRecording is not possible on memory cards with a write-protect tab when the tab is in the locked (downward) position. Slide the tab up until it clicks into the unlocked position. Terminals Battery Lock 2 Open the cover. zzSlide the cover ( ) and open it ( ). 3 Insert the battery. zzWhile pressing the battery lock in the direction of the arrow, insert the battery as shown and push it in until it clicks into the locked position. zzIf you insert the battery facing the wrong way, it cannot be locked into the correct position. Always confirm that the battery is facing the right way and locks when inserted. 4 Insert the memory card. zzInsert the memory card facing as shown until it clicks into the locked position. zzMake sure the memory card is facing the right way when you insert it. Inserting memory cards facing the wrong way may damage the camera. Cover Preliminary Notes and Legal Information Contents: Basic Operations Basic Guide Advanced Guide 1 Camera Basics 2 Smart Auto Mode 3 Other Shooting Modes 4 P Mode 5 Playback Mode 6 Setting Menu 7 Accessories 8 Appendix Index Label 5 Close the cover. zzLower the cover ( ) and hold it down as you slide it, until it clicks into the closed position ( ). 11
-
 1
1 -
2
-
3
-
4
-
5
-
 6
6 -
 7
7 -
 8
8 -
 9
9 -
 10
10 -
 11
11 -
 12
12 -
 13
13 -
 14
14 -
 15
15 -
 16
16 -
17
-
18
-
19
-
20
-
21
-
22
-
23
-
24
-
25
-
26
-
27
-
28
-
29
-
30
-
31
-
32
-
33
-
34
-
35
-
36
-
37
-
38
-
39
-
40
-
41
-
42
-
43
-
44
-
45
-
46
-
47
-
48
-
49
-
50
-
51
-
52
-
53
-
54
-
55
-
56
-
57
-
58
-
59
-
60
-
61
-
62
-
63
-
64
-
65
-
66
-
67
-
68
-
69
-
70
-
71
-
72
-
73
-
74
-
75
-
76
-
77
-
78
-
79
-
80
-
81
-
82
-
83
-
84
-
85
-
86
-
87
-
88
-
89
-
90
-
91
-
92
-
93
-
94
-
95
-
96
-
97
-
98
-
99
-
100
-
101
-
102
-
103
-
104
-
105
-
106
-
107
-
108
-
109
 |
 |