Canon PowerShot A2500 User Guide - Page 85
Choosing Paper Size and Layout Before Printing
 |
View all Canon PowerShot A2500 manuals
Add to My Manuals
Save this manual to your list of manuals |
Page 85 highlights
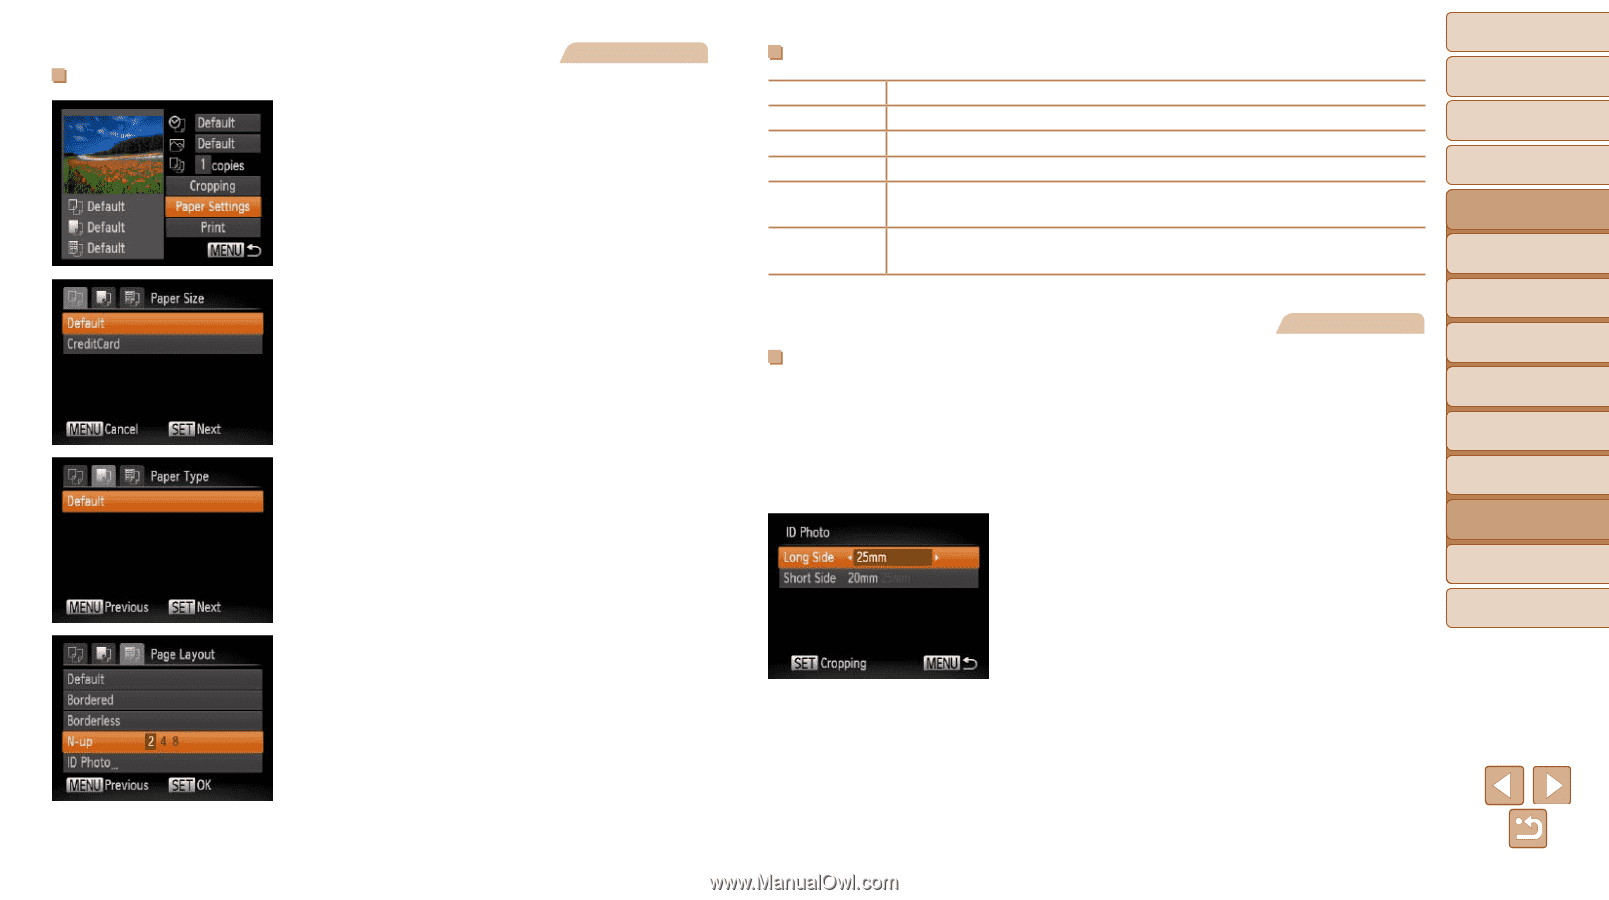
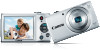
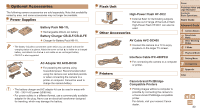
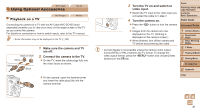
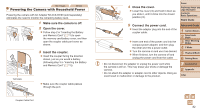
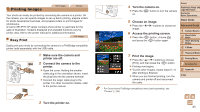
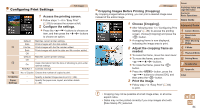
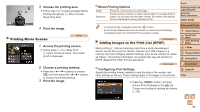
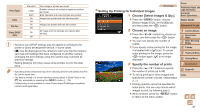
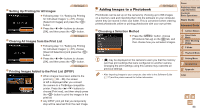
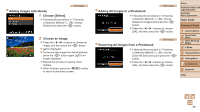
Still Images Choosing Paper Size and Layout Before Printing 1 Choose [Paper Settings]. zzAfter following step 1 in "Configuring Print Settings" (=84) to access the printing screen, choose [Paper Settings] and press the button. 2 Choose a paper size. zzPress the buttons to choose an option, and then press the button. 3 Choose a type of paper. zzPress the buttons to choose an option, and then press the button. 4 Choose a layout. zzPress the buttons to choose an option. zzWhen choosing [N-up], press the buttons to specify the number of images per sheet. zzPress the button. 5 Print the image. Available Layout Options Default Bordered Borderless N-up ID Photo Fixed Size Matches current printer settings. Prints with blank space around the image. Borderless, edge-to-edge printing. Choose how many images to print per sheet. Prints images for identification purposes. Only available for images with a resolution of L. Choose the print size. Choose from 3.5 x 5 in., postcard, or wide-format prints. Printing ID Photos Still Images 1 Choose [ID Photo]. zzFollowing steps 1 - 4 in "Choosing Paper Size and Layout Before Printing" (=85), choose [ID Photo] and press the button. 2 Choose the long and short side length. zzPress the buttons to choose an item. Choose the length by pressing the buttons, and then press the button. Cover Preliminary Notes and Legal Information Contents: Basic Operations Basic Guide Advanced Guide 1 Camera Basics 2 Smart Auto Mode 3 Other Shooting Modes 4 P Mode 5 Playback Mode 6 Setting Menu 7 Accessories 8 Appendix Index 85
-
 1
1 -
2
-
3
-
4
-
5
-
6
-
7
-
8
-
9
-
10
-
11
-
12
-
13
-
14
-
15
-
16
-
17
-
18
-
19
-
20
-
21
-
22
-
23
-
24
-
25
-
26
-
27
-
28
-
29
-
30
-
31
-
32
-
33
-
34
-
35
-
36
-
37
-
38
-
39
-
40
-
41
-
42
-
43
-
44
-
45
-
46
-
47
-
48
-
49
-
50
-
51
-
52
-
53
-
54
-
55
-
56
-
57
-
58
-
59
-
60
-
61
-
62
-
63
-
64
-
65
-
66
-
67
-
68
-
69
-
70
-
71
-
72
-
73
-
74
-
75
-
76
-
77
-
78
-
79
-
 80
80 -
 81
81 -
 82
82 -
 83
83 -
 84
84 -
 85
85 -
 86
86 -
 87
87 -
 88
88 -
 89
89 -
 90
90 -
91
-
92
-
93
-
94
-
95
-
96
-
97
-
98
-
99
-
100
-
101
-
102
-
103
-
104
-
105
-
106
-
107
-
108
-
109
 |
 |