Canon PowerShot A2500 User Guide - Page 24
Shooting Display Options, Shutter Button
 |
View all Canon PowerShot A2500 manuals
Add to My Manuals
Save this manual to your list of manuals |
Page 24 highlights
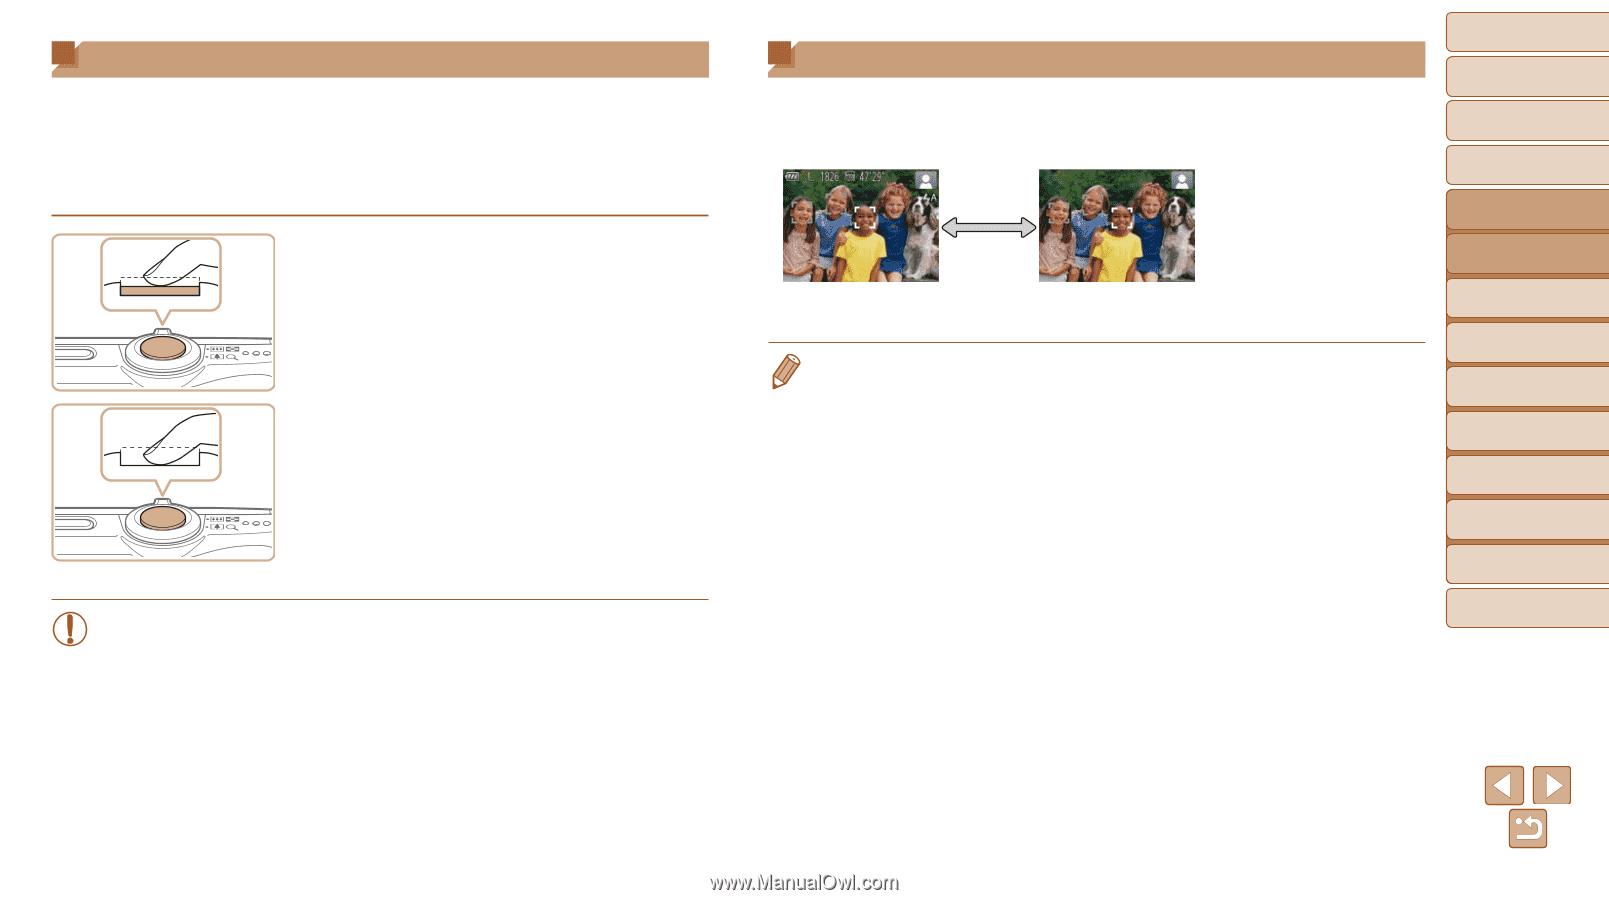
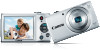
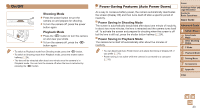
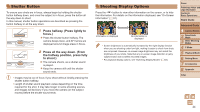
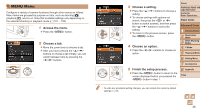
Shutter Button To ensure your shots are in focus, always begin by holding the shutter button halfway down, and once the subject is in focus, press the button all the way down to shoot. In this manual, shutter button operations are described as pressing the button halfway or all the way down. 1 Press halfway. (Press lightly to focus.) zzPress the shutter button halfway. The camera beeps twice, and AF frames are displayed around image areas in focus. 2 Press all the way down. (From the halfway position, press fully to shoot.) XXThe camera shoots, as a shutter sound is played. zzKeep the camera still until the shutter sound ends. • Images may be out of focus if you shoot without initially pressing the shutter button halfway. • Length of shutter sound playback varies depending on the time required for the shot. It may take longer in some shooting scenes, and images will be blurry if you move the camera (or the subject moves) before the shutter sound ends. Shooting Display Options Press the button to view other information on the screen, or to hide the information. For details on the information displayed, see "On-Screen Information" (=97). Information is displayed No information is displayed • Screen brightness is automatically increased by the night display function when you are shooting under low light, making it easier to check how shots are composed. However, on-screen image brightness may not match the brightness of your shots. Note that any on-screen image distortion or jerky subject motion will not affect recorded images. • For playback display options, see "Switching Display Modes" (=62). Cover Preliminary Notes and Legal Information Contents: Basic Operations Basic Guide Advanced Guide 1 Camera Basics 2 Smart Auto Mode 3 Other Shooting Modes 4 P Mode 5 Playback Mode 6 Setting Menu 7 Accessories 8 Appendix Index 24
-
 1
1 -
2
-
3
-
4
-
5
-
6
-
7
-
8
-
9
-
10
-
11
-
12
-
13
-
14
-
15
-
16
-
17
-
18
-
 19
19 -
 20
20 -
 21
21 -
 22
22 -
 23
23 -
 24
24 -
 25
25 -
 26
26 -
 27
27 -
 28
28 -
 29
29 -
30
-
31
-
32
-
33
-
34
-
35
-
36
-
37
-
38
-
39
-
40
-
41
-
42
-
43
-
44
-
45
-
46
-
47
-
48
-
49
-
50
-
51
-
52
-
53
-
54
-
55
-
56
-
57
-
58
-
59
-
60
-
61
-
62
-
63
-
64
-
65
-
66
-
67
-
68
-
69
-
70
-
71
-
72
-
73
-
74
-
75
-
76
-
77
-
78
-
79
-
80
-
81
-
82
-
83
-
84
-
85
-
86
-
87
-
88
-
89
-
90
-
91
-
92
-
93
-
94
-
95
-
96
-
97
-
98
-
99
-
100
-
101
-
102
-
103
-
104
-
105
-
106
-
107
-
108
-
109
 |
 |