Garmin GPS III Plus Owner's Manual - Page 52
appear. Select Auto to con
 |
UPC - 753759015817
View all Garmin GPS III Plus manuals
Add to My Manuals
Save this manual to your list of manuals |
Page 52 highlights
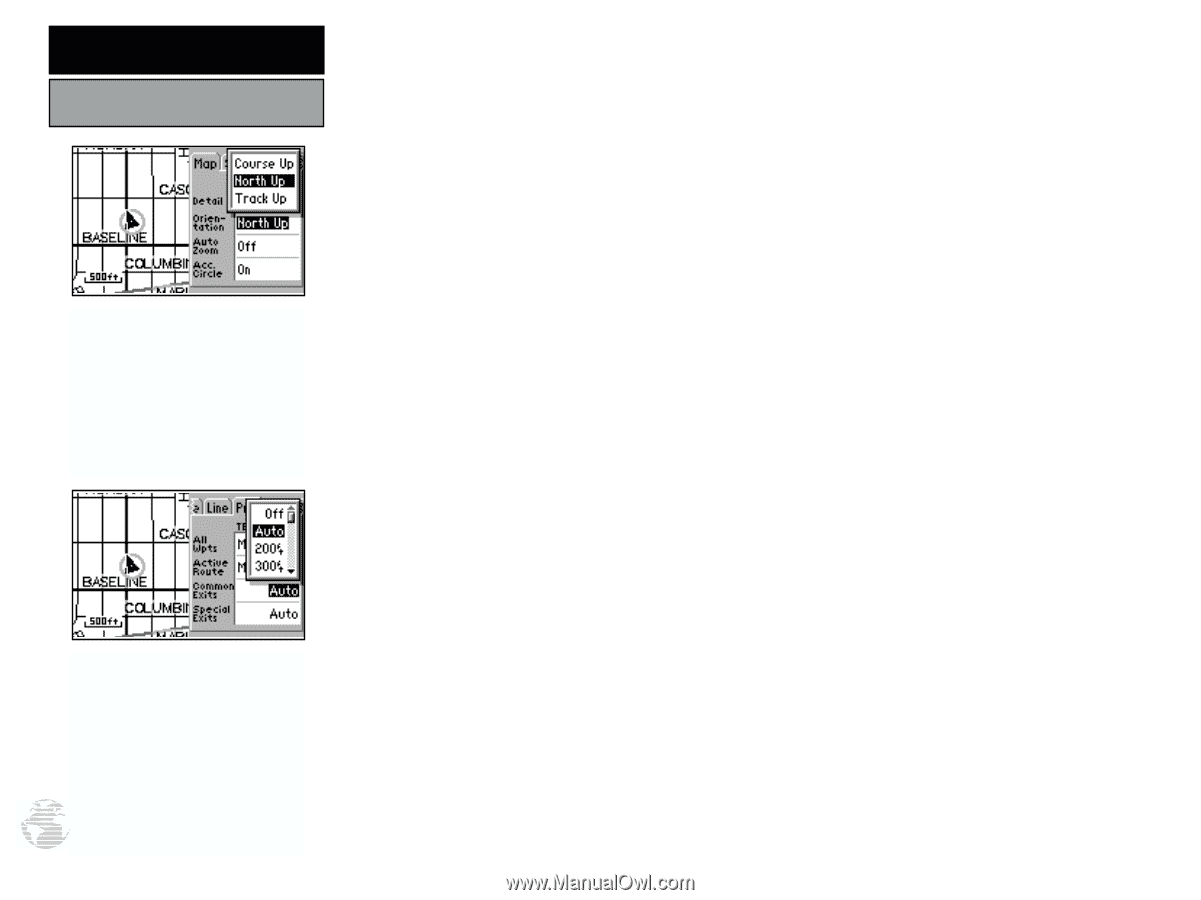
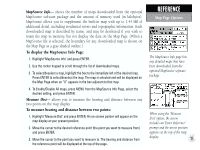
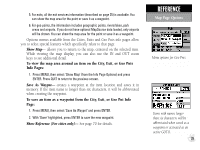
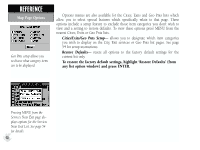
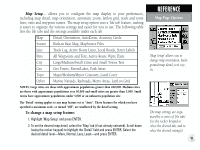
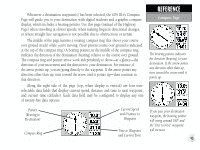
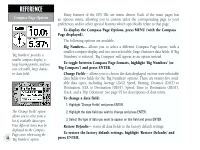
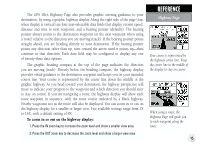
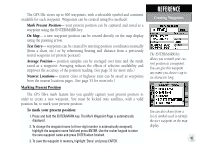
REFERENCE Map Page Options Select the 'North Up' option to keep the top of the map display fixed on North. 'Track Up' will cause the map to rotate so the top of the map is the direction you're heading. The 'Zoom' setting allows you to define the maximum scale at which the feature will appear. Select "Auto" to control the feature using the 'Detail' setting. 42 3. To change map orientation, select the 'Map' tab (if not already selected). Scroll down to highlight the 'Orientation' field and press ENTER. Select 'North Up' to fix the top of the map display to a north heading. Select 'Track Up' to adjust the top of the map display to your current track heading. Select 'Course Up' to fix the top of the map display to your desired course. Press ENTER to accept the selected option. 4. To enable/disable automatic zoom, select the 'Map' tab (if not already selected). Scroll down to highlight the 'Auto Zoom' field and press ENTER. Select 'On' or 'Off to enable or disable automatic zoom. Press ENTER to accept the selected option. The automatic zoom feature will automatically adjust the map scale from 80 miles through each lower scale, stopping at 800 ft. as you approach your destination waypoint. 5. To enable/disable the accuracy circle, select the 'Map' tab (if not already selected). Scroll down to highlight the 'Acc. Circle' field and press ENTER. Select 'On' or 'Off' to enable or disable the accuracy circle. Press ENTER to accept selected option. With the accuracy circle on, a gray circle will appear around your position (at lower scale settings) depicting the estimated accuracy of your position reading. 6. To enable/disable the built-in base map or MapSource files, select the 'Source' tab. Scroll down to highlight 'Basemap' or 'MapSource' and press ENTER. Select 'On' or 'Off' to enable or disable the selected map data and press ENTER. 7. For all waypoints, active route waypoints, rivers/lakes and cities: select the appropriate tab (per the chart on page 41). Scroll down to highlight the zoom field for the desired feature and press ENTER. Select the maximum scale at which the feature should appear on screen, or 'Off' to never display, and press ENTER. Highlight the text field for the desired feature and press ENTER. Select the text size for the desired feature, or 'None' to disable text, and press ENTER. 8. For track log data, active route lines, local roads, street labels, highway exits, lat/lon grid, metro areas, and railroad lines: select the appropriate tab (per the chart on page 41). Scroll down to highlight the zoom field for the desired feature and press ENTER. Select the maximum scale at which the feature should appear on screen, or select 'Off' to never display the feature. Press ENTER to accept the settings.
-
 1
1 -
2
-
3
-
4
-
5
-
6
-
7
-
8
-
9
-
10
-
11
-
12
-
13
-
14
-
15
-
16
-
17
-
18
-
19
-
20
-
21
-
22
-
23
-
24
-
25
-
26
-
27
-
28
-
29
-
30
-
31
-
32
-
33
-
34
-
35
-
36
-
37
-
38
-
39
-
40
-
41
-
42
-
43
-
44
-
45
-
46
-
 47
47 -
 48
48 -
 49
49 -
 50
50 -
 51
51 -
 52
52 -
 53
53 -
 54
54 -
 55
55 -
 56
56 -
 57
57 -
58
-
59
-
60
-
61
-
62
-
63
-
64
-
65
-
66
-
67
-
68
-
69
-
70
-
71
-
72
-
73
-
74
-
75
-
76
-
77
-
78
-
79
-
80
-
81
-
82
-
83
-
84
-
85
-
86
-
87
-
88
-
89
-
90
-
91
-
92
-
93
-
94
-
95
-
96
-
97
-
98
-
99
-
100
-
101
-
102
-
103
-
104
-
105
-
106
-
107
-
108
-
109
-
110
-
111
-
112
-
113
-
114
 |
 |