HP 2700n Service Manual - Page 196
Troubleshooting flowchart, the next major step in this troubleshooting flowchart.
 |
View all HP 2700n manuals
Add to My Manuals
Save this manual to your list of manuals |
Page 196 highlights
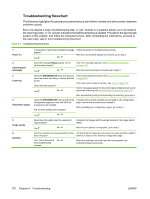
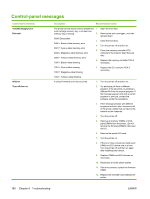
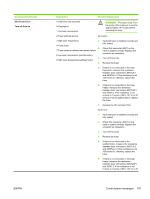
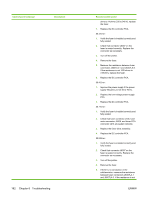
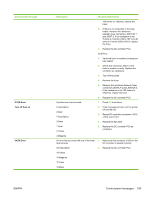
Troubleshooting flowchart This flowchart highlights the general processes that you can follow to isolate and solve printer hardware problems quickly. Each row depicts a major troubleshooting step. A "yes" answer to a question allows you to proceed to the next major step. A "no" answer indicates that additional testing is needed. Proceed to the appropriate section in this chapter, and follow the instructions there. After completing the instructions, proceed to the next major step in this troubleshooting flowchart. Table 6-1 Troubleshooting flowchart 1 Power on 2 Control-panel messages 3 Event log 4 Information pages 5 Image quality 6 Interface Is the printer on and does a readable message appear? Yes No Follow the power-on troubleshooting checks. After the control-panel display is functional, go to step 2. Does the message Ready appear on the control-panel display? If an error message appears, see Control-panel messages on page 180. Yes No After the errors have been corrected, go to step 3. Open the DIAGNOSTICS menu and print an event log to see the history of errors with this printer. Does the event log print? Yes No If the event log does not print, see Control-panel messages on page 180. If the paper jams inside the printer, see Jams on page 194. If error messages appear on the control-panel display when you try to print an event log, see Control-panel messages on page 180. After successfully printing and evaluating the event log, go to step 4. Open the INFORMATION menu and print the configuration pages to verify that all of the accessories are installed. Are all of the accessories installed? If accessories that are installed are not listed on the configuration page, remove the accessory and reinstall it. After evaluating the configuration pages, go to step 5. Yes No Does the print quality meet the customer's requirements? Compare the images with the sample defects in the image-defect tables. Yes No After the print quality is acceptable, go to step 6. Can the customer print successfully from the Verify that all I/O cables are connected correctly and that a valid IP host computer? address is listed on the Jetdirect configuration page. Yes. This is the end of No the troubleshooting process. When the customer can print from the host computer, the troubleshooting process ends. 178 Chapter 6 Troubleshooting ENWW
-
 1
1 -
2
-
3
-
4
-
5
-
6
-
7
-
8
-
9
-
10
-
11
-
12
-
13
-
14
-
15
-
16
-
17
-
18
-
19
-
20
-
21
-
22
-
23
-
24
-
25
-
26
-
27
-
28
-
29
-
30
-
31
-
32
-
33
-
34
-
35
-
36
-
37
-
38
-
39
-
40
-
41
-
42
-
43
-
44
-
45
-
46
-
47
-
48
-
49
-
50
-
51
-
52
-
53
-
54
-
55
-
56
-
57
-
58
-
59
-
60
-
61
-
62
-
63
-
64
-
65
-
66
-
67
-
68
-
69
-
70
-
71
-
72
-
73
-
74
-
75
-
76
-
77
-
78
-
79
-
80
-
81
-
82
-
83
-
84
-
85
-
86
-
87
-
88
-
89
-
90
-
91
-
92
-
93
-
94
-
95
-
96
-
97
-
98
-
99
-
100
-
101
-
102
-
103
-
104
-
105
-
106
-
107
-
108
-
109
-
110
-
111
-
112
-
113
-
114
-
115
-
116
-
117
-
118
-
119
-
120
-
121
-
122
-
123
-
124
-
125
-
126
-
127
-
128
-
129
-
130
-
131
-
132
-
133
-
134
-
135
-
136
-
137
-
138
-
139
-
140
-
141
-
142
-
143
-
144
-
145
-
146
-
147
-
148
-
149
-
150
-
151
-
152
-
153
-
154
-
155
-
156
-
157
-
158
-
159
-
160
-
161
-
162
-
163
-
164
-
165
-
166
-
167
-
168
-
169
-
170
-
171
-
172
-
173
-
174
-
175
-
176
-
177
-
178
-
179
-
180
-
181
-
182
-
183
-
184
-
185
-
186
-
187
-
188
-
189
-
190
-
 191
191 -
 192
192 -
 193
193 -
 194
194 -
 195
195 -
 196
196 -
 197
197 -
 198
198 -
 199
199 -
 200
200 -
 201
201 -
202
-
203
-
204
-
205
-
206
-
207
-
208
-
209
-
210
-
211
-
212
-
213
-
214
-
215
-
216
-
217
-
218
-
219
-
220
-
221
-
222
-
223
-
224
-
225
-
226
-
227
-
228
-
229
-
230
-
231
-
232
-
233
-
234
-
235
-
236
-
237
-
238
-
239
-
240
-
241
-
242
-
243
-
244
-
245
-
246
-
247
-
248
-
249
-
250
-
251
-
252
-
253
-
254
-
255
-
256
-
257
-
258
-
259
-
260
-
261
-
262
-
263
-
264
-
265
-
266
-
267
-
268
-
269
-
270
-
271
-
272
-
273
-
274
-
275
-
276
-
277
-
278
-
279
-
280
-
281
-
282
-
283
-
284
-
285
-
286
-
287
-
288
-
289
-
290
-
291
-
292
-
293
-
294
-
295
-
296
-
297
-
298
-
299
-
300
-
301
-
302
-
303
-
304
-
305
-
306
-
307
-
308
-
309
-
310
-
311
-
312
-
313
-
314
-
315
-
316
-
317
-
318
-
319
-
320
-
321
-
322
-
323
-
324
-
325
-
326
-
327
-
328
-
329
-
330
-
331
-
332
-
333
-
334
-
335
-
336
-
337
-
338
-
339
-
340
-
341
-
342
-
343
-
344
-
345
-
346
-
347
-
348
 |
 |
