HP 8000f Maintenance and Service Guide: HP Compaq 8000f Elite Business PC Ultr - Page 161
Accessing DPS Through Computer Setup
 |
UPC - 885631750551
View all HP 8000f manuals
Add to My Manuals
Save this manual to your list of manuals |
Page 161 highlights
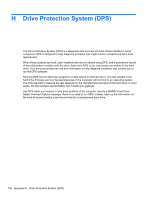
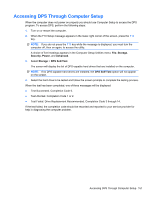
Accessing DPS Through Computer Setup When the computer does not power on properly you should use Computer Setup to access the DPS program. To access DPS, perform the following steps: 1. Turn on or restart the computer. 2. When the F10 Setup message appears in the lower-right corner of the screen, press the F10 key. NOTE: If you do not press the F10 key while the message is displayed, you must turn the computer off, then on again, to access the utility. A choice of five headings appears in the Computer Setup Utilities menu: File, Storage, Security, Power, and Advanced. 3. Select Storage > DPS Self-Test. The screen will display the list of DPS-capable hard drives that are installed on the computer. NOTE: If no DPS-capable hard drives are installed, the DPS Self-Test option will not appear on the screen. 4. Select the hard drive to be tested and follow the screen prompts to complete the testing process. When the test has been completed, one of three messages will be displayed: ● Test Succeeded. Completion Code 0. ● Test Aborted. Completion Code 1 or 2. ● Test Failed. Drive Replacement Recommended. Completion Code 3 through 14. If the test failed, the completion code should be recorded and reported to your service provider for help in diagnosing the computer problem. Accessing DPS Through Computer Setup 151
-
 1
1 -
2
-
3
-
4
-
5
-
6
-
7
-
8
-
9
-
10
-
11
-
12
-
13
-
14
-
15
-
16
-
17
-
18
-
19
-
20
-
21
-
22
-
23
-
24
-
25
-
26
-
27
-
28
-
29
-
30
-
31
-
32
-
33
-
34
-
35
-
36
-
37
-
38
-
39
-
40
-
41
-
42
-
43
-
44
-
45
-
46
-
47
-
48
-
49
-
50
-
51
-
52
-
53
-
54
-
55
-
56
-
57
-
58
-
59
-
60
-
61
-
62
-
63
-
64
-
65
-
66
-
67
-
68
-
69
-
70
-
71
-
72
-
73
-
74
-
75
-
76
-
77
-
78
-
79
-
80
-
81
-
82
-
83
-
84
-
85
-
86
-
87
-
88
-
89
-
90
-
91
-
92
-
93
-
94
-
95
-
96
-
97
-
98
-
99
-
100
-
101
-
102
-
103
-
104
-
105
-
106
-
107
-
108
-
109
-
110
-
111
-
112
-
113
-
114
-
115
-
116
-
117
-
118
-
119
-
120
-
121
-
122
-
123
-
124
-
125
-
126
-
127
-
128
-
129
-
130
-
131
-
132
-
133
-
134
-
135
-
136
-
137
-
138
-
139
-
140
-
141
-
142
-
143
-
144
-
145
-
146
-
147
-
148
-
149
-
150
-
151
-
152
-
153
-
154
-
155
-
 156
156 -
 157
157 -
 158
158 -
 159
159 -
 160
160 -
 161
161 -
 162
162 -
 163
163 -
 164
164 -
 165
165 -
 166
166
 |
 |