| Section |
Page |
| Purpose and scope |
23 |
| Introduction |
23 |
| HP Color LaserJet 4730mfp |
25 |
| Printing-system software |
29 |
| System requirements |
29 |
| Windows |
29 |
| Macintosh |
29 |
| Linux |
29 |
| UNIX |
30 |
| Supported operating systems |
30 |
| Standalone drivers |
30 |
| Print driver support in other operating systems |
30 |
| Availability |
31 |
| Printing-system software on the Web |
31 |
| Printing-system software |
31 |
| Software component availability |
31 |
| In-box printing-system software CDs |
32 |
| CD structure |
32 |
| HP LaserJet software CD, Windows partition |
33 |
| HP LaserJet software CD, Macintosh partition |
33 |
| CD versions |
33 |
| HP LaserJet documentation |
39 |
| HP Color LaserJet 4730mfp User Guide |
39 |
| HP Color LaserJet 4730mfp Printing System Install Notes |
40 |
| HP Embedded Web Server User Guide |
41 |
| HP Jetdirect Administrator's Guide |
41 |
| HP Driver Preconfiguration Support Guide |
42 |
| HP Device Installer Customization Wizard |
42 |
| Software description |
43 |
| Introduction |
43 |
| Printing-system software |
44 |
| Windows Software features |
44 |
| Printing system and installer |
44 |
| HP Color LaserJet 4730mfp printing-system software CD for Windows systems |
44 |
| Installer features |
46 |
| HP LaserJet print drivers |
47 |
| HP PCL 6, PCL 5, and PS emulation drivers |
47 |
| Print-driver version numbers for Windows operating systems |
48 |
| Macintosh printing-system software |
49 |
| Mac OS 9 Classic support |
49 |
| Macintosh printing system |
49 |
| Driver Configuration for Windows |
51 |
| Driver Autoconfiguration |
51 |
| Bidirectional communication |
51 |
| Enterprise AutoConfiguration |
51 |
| Update Now |
53 |
| HP Driver Preconfiguration |
53 |
| Lockable features |
54 |
| Continuous export |
54 |
| HP Driver Diagnostic Printer Check Tool |
56 |
| International Color Consortium profiles |
57 |
| PANTONE color profiles |
58 |
| HP Embedded Web Server |
59 |
| The HP EWS frame |
59 |
| Information tab |
60 |
| Links to off-product solutions |
60 |
| Device Status screen |
61 |
| Configuration Page |
62 |
| Settings tab |
64 |
| Configure device |
65 |
| Alerts |
66 |
| Security |
68 |
| Digital Sending tab |
69 |
| General |
69 |
| Send to E-mail |
70 |
| Send to Fax |
71 |
| Addressing |
72 |
| Address Book |
73 |
| Log |
74 |
| Preferences |
75 |
| Networking tab |
75 |
| Configuration section |
76 |
| Security section |
77 |
| Diagnostics section |
77 |
| Network settings |
77 |
| HP Printer Utility for Macintosh |
78 |
| Access to the HP Printer Utility |
78 |
| Supplies Status |
80 |
| Device Information |
83 |
| HP Support |
84 |
| File Upload |
84 |
| Update Firmware |
85 |
| Duplex Mode |
86 |
| Trays Configuration |
86 |
| Lock Resources |
87 |
| Stored Jobs |
88 |
| E-mail Alerts |
89 |
| Network Settings |
90 |
| Rendezvous Setting |
91 |
| Additional Settings |
92 |
| HP Web Jetadmin |
93 |
| HP Digital Sending Software |
94 |
| HP traditional print drivers for Windows |
95 |
| Introduction |
95 |
| HP traditional PCL 6 and PCL 5 driver features |
96 |
| Access to print drivers |
96 |
| Access to print drivers in Windows 98 and Windows Me |
96 |
| Help system |
97 |
| What's this? Help |
97 |
| Context-sensitive Help |
97 |
| Incompatible Options messages |
97 |
| Bubble Help |
98 |
| Finishing tab features |
99 |
| Print Task Quick Sets |
100 |
| Default Print Settings |
100 |
| User Guide Print Settings |
103 |
| Document Options |
103 |
| Print on Both Sides |
104 |
| Automatically printing on both sides |
104 |
| Manually printing on both sides |
104 |
| Flip Pages Up |
106 |
| Booklet Printing |
107 |
| Book and Booklet Printing |
107 |
| Pages per Sheet |
108 |
| Print Page Borders |
109 |
| Page Order |
109 |
| Document preview image |
109 |
| Print Quality group box |
110 |
| Print Quality Details for the HP Traditional PCL 6 Driver |
110 |
| Current Setting |
110 |
| Graphic Settings |
110 |
| Font Settings |
111 |
| Output Settings |
111 |
| Print Quality Details for the HP Traditional PCL 5 Driver |
111 |
| Current Setting |
112 |
| Graphic Settings |
112 |
| Output Settings |
112 |
| Font Settings |
112 |
| Effects tab features |
113 |
| Print Task Quick Sets |
114 |
| Fit To Page group box |
114 |
| Print Document On setting |
114 |
| Scale to Fit option |
114 |
| % of Normal Size option |
115 |
| Watermarks group box |
115 |
| Watermarks drop-down menu |
116 |
| First Page Only check box |
116 |
| Watermark Details dialog box |
116 |
| Current Watermarks |
117 |
| Watermark Message |
118 |
| Message Angle |
118 |
| Document preview image |
118 |
| Font Attributes |
118 |
| Default settings |
119 |
| Paper tab features |
119 |
| Print Task Quick Sets |
120 |
| Paper Options |
120 |
| Size is |
121 |
| Custom |
122 |
| Name |
123 |
| Save, Delete, or Rename |
123 |
| Custom size (width and height controls) |
124 |
| Custom width and height control limits |
125 |
| Dynamic measurement units |
125 |
| Close |
125 |
| Source Is |
126 |
| Type is |
126 |
| Use Different Paper/Covers |
127 |
| Front Cover |
128 |
| First Page |
129 |
| Other Pages |
129 |
| Last Page |
130 |
| Back Cover |
131 |
| Document preview image |
132 |
| Product image |
132 |
| Output tab features |
132 |
| Print Task Quick Sets |
134 |
| Output Options |
134 |
| Output Bin Options |
135 |
| Document preview image |
135 |
| Product image |
135 |
| Job Storage tab features |
135 |
| Print Task Quick Sets |
137 |
| Status group box |
138 |
| Job Storage Mode |
138 |
| Off |
138 |
| Proof and Hold |
138 |
| Private Job |
138 |
| Quick Copy |
139 |
| Stored Job |
139 |
| PIN |
140 |
| Job notification |
140 |
| User Name |
140 |
| Job Name |
140 |
| Using Job Storage features when printing |
141 |
| Releasing a Job Storage print job |
141 |
| Deleting a Job Storage print job |
141 |
| Basics tab features |
142 |
| Print Task Quick Sets |
143 |
| Copies |
143 |
| Orientation |
144 |
| Document preview image |
144 |
| About |
144 |
| Color tab features |
145 |
| Print Task Quick Sets |
146 |
| Color Options |
147 |
| Automatic |
147 |
| Manual |
147 |
| General |
148 |
| Neutral Grays |
148 |
| Halftone |
149 |
| Print in Grayscale |
149 |
| Color Themes |
149 |
| Default (sRGB) |
149 |
| Image Optimization (sRGB) |
149 |
| Adobe RGB (1998) |
149 |
| None |
150 |
| Custom Profile |
150 |
| Configure tab features |
150 |
| Printer Model |
151 |
| Paper Handling Options |
152 |
| Duplexing unit |
153 |
| Allow Manual Duplexing |
153 |
| Mopier Enabled |
153 |
| Mopier mode and collation |
153 |
| Optional Paper Destinations |
154 |
| Optional Paper Sources |
154 |
| Other Options |
154 |
| Storage |
155 |
| Fonts |
155 |
| Allow Scaling from Large Paper |
157 |
| Alternative Letterhead Mode |
157 |
| Ignore Application Collation |
157 |
| Product memory |
157 |
| Include types in application source list |
157 |
| Automatic configuration |
157 |
| Product image |
158 |
| HP Traditional Postscript 3 Emulation Driver features |
159 |
| Access to print-driver settings in Windows 98 and Windows Me |
159 |
| PS 3 emulation support for the HP Color LaserJet 4730mfp |
159 |
| Help system |
160 |
| What's this Help |
160 |
| Context-sensitive Help |
160 |
| Paper tab features |
160 |
| Paper size |
161 |
| Layout |
162 |
| Orientation |
163 |
| Paper source |
163 |
| Copies |
163 |
| Unprintable Area |
163 |
| More Options |
164 |
| About |
165 |
| Restore Defaults |
165 |
| Graphics tab features |
165 |
| Resolution |
166 |
| Color Control |
166 |
| Halftoning |
167 |
| Special |
167 |
| Scaling |
167 |
| Fonts tab features |
167 |
| Send TrueType fonts to printer according to the Font Substitution Table |
168 |
| Font Substitution Table |
168 |
| Always use built-in printer fonts instead of TrueType fonts |
169 |
| Always use TrueType fonts |
169 |
| Send Fonts As |
169 |
| Device Options tab features |
170 |
| Available printer memory |
171 |
| Printer features |
171 |
| HPPJLEncoding |
172 |
| Job Storage |
172 |
| User Name |
174 |
| PIN digit 1 (for Private Job) |
174 |
| Print Color as Gray |
174 |
| Collate |
174 |
| Fit to Page |
175 |
| Stapling Options |
175 |
| Color Options |
175 |
| Color Themes for RGB Color |
175 |
| Color Themes for CMYK Color |
176 |
| Edge Control |
176 |
| Text Neutral Grays |
176 |
| Text Halftone |
177 |
| Graphic Neutral Grays |
177 |
| Graphic Halftone |
177 |
| Photographs Neutral Grays |
177 |
| Photographs Halftone |
177 |
| Watermark (Pages per Sheet) |
177 |
| Print Watermark |
177 |
| Watermark |
178 |
| Watermark Font |
178 |
| Watermark Size |
178 |
| Watermark Angle |
178 |
| Watermark Style |
179 |
| Watermark Color |
179 |
| Watermark Intensity |
179 |
| Installable Options |
180 |
| Accessory Output Bin |
180 |
| Mopier Mode |
180 |
| Printer Hard Disk |
180 |
| Job Storage |
180 |
| Duplex Unit (for 2-sided Printing) |
180 |
| PostScript tab features |
181 |
| PostScript output format |
182 |
| PostScript header |
182 |
| Print PostScript error information |
182 |
| PostScript timeout values |
183 |
| Advanced |
183 |
| PostScript Language Level |
183 |
| Bitmap compression |
184 |
| Data format |
184 |
| Send CTRL+D before job |
184 |
| Send CTRL+D after job |
184 |
| HP PCL 6, PCL 5, and PS emulation unidrivers for Windows |
185 |
| Introduction |
185 |
| Access to print drivers |
187 |
| Printing Preferences driver tabs |
187 |
| Properties driver tabs |
188 |
| Help system |
189 |
| What's this? Help |
189 |
| Context-sensitive Help |
189 |
| Incompatible Print Settings messages |
189 |
| Advanced tab features |
191 |
| Paper/Output |
192 |
| Copy Count |
192 |
| Collated |
192 |
| Graphic |
193 |
| Image Color Management |
193 |
| True Type Font |
193 |
| Document Options |
193 |
| Advanced Printing Features |
194 |
| Print Optimizations |
194 |
| PostScript Options |
194 |
| Printer Features |
195 |
| Layout Options |
196 |
| Paper/Quality tab features |
197 |
| Print Task Quick Sets |
198 |
| Default Print Settings |
198 |
| User Guide Print Settings |
201 |
| Type new Quick Set name here |
202 |
| Paper Options |
202 |
| Size is |
203 |
| Custom Paper Size |
203 |
| Name |
204 |
| Paper size |
204 |
| Units |
204 |
| Custom width and height control limits |
204 |
| Source Is |
205 |
| Type is |
205 |
| Use Different Paper/Covers |
206 |
| Front Cover |
207 |
| First Page |
208 |
| Other Pages |
209 |
| Last Page |
210 |
| Back Cover |
211 |
| Document preview image |
212 |
| HP Digital Imaging |
212 |
| Effects tab features |
214 |
| Print Task Quick Sets |
215 |
| Resizing options |
215 |
| Actual Size |
215 |
| Print Document On |
215 |
| Scale to Fit |
215 |
| % of Normal Size |
216 |
| Document preview image |
216 |
| Watermarks |
217 |
| Current watermarks |
218 |
| Watermark Message |
218 |
| Message Angle |
218 |
| Font Attributes |
218 |
| Default settings |
219 |
| Finishing tab features |
220 |
| Print Task Quick Sets |
221 |
| Document Options |
221 |
| Print on Both Sides |
221 |
| Automatically printing on both sides |
221 |
| Manually printing on both sides |
222 |
| Flip Pages Up |
223 |
| Booklet layout |
224 |
| Book and Booklet Printing |
224 |
| Pages per Sheet |
224 |
| Print Page Borders |
225 |
| Page Order |
225 |
| Document preview image |
226 |
| Orientation |
226 |
| Output tab features |
227 |
| Print Task Quick Sets |
229 |
| Output Options |
230 |
| Document preview image |
230 |
| Output Bin Options |
230 |
| Job Storage tab features |
231 |
| Print Task Quick Sets |
232 |
| Status group box |
233 |
| Job Storage Mode |
233 |
| Off |
233 |
| Proof and Hold |
233 |
| Private Job |
233 |
| Quick Copy |
234 |
| Stored Job |
234 |
| Require PIN |
235 |
| Job notification |
235 |
| User Name |
235 |
| Job Name |
235 |
| If Job Name Exists |
236 |
| Using Job Storage features when printing |
236 |
| Releasing a Job Storage print job |
236 |
| Deleting a Job Storage print job |
237 |
| Color tab features |
238 |
| Print Task Quick Sets |
239 |
| Color Options |
239 |
| Automatic |
239 |
| Manual |
239 |
| General |
240 |
| Neutral Grays |
241 |
| Halftone |
241 |
| Color Themes |
241 |
| Default (sRGB) |
242 |
| Image Optimization (sRGB) |
242 |
| Adobe RGB (1998) |
242 |
| None |
242 |
| Custom Profile |
242 |
| Document preview image |
242 |
| Services tab |
244 |
| Device Settings |
246 |
| Form to Tray Assignment |
247 |
| External Fonts |
247 |
| Installing external fonts |
248 |
| Removing external fonts |
248 |
| Font Substitution Table |
249 |
| PS Emulation Unidriver Device Settings |
250 |
| Available PostScript Memory |
250 |
| Output Protocol |
250 |
| Send Ctrl-D Before Each Job |
250 |
| Send Ctrl-D After Each Job |
250 |
| Job Timeout |
250 |
| Wait Timeout |
251 |
| Minimum Font Size to Download as Outline |
251 |
| Maximum Font Size to Download as Outline |
251 |
| Installable Options |
251 |
| Automatic Configuration |
251 |
| Duplex Unit (for 2-Sided Printing) |
252 |
| Allow Manual Duplexing |
252 |
| Accessory Output Bin |
252 |
| Printer Memory |
252 |
| Printer Hard Disk |
252 |
| Job Storage |
252 |
| Mopier Mode |
253 |
| Mopier mode and collation |
253 |
| Postscript Passthrough (PS Emulation Unidriver only) |
254 |
| About tab |
255 |
| Installing Windows printing-system components |
257 |
| Introduction |
257 |
| Font support |
258 |
| Basic fonts |
258 |
| Default fonts |
258 |
| Installation instructions |
264 |
| General installation for Windows 98, Me, 2000, and XP operating systems |
264 |
| Installing from the printing-system CD |
264 |
| Installing from a network or from downloaded files |
264 |
| Detailed Windows installation |
265 |
| Using the Help, Back, Next, and Cancel buttons |
265 |
| Modifying a pre-existing installation |
266 |
| Typical Installation dialog box sequence |
266 |
| Custom Installation |
284 |
| Installing print drivers by using Add Printer |
285 |
| Installer Customization Wizard for Windows |
286 |
| Running the Installer Customization Wizard |
286 |
| Dialogs |
287 |
| Distribution |
298 |
| Point and Print installation for Windows 98, Me, 2000, XP, and Server 2003 |
298 |
| Setting a default printer |
299 |
| Installation for Macintosh operating systems |
301 |
| Introduction |
301 |
| Macintosh component descriptions |
302 |
| HP LaserJet PPDs |
302 |
| PDEs |
302 |
| HP Embedded Web Server |
302 |
| Install notes |
302 |
| Online help |
302 |
| Screen fonts |
302 |
| Installing the Macintosh printing system |
303 |
| Installing the HP LaserJet printing-system software for the Macintosh OS |
303 |
| Setting up an AppleTalk networked product with Mac OS 9. V9.2.2 |
304 |
| Setting up a product with Mac OS X V10.4 |
304 |
| Setting up a product with Mac OS X V10.3 |
307 |
| Setting up an IP/LPR networked product with Mac OS 9.x |
308 |
| Uninstalling the Macintosh printing system |
309 |
| In-box disk layout |
310 |
| Mac OS Classic installation |
311 |
| Main Install dialog box sequence |
311 |
| Mac OS X installation |
313 |
| Main Install dialog box sequence |
313 |
| Engineering Details |
319 |
| Introduction |
319 |
| Media attributes |
320 |
| Media sources and destinations |
320 |
| Media-source commands |
320 |
| Media types and sizes |
321 |
| Driver features and attributes |
321 |
| Custom paper sizes |
324 |
| Media-type commands |
324 |
| Remote firmware update |
326 |
| Determining the current level of firmware |
326 |
| Downloading the new firmware from the HP Web site |
326 |
| Downloading the new firmware to the product |
326 |
| Printer messages during the firmware update |
327 |
| Remote firmware update by using FTP through a browser |
328 |
| Remote firmware update by using FTP on a direct network connection |
329 |
| Windows operating systems |
329 |
| Macintosh operating systems |
331 |
| Remote firmware update through a local Windows port |
331 |
| Windows 98 or Windows Me |
332 |
| Windows NT 4.0, Windows 2000, Windows XP, or Windows Server 2003 |
332 |
| Remote firmware update through a Windows network |
333 |
| Remote firmware update for UNIX systems |
334 |
| Remote firmware update by using the HP Printer Utility |
334 |
| Remote firmware update by using the HP LaserJet Utility (Mac OS 9.x only) |
335 |
| Remote firmware update by using the LPR command |
336 |
| Remote firmware update through HP Web Jetadmin |
336 |
| Printing print-ready documents |
338 |
| Print-ready file printing by using FTP through a browser |
338 |
| Print-ready file printing by using FTP on a direct network connection |
338 |
| Windows operating systems |
339 |
| Macintosh operating systems |
340 |
| Print-ready printing by using a local Windows port |
340 |
| Windows 98 or Windows Me |
341 |
| Windows NT 4.0, Windows 2000, Windows XP, or Windows Server 2003 |
341 |
| Print-ready file printing in a Windows network |
342 |
| Print-ready file printing in UNIX systems |
342 |
| Print-ready file printing by using the LPR command |
342 |
| Driver-feature comparison in various operating systems |
343 |
| Job stream output |
343 |
| PCL 6 raster compression |
343 |
| PJL/PJL Encoding |
344 |
| Job tracking |
344 |
| Connectivity/Printing |
344 |
| Bidirectional communication |
345 |
| HP Driver Preconfiguration |
346 |
| Bundle support |
346 |
| Tray and paper assignment |
347 |
| Installable options |
347 |
| Printer services |
348 |
| UI features |
348 |
| Help features |
348 |
| Quick Sets |
349 |
| Paper Sizes |
349 |
| Media Types |
350 |
| Job storage |
350 |
| Print quality and resolution |
351 |
| Reordering Options |
351 |
| Resizing options |
352 |
| Color settings |
352 |
| Watermarks |
352 |
| Alternative source/paper type |
353 |
| Printing destination |
354 |
| Finishing options and duplexing |
354 |
| Other document options |
355 |
| Font support |
355 |
| Postscript-specific features |
355 |

 1
1 278
278 279
279 280
280 281
281 282
282 283
283 284
284 285
285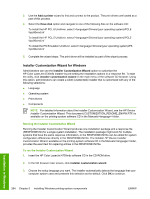 286
286 287
287 288
288

