HP Jornada 820 HP Jornada 820/820e Handheld PC User's Guide - F1260-90001 - Page 57
Creating and modifying connections
 |
View all HP Jornada 820 manuals
Add to My Manuals
Save this manual to your list of manuals |
Page 57 highlights
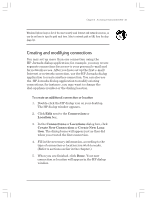
Chapter 3 | Accessing e-mail and the Web | 53 Windows Explorer keeps a list of the most recently used Internet and network resources, so you do not have to type the path each time. Select a network path or URL from the dropdown list. Creating and modifying connections You may set up more than one connection using the HP Jornada dialup application; for example, you may create separate connections for access to your personal e-mail and for network access. After you have set up the first e-mail/ Internet or network connection, use the HP Jornada dialup application to create another connection. You can also use the HP Jornada dialup application to modify existing connections; for instance, you may want to change the dial-up phone number or the dialing location. To create an additional connection or location 1. Double-click the HP dialup icon on your desktop. The HP dialup window appears. 2. Click Edit next to the Connection or Location box. 3. In the Connections or Locations dialog box, click Create New Connection or Create New Location. The dialog boxes will appear just as they did when you created the first connection. 4. Fill in the necessary information, according to the type of connection or location you wish to make. (Refer to sections earlier in the chapter.) 5. When you are finished, click Done. Your new connection or location will appear in the HP dialup window. Chapter3.P65 0109 53 2/4/99, 4:12 PM
-
 1
1 -
2
-
3
-
4
-
5
-
6
-
7
-
8
-
9
-
10
-
11
-
12
-
13
-
14
-
15
-
16
-
17
-
18
-
19
-
20
-
21
-
22
-
23
-
24
-
25
-
26
-
27
-
28
-
29
-
30
-
31
-
32
-
33
-
34
-
35
-
36
-
37
-
38
-
39
-
40
-
41
-
42
-
43
-
44
-
45
-
46
-
47
-
48
-
49
-
50
-
51
-
 52
52 -
 53
53 -
 54
54 -
 55
55 -
 56
56 -
 57
57 -
 58
58 -
 59
59 -
 60
60 -
 61
61 -
 62
62 -
63
-
64
-
65
-
66
-
67
-
68
-
69
-
70
-
71
-
72
-
73
-
74
-
75
-
76
-
77
-
78
-
79
-
80
-
81
-
82
-
83
-
84
-
85
-
86
-
87
-
88
-
89
-
90
-
91
-
92
-
93
-
94
-
95
-
96
-
97
-
98
-
99
-
100
-
101
-
102
-
103
-
104
-
105
-
106
-
107
-
108
-
109
-
110
-
111
-
112
-
113
-
114
-
115
-
116
-
117
-
118
-
119
-
120
-
121
-
122
-
123
-
124
-
125
-
126
-
127
-
128
-
129
-
130
-
131
-
132
-
133
-
134
-
135
-
136
-
137
-
138
-
139
-
140
-
141
-
142
-
143
-
144
-
145
-
146
-
147
-
148
-
149
-
150
-
151
-
152
-
153
-
154
-
155
-
156
-
157
-
158
-
159
-
160
-
161
-
162
-
163
-
164
-
165
-
166
-
167
-
168
-
169
-
170
-
171
-
172
-
173
-
174
-
175
-
176
-
177
-
178
 |
 |
