HP LaserJet 9000 HP LaserJet 9000 Series - Software Technical Reference - Page 113
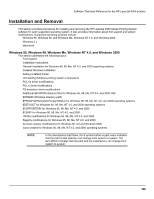
Installation instructions, General installation for Windows 95
 |
View all HP LaserJet 9000 manuals
Add to My Manuals
Save this manual to your list of manuals |
Page 113 highlights
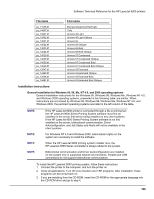
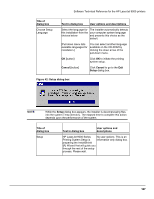
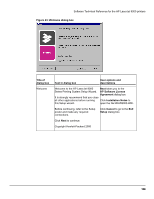
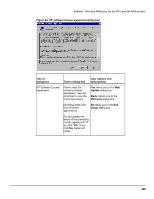
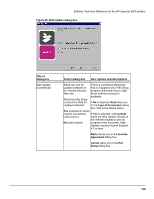
Software Technical Reference for the HP LaserJet 9000 printers File name Font name ps_11548.ttf ps_14507.ttf ps_13501.ttf ps_13502.ttf ps_14021.ttf ps_14022.ttf ps_14023.ttf ps_14024.ttf ps_14029.ttf ps_14039.ttf ps_14030.ttf ps_14040.ttf ps_13547.ttf ps_14480.ttf ps_13548.ttf ps_14481.ttf Stempel Garamond Bold Italic Taffy Univers 45 Light Univers 45 Light Oblique Univers 55 Univers 55 Oblique Univers 65 Bold Univers 65 Bold Oblique Univers 57 Condensed Univers 57 Condensed Oblique Univers 67 Condensed Bold Univers 67 Condensed Bold Oblique Univers 53 Extended Univers 53 Extended Oblique Univers 53 Extended Bold Univers 53 Extended Bold Oblique Installation instructions General installation for Windows 95, 98, Me, NT 4.0, and 2000 operating systems General installation instructions for the Windows 95, Windows 98, Windows Me, Windows NT 4.0, and Windows 2000 operating systems, presented in the following table, are similar. When instructions are not shared by Windows 95, Windows 98, Windows Me, Windows NT 4.0, and Windows 2000, the pertinent operating systems are listed in the left column of the table. NOTE: NOTE: NOTE: NOTE: If the HP LaserJet 9000 printer is connected through a file or print server, the HP LaserJet 9000 Series Printing System software must first be installed on the server first before being installed on any client systems. If the HP LaserJet 9000 Series Printing System software is not first installed on the server, bidirectional communication, Driver Autoconfiguration, and Job Status and Alerts will not be available to the client systems. For Windows NT 4.0 and Windows 2000, administrator rights on the system are necessary to install the software. When the HP LaserJet 9000 printing system installer runs, the HP LaserJet 9000 Series uninstaller is always added to the system. Bidirectional communication and Driver Autoconfiguration are installed on the system only in supported network environments. Parallel and USB connections do not support bidirectional communication. To install the HP LaserJet 9000 printing system, follow these instructions: 1. Connect the printer to the computer, and turn the printer on. 2. Close all applications. Turn off virus checkers and TSR programs. After installation, these programs can be turned back on. 3. If you are installing from the CD-ROM, insert the CD-ROM for the appropriate language into the CD-ROM drive and go to step 4. 105
-
 1
1 -
2
-
3
-
4
-
5
-
6
-
7
-
8
-
9
-
10
-
11
-
12
-
13
-
14
-
15
-
16
-
17
-
18
-
19
-
20
-
21
-
22
-
23
-
24
-
25
-
26
-
27
-
28
-
29
-
30
-
31
-
32
-
33
-
34
-
35
-
36
-
37
-
38
-
39
-
40
-
41
-
42
-
43
-
44
-
45
-
46
-
47
-
48
-
49
-
50
-
51
-
52
-
53
-
54
-
55
-
56
-
57
-
58
-
59
-
60
-
61
-
62
-
63
-
64
-
65
-
66
-
67
-
68
-
69
-
70
-
71
-
72
-
73
-
74
-
75
-
76
-
77
-
78
-
79
-
80
-
81
-
82
-
83
-
84
-
85
-
86
-
87
-
88
-
89
-
90
-
91
-
92
-
93
-
94
-
95
-
96
-
97
-
98
-
99
-
100
-
101
-
102
-
103
-
104
-
105
-
106
-
107
-
 108
108 -
 109
109 -
 110
110 -
 111
111 -
 112
112 -
 113
113 -
 114
114 -
 115
115 -
 116
116 -
 117
117 -
 118
118 -
119
-
120
-
121
-
122
-
123
-
124
-
125
-
126
-
127
-
128
-
129
-
130
-
131
-
132
-
133
-
134
-
135
-
136
-
137
-
138
-
139
-
140
-
141
-
142
-
143
-
144
-
145
-
146
-
147
-
148
-
149
-
150
-
151
-
152
-
153
-
154
-
155
-
156
-
157
-
158
-
159
-
160
-
161
-
162
-
163
-
164
-
165
-
166
-
167
-
168
-
169
-
170
-
171
-
172
-
173
-
174
-
175
-
176
-
177
-
178
-
179
-
180
-
181
-
182
-
183
-
184
 |
 |
