HP LaserJet 9000 HP LaserJet 9000 Series - Software Technical Reference - Page 32
Set registration, Printing a registration Shifting the printed area
 |
View all HP LaserJet 9000 manuals
Add to My Manuals
Save this manual to your list of manuals |
Page 32 highlights
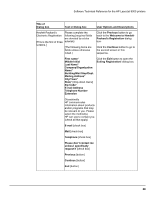
Software Technical Reference for the HP LaserJet 9000 printers Set registration The Set registration feature allows you to adjust, for each paper tray, the printed area of the page. The printed area can be shifted towards the top, the bottom, the left, the right, or the left and right edges of the page in increments of 0.25 mm (0.0009 inch). You can print a registration page directly from the printer. NOTE: The registration page is printed in landscape mode. Accordingly, the terms "top" and "bottom" in the following instructions refer to the wide edges of the page, and "left" and "right" refer to the short edges of the page (see illustrations in "Shifting the printed area""). Printing a registration page To print a registration page, navigate through the menus on the HP LaserJet 9000 printer control panel using the following steps: 1. Press the select button (the one with the check mark) to enter the menus. 2. Press the up and down buttons to scroll to CONFIGURE DEVICE, and then press the select button. 3. Press the up and down buttons to scroll to PRINT QUALITY, and then press the select button. 4. Press the up and down buttons to scroll to SET REGISTRATION, and then press the select button. 5. Press the up and down buttons to scroll to PRINT TEST PAGE, and then press the select button. Shifting the printed area The registration page is shown in the following two illustrations. NOTE: The instructions on the registration page are repeated below. Figure 8: Registration page, side 1 24
-
 1
1 -
2
-
3
-
4
-
5
-
6
-
7
-
8
-
9
-
10
-
11
-
12
-
13
-
14
-
15
-
16
-
17
-
18
-
19
-
20
-
21
-
22
-
23
-
24
-
25
-
26
-
 27
27 -
 28
28 -
 29
29 -
 30
30 -
 31
31 -
 32
32 -
 33
33 -
 34
34 -
 35
35 -
 36
36 -
 37
37 -
38
-
39
-
40
-
41
-
42
-
43
-
44
-
45
-
46
-
47
-
48
-
49
-
50
-
51
-
52
-
53
-
54
-
55
-
56
-
57
-
58
-
59
-
60
-
61
-
62
-
63
-
64
-
65
-
66
-
67
-
68
-
69
-
70
-
71
-
72
-
73
-
74
-
75
-
76
-
77
-
78
-
79
-
80
-
81
-
82
-
83
-
84
-
85
-
86
-
87
-
88
-
89
-
90
-
91
-
92
-
93
-
94
-
95
-
96
-
97
-
98
-
99
-
100
-
101
-
102
-
103
-
104
-
105
-
106
-
107
-
108
-
109
-
110
-
111
-
112
-
113
-
114
-
115
-
116
-
117
-
118
-
119
-
120
-
121
-
122
-
123
-
124
-
125
-
126
-
127
-
128
-
129
-
130
-
131
-
132
-
133
-
134
-
135
-
136
-
137
-
138
-
139
-
140
-
141
-
142
-
143
-
144
-
145
-
146
-
147
-
148
-
149
-
150
-
151
-
152
-
153
-
154
-
155
-
156
-
157
-
158
-
159
-
160
-
161
-
162
-
163
-
164
-
165
-
166
-
167
-
168
-
169
-
170
-
171
-
172
-
173
-
174
-
175
-
176
-
177
-
178
-
179
-
180
-
181
-
182
-
183
-
184
 |
 |
