HP Officejet Pro K5300 User Manual - Page 26
Use the HP Solution Center (Windows), Print on both sides (duplexing) - manual
 |
View all HP Officejet Pro K5300 manuals
Add to My Manuals
Save this manual to your list of manuals |
Page 26 highlights
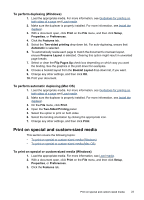
Chapter 3 Use the HP Solution Center (Windows) Use the HP Solution Center to change print settings, order supplies, and access the onscreen Help. The features available in the HP Solution Center vary depending on the devices you have installed. The HP Solution Center is customized to show icons that are associated with the selected device. If the selected device is not equipped with a particular feature, then the icon for that feature does not appear in the HP Solution Center. If the HP Solution Center on your computer does not contain any icons, an error might have occurred during the software installation. To correct this, use the Control Panel in Windows to completely uninstall and reinstall the software. Print on both sides (duplexing) You can print on both sides of a sheet of media, either automatically by using the optional automatic two-sided printing accessory (duplexer), or manually by turning the media over and feeding it into the device again. • Guidelines for printing on both sides of a page • To perform duplexing (Windows) • To perform automatic duplexing (Mac OS) Guidelines for printing on both sides of a page • Always use media that conforms to the device specifications. For more information, see Understand specifications for supported media. • Specify duplex options in your application or in the printer driver. • Do not print on both sides of transparencies, envelopes, photo paper, glossy media, or paper lighter than 16 lb bond (60 g/m2) or heavier than 28 lb bond (105 g/ m2). Jams might occur with these media types. • Several kinds of media require a specific orientation when you print on both sides of a page, such as letterhead, preprinted paper, and paper with watermarks and prepunched holes. When you print from a computer running Windows, the device prints the first side of the media first. When you print from a computer using the Mac OS, the device prints the second side first. Load the media with the front side facing down. • For auto-duplexing, when printing finishes on one side of the media, the device holds the media and pauses while the ink dries. Once the ink dries, the media is pulled back into the device and the second side is printed. When printing is complete, the media is dropped onto the output tray. Do not grab it before printing is complete. • You can print on both sides of supported custom-sized media by turning the media over and feeding it into the device again. For more information, see Understand specifications for supported media. 22 Use the device
-
 1
1 -
2
-
3
-
4
-
5
-
6
-
7
-
8
-
9
-
10
-
11
-
12
-
13
-
14
-
15
-
16
-
17
-
18
-
19
-
20
-
 21
21 -
 22
22 -
 23
23 -
 24
24 -
 25
25 -
 26
26 -
 27
27 -
 28
28 -
 29
29 -
 30
30 -
 31
31 -
32
-
33
-
34
-
35
-
36
-
37
-
38
-
39
-
40
-
41
-
42
-
43
-
44
-
45
-
46
-
47
-
48
-
49
-
50
-
51
-
52
-
53
-
54
-
55
-
56
-
57
-
58
-
59
-
60
-
61
-
62
-
63
-
64
-
65
-
66
-
67
-
68
-
69
-
70
-
71
-
72
-
73
-
74
-
75
-
76
-
77
-
78
-
79
-
80
-
81
-
82
-
83
-
84
-
85
-
86
-
87
-
88
-
89
-
90
-
91
-
92
-
93
-
94
-
95
-
96
-
97
-
98
-
99
-
100
-
101
-
102
-
103
 |
 |