HP Rp2430 rp24xx A180 User Manual - Page 37
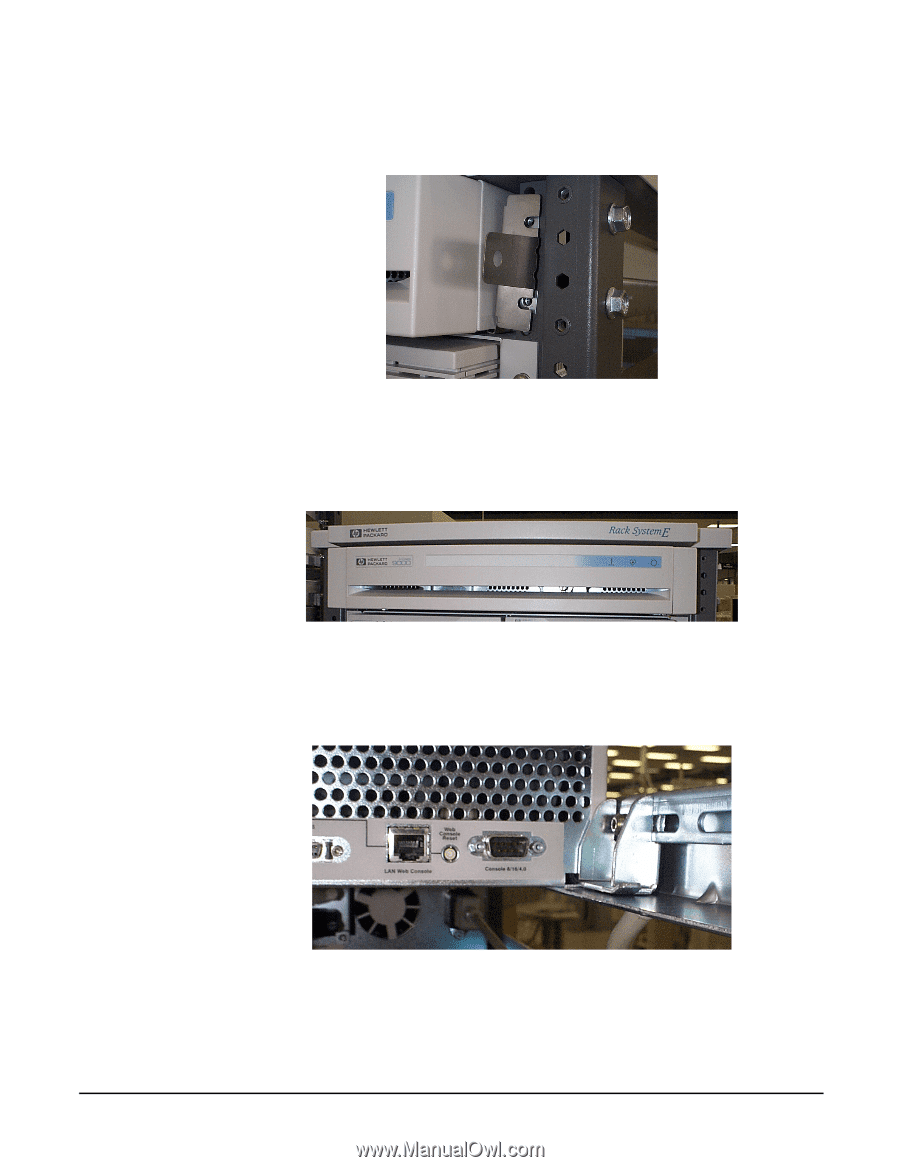
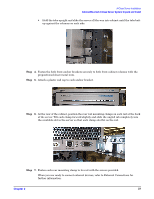
Step 4., the available slot in the server so that each clamp sits flat on the rail.
 |
View all HP Rp2430 manuals
Add to My Manuals
Save this manual to your list of manuals |
Page 37 highlights
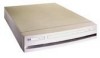
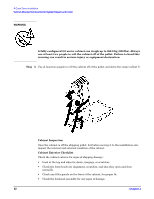
A-Class Server Installation Cabinet-Mounted A-Class Server System Unpack and Install • Hold the tabs upright and slide the server all the way into cabinet until the tabs butt up against the columns on each side. Step 4. Fasten the both front anchor brackets securely to both front cabinet columns with the prepositioned sheet metal nuts. Step 5. Attach a plastic end cap to each anchor bracket. Step 6. At the rear of the cabinet, position the rear rail mounting clamps on each rail at the back of the server. Tilt each clamp forward slightly and slide the angled tab completely into the available slot in the server so that each clamp sits flat on the rail. Step 7. Fasten each rear mounting clamp to its rail with the screws provided. When you are ready to connect external devices, refer to External Connections for further information. Chapter 2 37
-
 1
1 -
2
-
3
-
4
-
5
-
6
-
7
-
8
-
9
-
10
-
11
-
12
-
13
-
14
-
15
-
16
-
17
-
18
-
19
-
20
-
21
-
22
-
23
-
24
-
25
-
26
-
27
-
28
-
29
-
30
-
31
-
 32
32 -
 33
33 -
 34
34 -
 35
35 -
 36
36 -
 37
37 -
 38
38 -
 39
39 -
 40
40 -
 41
41 -
 42
42 -
43
-
44
-
45
-
46
-
47
-
48
-
49
-
50
-
51
-
52
-
53
-
54
-
55
-
56
-
57
-
58
-
59
-
60
-
61
-
62
-
63
-
64
-
65
-
66
-
67
-
68
-
69
-
70
-
71
-
72
-
73
-
74
-
75
-
76
-
77
-
78
-
79
-
80
-
81
-
82
-
83
-
84
-
85
-
86
-
87
-
88
-
89
-
90
-
91
-
92
-
93
-
94
-
95
-
96
-
97
-
98
-
99
-
100
-
101
-
102
-
103
-
104
-
105
-
106
 |
 |