HP Rp2430 rp24xx A180 User Manual - Page 45
Step 5., Attach power and data cables to the embedded disk drives.
 |
View all HP Rp2430 manuals
Add to My Manuals
Save this manual to your list of manuals |
Page 45 highlights
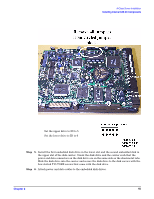
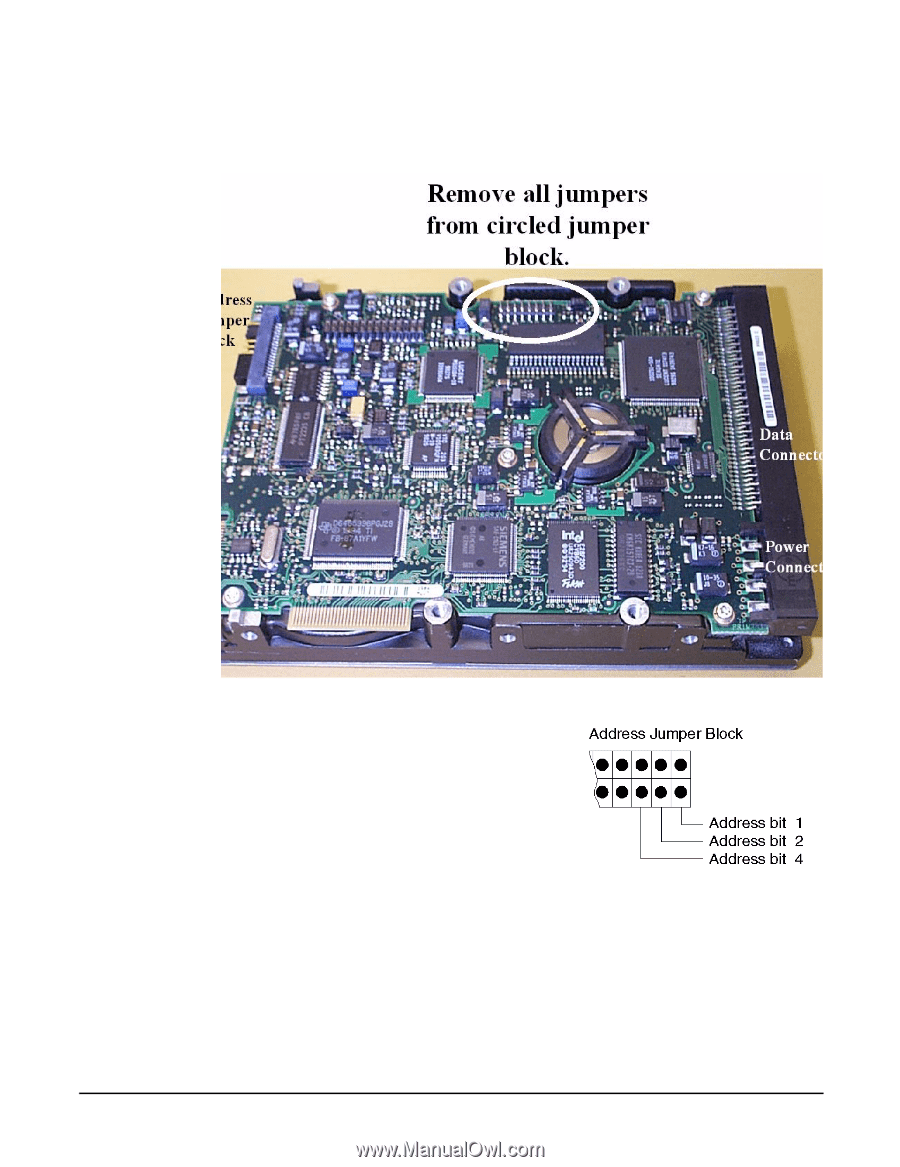
A-Class Server Installation Installing Internal Add-On Components Set the upper drive to ID to 5 Set the lower drive to ID to 6 Step 5. Install the first embedded disk drive in the lower slot and the second embedded disk in the upper slot of the disk carrier. Orient the disk drive and the carrier such that the power and data connectors on the disk drive are on the same side as the sheetmetal tabs. Slide the disk drive into the carrier and secure the disk drive to the disk carrier with the four slotted T15 TORX screws that came with the disk drive. Step 6. Attach power and data cables to the embedded disk drives. Chapter 2 45
-
 1
1 -
2
-
3
-
4
-
5
-
6
-
7
-
8
-
9
-
10
-
11
-
12
-
13
-
14
-
15
-
16
-
17
-
18
-
19
-
20
-
21
-
22
-
23
-
24
-
25
-
26
-
27
-
28
-
29
-
30
-
31
-
32
-
33
-
34
-
35
-
36
-
37
-
38
-
39
-
 40
40 -
 41
41 -
 42
42 -
 43
43 -
 44
44 -
 45
45 -
 46
46 -
 47
47 -
 48
48 -
 49
49 -
 50
50 -
51
-
52
-
53
-
54
-
55
-
56
-
57
-
58
-
59
-
60
-
61
-
62
-
63
-
64
-
65
-
66
-
67
-
68
-
69
-
70
-
71
-
72
-
73
-
74
-
75
-
76
-
77
-
78
-
79
-
80
-
81
-
82
-
83
-
84
-
85
-
86
-
87
-
88
-
89
-
90
-
91
-
92
-
93
-
94
-
95
-
96
-
97
-
98
-
99
-
100
-
101
-
102
-
103
-
104
-
105
-
106
 |
 |
A-Class Server Installation
Installing Internal Add-On Components
Chapter 2
45
Step 5.
Install the first embedded disk drive in the lower slot and the second embedded disk in
the upper slot of the disk carrier. Orient the disk drive and the carrier such that the
power and data connectors on the disk drive are on the same side as the sheetmetal tabs.
Slide the disk drive into the carrier and secure the disk drive to the disk carrier with the
four slotted T15 TORX screws that came with the disk drive.
Step 6.
Attach power and data cables to the embedded disk drives.
Set the upper drive to ID to 5
Set the lower drive to ID to 6