HP Rp2430 rp24xx A180 User Manual - Page 46
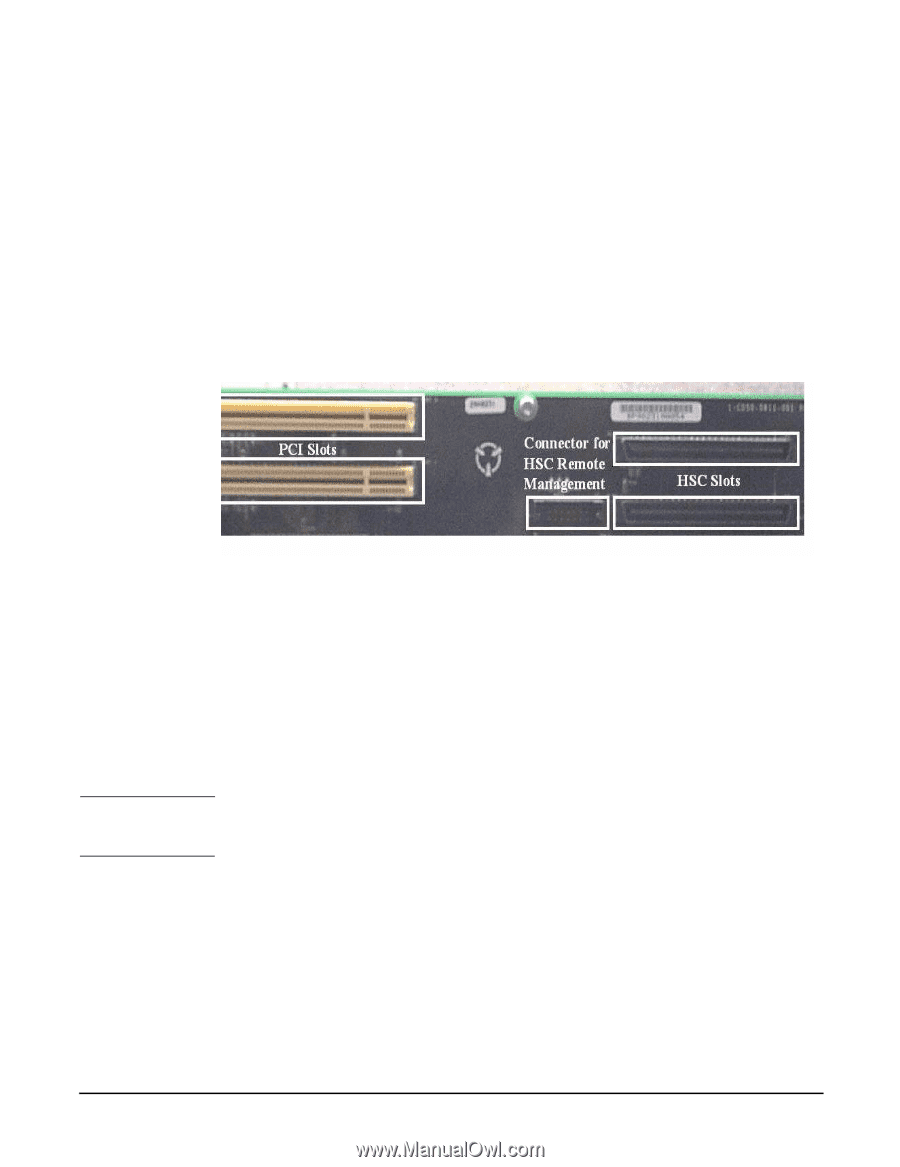
Installing Input/Output (I/O) Cards., Step 7.
 |
View all HP Rp2430 manuals
Add to My Manuals
Save this manual to your list of manuals |
Page 46 highlights
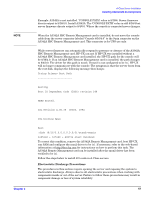
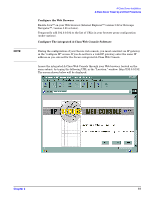
A-Class Server Installation Installing Internal Add-On Components Step 7. Install the disk carrier by inserting the two sheetmetal tabs on the disk carrier into the cut-outs in the server chassis. Secure the disk carrier using the slotted T15 TORX screw removed in step 1. Step 8. Proceed to A-Class Server Power Up and Boot Procedures. Installing Input/Output (I/O) Cards. This section describes how to install I/O cards into A-Class servers. Abbreviated embedded PCI I/O card installation instructions also appear on the 11" x 14" maintenance label adhered to the bottom of the top cover. A-Class servers provide two slots for I/O cards. The cards which plug into these slots can be Peripheral Component Interconnect (PCI), High Speed Connect (HSC) I/O cards or both (see photo). NOTE 46 The following rules govern the installation of I/O cards: • When present, the A3342A HSC Remote Management I/O card must be installed in the bottom slot. • For one HSC and one PCI card configurations, the HSC card must be installed in the bottom slot. • For two HSC or two PCI cards, the load order does not matter. When the A3342A HSC Remote Management card is installed, the console path changes from 8/16/4 to 8/4/0. This may prevent HP-UX from booting. During selftest, server firmware detects the presence or absence of the A3342A HSC Remote Management card and will automatically direct server firmware output to the appropriate path (8/4/0.0 when the A3342A is present, 8/16/4.0 when the A3342A is absent). These path changes are transparent to the physical console which should be connected to the server via the connector labeled "Console 8/16/4.0". These path changes are also transparent to the server firmware 'CONSOLE PATH' value. Server firmware will not change the 'CONSOLE PATH' value. It is not necessary to manually change the 'CONSOLE PATH' value when installing or removing the A3342A. You may do so if you chose. Chapter 2
-
 1
1 -
2
-
3
-
4
-
5
-
6
-
7
-
8
-
9
-
10
-
11
-
12
-
13
-
14
-
15
-
16
-
17
-
18
-
19
-
20
-
21
-
22
-
23
-
24
-
25
-
26
-
27
-
28
-
29
-
30
-
31
-
32
-
33
-
34
-
35
-
36
-
37
-
38
-
39
-
40
-
 41
41 -
 42
42 -
 43
43 -
 44
44 -
 45
45 -
 46
46 -
 47
47 -
 48
48 -
 49
49 -
 50
50 -
 51
51 -
52
-
53
-
54
-
55
-
56
-
57
-
58
-
59
-
60
-
61
-
62
-
63
-
64
-
65
-
66
-
67
-
68
-
69
-
70
-
71
-
72
-
73
-
74
-
75
-
76
-
77
-
78
-
79
-
80
-
81
-
82
-
83
-
84
-
85
-
86
-
87
-
88
-
89
-
90
-
91
-
92
-
93
-
94
-
95
-
96
-
97
-
98
-
99
-
100
-
101
-
102
-
103
-
104
-
105
-
106
 |
 |