Oki PRO510DW Pro510DW Printing Guide - Page 54
Print To, Properties, Create Form, Start, Storage Device, Manager, Printers > New Project,
 |
View all Oki PRO510DW manuals
Add to My Manuals
Save this manual to your list of manuals |
Page 54 highlights
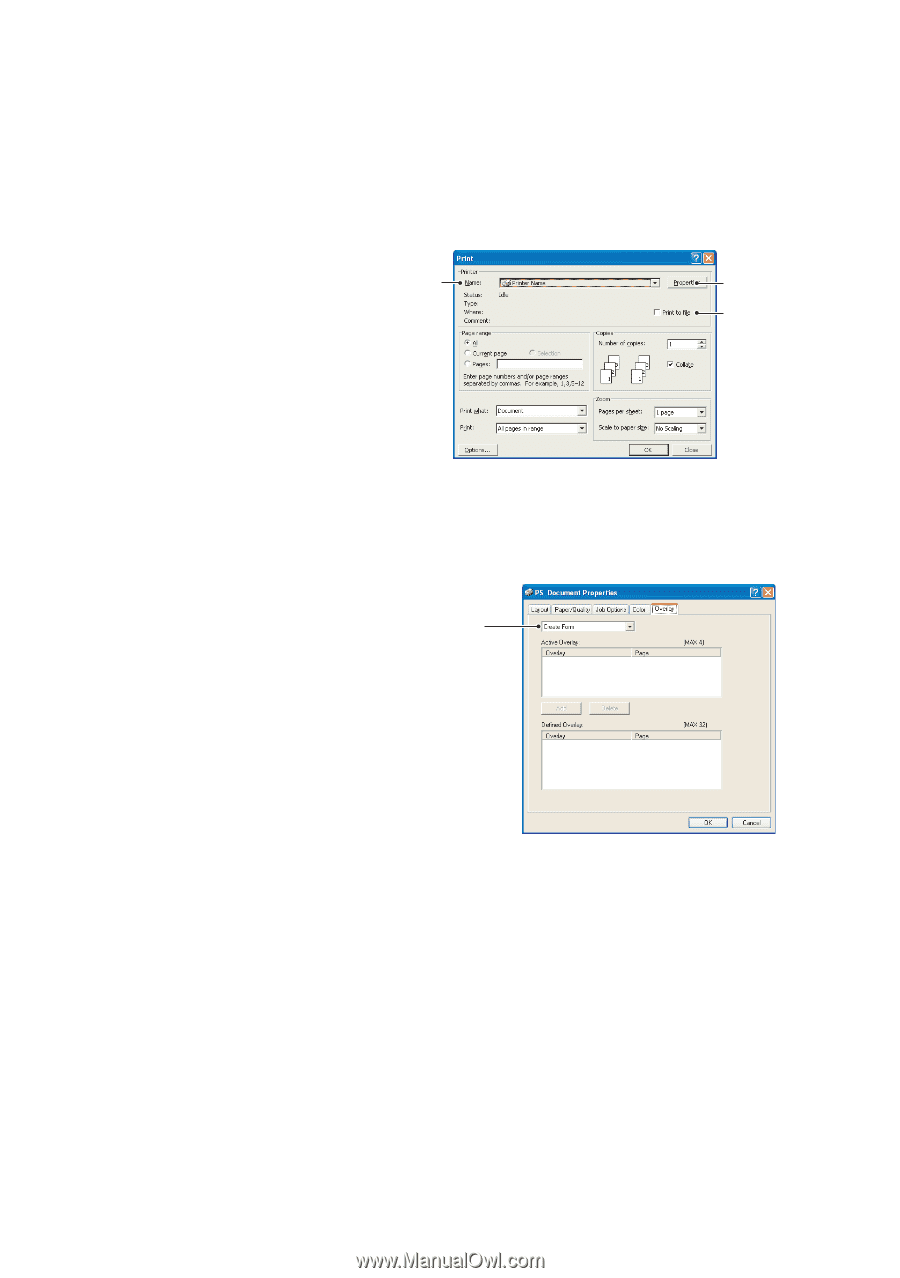
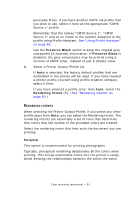
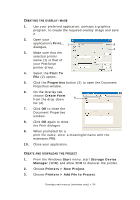
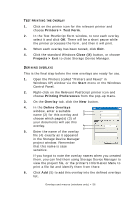
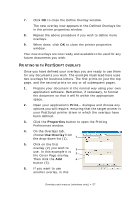
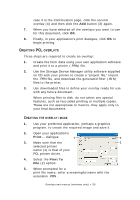
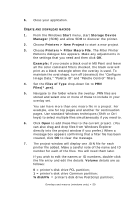
CREATING THE OVERLAY IMAGE 1. Use your preferred application, perhaps a graphics program, to create the required overlay image and save it. 2. Open your application's Print... 1 3 dialogue. 2 3. Make sure that the selected printer name (1) is that of your PostScript printer driver. 4. Select the Print To File (2) option. 5. Click the Properties button (3) to open the Document Properties window. 6. On the Overlay tab, choose Create Form from the drop-down 4 list (4). 7. Click OK to close the Document Properties window. 8. Click OK again to close the Print dialogue. 9. When prompted for a print file name, enter a meaningful name with the extension.PRN. 10. Close your application. CREATE AND DOWNLOAD THE PROJECT 1. From the Windows Start menu, start Storage Device Manager (SDM) and allow SDM to discover the printer. 2. Choose Printers > New Project. 3. Choose Printers > Add File to Project. Overlays and macros (windows only) > 54
-
 1
1 -
2
-
3
-
4
-
5
-
6
-
7
-
8
-
9
-
10
-
11
-
12
-
13
-
14
-
15
-
16
-
17
-
18
-
19
-
20
-
21
-
22
-
23
-
24
-
25
-
26
-
27
-
28
-
29
-
30
-
31
-
32
-
33
-
34
-
35
-
36
-
37
-
38
-
39
-
40
-
41
-
42
-
43
-
44
-
45
-
46
-
47
-
48
-
 49
49 -
 50
50 -
 51
51 -
 52
52 -
 53
53 -
 54
54 -
 55
55 -
 56
56 -
 57
57 -
 58
58 -
 59
59 -
60
-
61
-
62
-
63
-
64
-
65
-
66
-
67
-
68
-
69
-
70
-
71
-
72
-
73
-
74
-
75
-
76
-
77
-
78
-
79
-
80
-
81
-
82
-
83
-
84
-
85
-
86
-
87
-
88
-
89
-
90
-
91
-
92
-
93
-
94
-
95
-
96
-
97
-
98
-
99
-
100
-
101
 |
 |