Panasonic AJ-HPD2500 Operating Instructions - Page 26
GUI Operations, MENU button, DIAG SHIFT + MENU button
 |
View all Panasonic AJ-HPD2500 manuals
Add to My Manuals
Save this manual to your list of manuals |
Page 26 highlights
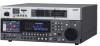
GUI Operations LCDӷMথonitor Dදispࣔlaύy Pωaϧnel 1 23 4 5 6 7 8 9 11 13 15 17 10 12 14 16 18 1. THUMBNAIL button Press this button and the button lights, and the thumbnail screen appears on the LCD monitor. Press again to return to the recording/playback mode and the button goes out. Setting setup menu No. 051 (GUI OUTPUT) allows you to transfer the thumbnail screen and the playlist screen to the video output. 2. PLAY LIST button Press to start or end playlist mode. ➝Refer to "Playlist Function" (page 78). 3. Cursor buttons (b / a / 4 / 5) The four outer buttons are cursor buttons. Use them to move the cursor in thumbnails, menus, events, etc. The SET button at the center is used to select menu items and clips. In the thumbnail or playlist screen, hold down the SHIFT button and press a cursor button to move the cursor to the beginning or the end. Or hold down the SHIFT button and press the SET button to select multiple clips or events. Holding down the SET button in the playlist screen, selects all track events with the same IN and OUT points as the event at the cursor. 4. MENU/DIAG/OPERATION button MENU button Press this button to open the setup menu, thumbnail or playlist menus. Press again to return to the previous screen. ➝Refer to "Moving Between Screens and Menu Operations" (page 37). Refer to "Setup" (page 164). DIAG (SHIFT + MENU) button When not in the thumbnail or playlist screen, press this button to show information about this unit. Press again to return to the previous screen. However, in the thumbnail or playlist screen, it has the same effect as pressing the OPERATION (SHIFT+MENU) button. Information about this unit includes [VIDEO SYSTEM], [WARNING], [HOURS METER] and [UMID]. Use the SET button or the right and left cursor buttons (b / a) to switch among them. [VIDEO SYSTEM] Shows current system frequency, screen: recording format, input and output formats and other information. [WARNING] Shows warning information. screen: [HOURS METER] Shows the unit serial number, the screen: number of hours it has been on, and the number of times it has been switched on and off. 26 Introduction: Control Reference Guide
-
 1
1 -
2
-
3
-
4
-
5
-
6
-
7
-
8
-
9
-
10
-
11
-
12
-
13
-
14
-
15
-
16
-
17
-
18
-
19
-
20
-
 21
21 -
 22
22 -
 23
23 -
 24
24 -
 25
25 -
 26
26 -
 27
27 -
 28
28 -
 29
29 -
 30
30 -
 31
31 -
32
-
33
-
34
-
35
-
36
-
37
-
38
-
39
-
40
-
41
-
42
-
43
-
44
-
45
-
46
-
47
-
48
-
49
-
50
-
51
-
52
-
53
-
54
-
55
-
56
-
57
-
58
-
59
-
60
-
61
-
62
-
63
-
64
-
65
-
66
-
67
-
68
-
69
-
70
-
71
-
72
-
73
-
74
-
75
-
76
-
77
-
78
-
79
-
80
-
81
-
82
-
83
-
84
-
85
-
86
-
87
-
88
-
89
-
90
-
91
-
92
-
93
-
94
-
95
-
96
-
97
-
98
-
99
-
100
-
101
-
102
-
103
-
104
-
105
-
106
-
107
-
108
-
109
-
110
-
111
-
112
-
113
-
114
-
115
-
116
-
117
-
118
-
119
-
120
-
121
-
122
-
123
-
124
-
125
-
126
-
127
-
128
-
129
-
130
-
131
-
132
-
133
-
134
-
135
-
136
-
137
-
138
-
139
-
140
-
141
-
142
-
143
-
144
-
145
-
146
-
147
-
148
-
149
-
150
-
151
-
152
-
153
-
154
-
155
-
156
-
157
-
158
-
159
-
160
-
161
-
162
-
163
-
164
-
165
-
166
-
167
-
168
-
169
-
170
-
171
-
172
-
173
-
174
-
175
-
176
-
177
-
178
-
179
-
180
-
181
-
182
-
183
-
184
-
185
-
186
-
187
-
188
-
189
-
190
-
191
-
192
-
193
-
194
-
195
-
196
-
197
-
198
-
199
-
200
-
201
-
202
-
203
-
204
-
205
-
206
-
207
-
208
-
209
-
210
-
211
-
212
-
213
-
214
-
215
-
216
-
217
-
218
-
219
-
220
-
221
-
222
-
223
-
224
-
225
-
226
 |
 |
