Panasonic PVGS70D PVGS70D User Guide
Panasonic PVGS70D - DIGITAL VIDEO CAMCOR Manual
 |
View all Panasonic PVGS70D manuals
Add to My Manuals
Save this manual to your list of manuals |
Panasonic PVGS70D manual content summary:
- Panasonic PVGS70D | PVGS70D User Guide - Page 1
or adjust this product, please read these instructions thoroughly. Spanish Quick Use Guide is included. Guía para rápida consulta en español está incluida. For USA assistance, please call: 1-800-211-PANA(7262) or send e-mail to : [email protected] For Canadian assistance, please call - Panasonic PVGS70D | PVGS70D User Guide - Page 2
Panasonic! of your Palmcorder. Be sure to retain this manual as your convenient Palmcorder information source. Date of OR BACK) NO USER-SERVICEABLE PARTS INSIDE REFER SERVICING TO QUALIFIED SERVICE PERSONNEL This symbol warns problems. The above markings are located on the appliance bottom cover. 2 - Panasonic PVGS70D | PVGS70D User Guide - Page 3
: To assure continued compliance, follow the attached installation instructions and use only shielded interface cables with ferrite core when : Matsushita Electric Corporation of America One Panasonic Way, Secaucus, NJ 07094 Support Contact: Panasonic Consumer Electronics Company 1-800-211-PANA - Panasonic PVGS70D | PVGS70D User Guide - Page 4
block any ventilation openings. Install in accordance with the manufacturer's instructions. 8) Do not install near any heat sources such as for long periods of time. S3125A 14) Refer all servicing to qualified service personnel. Servicing is required when the apparatus has been damaged in any - Panasonic PVGS70D | PVGS70D User Guide - Page 5
cup of coffee. This action could permanently damage the internal parts of your Palmcorder. Do not attempt to disassemble this unit. There are no user serviceable parts inside. Unplug your Palmcorder from the power supply before cleaning. ≥DO NOT AIM YOUR PALMCORDER AT THE SUN OR OTHER BRIGHT OBJECTS - Panasonic PVGS70D | PVGS70D User Guide - Page 6
package, please read the following. End User License Agreement (for USB Driver, SD Viewer and DV STUDIO) You ("Licensee") are granted a software, including the information recorded or described on the CD-ROM, instruction manuals, and any other media provided to Licensee (collectively "Software"), but - Panasonic PVGS70D | PVGS70D User Guide - Page 7
Before opening the CD-ROM package, please read the following. G.726 Audio Decoder End User License Agreement YOU SHOULD CAREFULLY READ THE FOLLOWING TERMS AND CONDITIONS. THIS IS A LEGAL DOCUMENT WHICH CONSTITUTES YOUR AGREEMENT AS END USER FOR THE USE OF THE SOFTWARE IN THAT PACKAGE. BY INSTALLING - Panasonic PVGS70D | PVGS70D User Guide - Page 8
Contents Before Using Standard Accessories 10 Quick Guide 12 To View the Playback Picture 12 Controls and 35 Recording in Special Situations (Program AE 35 Manual Shutter Speed Adjustment 36 Manual Iris Adjustment (F Number 36 Manual Focus Adjustment 37 Recording in Natural Colors (White - Panasonic PVGS70D | PVGS70D User Guide - Page 9
69 Using USB Driver 69 Installing USB Driver 70 Connecting Computer and Service (Problems and Solutions 102 Request for Service Notice (USA Only 105 Limited Warranty (For USA Customers 106 Customer Services Directory 107 Warranty (For Canadian Customers 108 Index 109 Spanish Quick Use Guide - Panasonic PVGS70D | PVGS70D User Guide - Page 10
1) PV-DAC13 2) CGA-DU14 3) CR2025 N2QAEC000003 4) Before Using Standard Accessories Illustrated on the left are accessories packaged with the Palmcorder. 1) AC Adaptor, DC Cable and AC Cable (l 18) ≥Supplies power to the Palmcorder. CAUTION: This unit will operate on 110/120/220/240 V AC. An AC - Panasonic PVGS70D | PVGS70D User Guide - Page 11
VFA0397 7) Shoulder Strap (l 20) 8) SD Memory Card (l 79) 9) CD-ROM: USB Driver (l 69) DV STUDIO 3.1E-SE (l 74) G.726 Audio Decoder (l 75) ArcSoft Software Operating Instructions are shown in English for the sake of example, other languages are supported as well. ≥In this Manual, the Panasonic make - Panasonic PVGS70D | PVGS70D User Guide - Page 12
2 PUSH 4 4 CAMERA VCR CARD PB OFF ON MODE 3 5, 6 9 CAMERA VCR CARD PB OFF ON MODE 5 6 SEARCH 8 FADE 7 BACK LIGHT OPEN / EJECT Quick Guide 1 Charge the Battery. (l 18) ≥Connect the AC Cable to the AC Adaptor and plug it into the AC Wall Outlet. ≥Attach the Battery to the - Panasonic PVGS70D | PVGS70D User Guide - Page 13
not affect the recorded picture...25) Menu Button [MENU] (l 22) 26) Reset Button [RESET] (l 102) 27) Easy-Grip Strap (l 19) 28) Mode Selector Switch [AUTO/MANUAL/FOCUS] (l 28, 35, 37) 29) Tape/Card Selector [TAPE/CARD/CARD MODE] (l 28, 52) 13 - Panasonic PVGS70D | PVGS70D User Guide - Page 14
30) S-VIDEO IN/OUT DV 31) 32) 33) CAMERA VCR CARD PB OFF ON MODE 34) 35) 36) 37) 38) 39) 40) 41) 42) 43) REMOTE/MIC (PLUG IN POWER) 44) AV IN/OUT 45) PHONES 46) 47) 48) 49) 57) 50) 51) 54) 55) 56) 52) 53) 30) Cassette Eject Lever [OPEN/EJECT] (l 20) 31) DV Input/Output Terminal [DV] (l 68 - Panasonic PVGS70D | PVGS70D User Guide - Page 15
1) 2) START/ DATE/ PHOTO STOP OSD TIME SHOT 3) COUNTER RESET TITLE ZOOM 4) MULTI/ T 6) 5) P-IN-P ¥REC A.DUB sVOL r 7) V/REW PLAY FF/W W 61 5 STILL ADV PAUSE STILL ADV E ; D INDEX STOP INDEX K ∫ L SELECT VAR. P.B. 8) SEARCH STORE ZOOM 9) MENU OFF/ON SET 10) P.B.DIGITAL - Panasonic PVGS70D | PVGS70D User Guide - Page 16
the equipment manufacturer. Discard used batteries according to manufacturer's instructions. Risk of fire, explosion and burns. Do not Button-Type battery in mouth. If swallowed, call your doctor...Replace battery with Panasonic PART NO. CR2025 only. Use of another battery may present a risk - Panasonic PVGS70D | PVGS70D User Guide - Page 17
10˚ 1 15˚ 15˚ 15˚ 2 START/ DATE/ PHOTO STOP OSD TIME SHOT COUNTER RESET TITLE MULTI/ P-IN-P ¥REC A.DUB ZOOM T sVOL r V/REW PLAY FF/W W 61 5 STILL ADV PAUSE STILL ADV E ; D INDEX STOP INDEX K ∫ L SELECT VAR. SEARCH P.B. ZOOM STORE MENU OFF/ON SET P.B.DIGITAL ITEM ª Using the - Panasonic PVGS70D | PVGS70D User Guide - Page 18
1 1 2 3 1 2 2 PUSH BATT OFF ON MODE 1 CGA-DU14 A 2 h 45 min. B CGA-DU21 A 2 h 50 min. (2 h 10 min.) 3 h 55 min. B CGA-DU07 A 4 h 15 min. (3 h 15 min.) 1 h 30 min. B 1 h 25 min. (1 h 5 min.) Power Supply ª Using the AC Adaptor 1 Insert the battery-shaped connector of the DC Cable into - Panasonic PVGS70D | PVGS70D User Guide - Page 19
1 1 1 2 Lens Cap and Easy-Grip Strap ª Attach the Lens Cap To protect the Lens surface, attach the Lens Cap. 1 Pass the end of the Lens Cap Cord through the hole in the Easy-Grip Strap Attachment part and the Lens Cap through the Lens Cap Cord. ≥The removed Lens Cap can be hooked onto the Easy- - Panasonic PVGS70D | PVGS70D User Guide - Page 20
1 2 1 1 2 3, 4 1 PUSH 2 R E C SAVE CAMERA VCR CARD PB OFF ON MODE 3 1 1, 2 OPEN / EJECT Attaching the Shoulder Strap We recommend that you attach the Shoulder Strap before going outdoors to record so as to avoid dropping the Palmcorder. 1 Pass the tip of the Shoulder Strap through the Shoulder - Panasonic PVGS70D | PVGS70D User Guide - Page 21
1 21 1, 2 2 PUSH OPEN OFF ON MODE 3 3 180x CNOIGLOHRT STILL VIEW TSIEMLEFR MTAECLREO SSOKFINT 4 90x TSIEMLEFR MTAECLREO LCD/EVF SET LCD BRIGHTNESS LOW||||----HIGH LCD COLOR LEVEL LOW||||----HIGH EVF BRIGHTNESS LOW||||----HIGH PUSH MENU TO RETURN Using the Viewfinder Before using the - Panasonic PVGS70D | PVGS70D User Guide - Page 22
of the file. ≥After the above File Selection Procedure, carry out the various Menu Operations. (The above procedure will not be repeated in the following instructions.) 22 - Panasonic PVGS70D | PVGS70D User Guide - Page 23
14) Low Light Recording [LOW LIGHT SHOT] (l 53) 15) Title Creation [CREATE TITLE] (l 62) 16) 17) 18) 19) MULTI-PICTURES SCAN MODE STROBE MANUAL SPEED FAST NORMAL SLOW SWING OFF ON P-IN-P 1 2 3 4 RETURN ---- YES PUSH MENU TO EXIT [MULTI-PICTURES] Sub-Menu 16) Multi-Picture Mode [SCAN - Panasonic PVGS70D | PVGS70D User Guide - Page 24
28) 29) 30) 31) 32) 33) 34) DISPLAY SETUP DATE/TIME OFF D/T DATE C.DISPLAY COUNTER MEMORY TIMECODE C.RESET ---- YES DISPLAY ALL PARTIAL OFF LCD AI ON OFF LCD MODE NORMAL BRIGHT LCD/EVF SET ---- YES RETURN ---- YES PUSH MENU TO EXIT 35) 36) 37) 38) 39) 40) 41) OTHER FUNCTIONS1 - Panasonic PVGS70D | PVGS70D User Guide - Page 25
ECONOMY MPEG4 MODE SUPERFINE FINE NORMAL CREATE TITLE ---- YES RETURN ---- YES PUSH MENU TO EXIT 12) 13) 14) MULTI-PICTURES SCAN MODE STROBE MANUAL PHOTO SCENE SPEED FAST NORMAL SLOW SWING OFF ON RETURN ---- YES PUSH MENU TO EXIT 15) 16) RECORDING SETUP REC SPEED AUDIO REC SP - Panasonic PVGS70D | PVGS70D User Guide - Page 26
DELETE CARD FILE 1) 1.DELETE FILE 2) BY SELECTION 2.DELETE ALL FILES 3.DELETE TITLE 3) BY SELECTION RETURN ---- YES PUSH MENU TO EXIT 4) 5) CARD EDITING RECORD TO TAPE ---- YES 6) FILE SEARCH FILE LOCK ---- YES ---- YES 7) SLIDE SHOW DPOF SETTING ---- YES ---- YES 8) CARD - Panasonic PVGS70D | PVGS70D User Guide - Page 27
CLOCK SET YEAR :2003 MONTH :OCT DAY :20 HOUR : 8PM MINUTE:46 PUSH MENU TO RETURN 1, 3 MENU 1, 2 WB/SHUTTER IRIS/MF/VOL/JOG PUSH 1 1 1 RECORDING SETUP REC SPEED SP LP AUDIO REC 12bit SCENE INDEX 2HOUR WIND CUT OFF ZOOM MIC ON FLASH ON RED EYE REDUCTION OFF FLASH LEVEL - Panasonic PVGS70D | PVGS70D User Guide - Page 28
to [AUTO] 5, the Palmcorder automatically adjusts the focus and white balance. (In some cases, they cannot be adjusted automatically and need to be adjusted manually.) (l 37) ≥Before turning on the power, remove the Lens Cap. If the Lens Cap is still attached when the power is turned on, Automatic - Panasonic PVGS70D | PVGS70D User Guide - Page 29
1 REC 2 3x ° 1 QUICK START OFF ON MODE 2, 3 ª To add Sound while Recording With the supplied MagicWire Remote Control with Narration Mic connected to the [REMOTE] Jack, you can add a narration while recording is in progress. While the [TALK] Button 2 is pressed, the [ ] Indication is displayed - Panasonic PVGS70D | PVGS70D User Guide - Page 30
PHOTO SHOT 2 1 SELF TIMER PHOTO 2 SHOT 1 TAPE CARD CARD MODE PHOTO PHOTO PHOTO 1 2 STILL Self-timer Recording When you set the self-timer, the still pictures are automatically taken after 10 seconds, on the Cassette and the Memory Card. 1 Press the [SELF TIMER] Button. ≥The [ ] Indication - Panasonic PVGS70D | PVGS70D User Guide - Page 31
1 WT 1tW T 5tW T 10tW T Z.MIC 1 2 1 TELE MACRO 2 T.MACRO Zoom In/Out Functions The Zoom Function can be used to record objects close by or to achieve a wide-angle shot. 1 For wide-angle shots (zoom out): Press the [W/T] zoom lever towards [W]. For close-ups (zoom in): Press the [W/T] zoom - Panasonic PVGS70D | PVGS70D User Guide - Page 32
1 MENU WB/SHUTTER IRIS/MF/VOL/JOG PUSH 2 WT 25tW T D.ZOOM 2 1, 3 FADE 1 2 Digital Zoom Function This function is useful when you want to record close-up shots of subjects located beyond a normal zoom range of 1k to 10k magnification. With the Digital Zoom Function, you can select a - Panasonic PVGS70D | PVGS70D User Guide - Page 33
PHOTO 1 SHOT 2 WB/SHUTTER IRIS/MF/VOL/JOG MENU PUSH 2 1 EIS 1 MENU WB/SHUTTER IRIS/MF/VOL/JOG PUSH 1 CINEMA Digital Electronic Image Stabilizer Function If you are recording in unstable situations and the Palmcorder is shaky, you can use this function to correct for camera shake in these - Panasonic PVGS70D | PVGS70D User Guide - Page 34
1, 2 MAGIC PIX 1 MAGICPIX 2 0LUX MAGICPIX 3 MagicPix Function This function allows you to record color images brightly in a dark place without using a light. 1 Press the [MAGICPIX] Button until the [MAGICPIX] Indication 1 appears. 0 Lux MagicPix Function Using the LCD Monitor light, a dark scene of - Panasonic PVGS70D | PVGS70D User Guide - Page 35
JOG PUSH 1 WIND CUT 2 MENU WB/SHUTTER IRIS/MF/VOL/JOG PUSH AUTO MANUAL 1 FOCUS 1 2 3 4 5 Wind Noise Reduction Function This function reduces exposures under specific recording situations. 1 Set the Mode Selector Switch to [MANUAL]. ≥The [MNL] Indication appears. 2 Set [CAMERA FUNCTIONS] >> - Panasonic PVGS70D | PVGS70D User Guide - Page 36
Set the Mode Selector Switch to [AUTO]. ≥For other notes, see page 88. 2, 3 WB/SHUTTER IRIS/MF/VOL/JOG PUSH AUTO MANUAL 1 FOCUS MNL 1 1/60 F2.0 2 0dB Manual Iris Adjustment (F Number) You can use this function when the screen is too bright or too dark. 1 Set the Mode Selector Switch to - Panasonic PVGS70D | PVGS70D User Guide - Page 37
Adjustment Mode may not be able to bring out natural colors. In such a case, the white balance can be adjusted manually. 1 Set the Mode Selector Switch to [MANUAL]. ≥The [MNL] Indication appears. 2 Press the [PUSH] Dial. ≥The [AWB] Indication appears. 3 Rotate the [PUSH] Dial to set a desired White - Panasonic PVGS70D | PVGS70D User Guide - Page 38
Auto White Balance Adjustment function does not operate suitably under the existing light conditions, use the Manual White Balance Adjustment mode. 1 Set the Mode Selector Switch to [MANUAL]. ≥The [MNL] Indication 1 appears. 2 Press the [PUSH] Dial. ≥The [AWB] Indication appears. 3 Rotate the [PUSH - Panasonic PVGS70D | PVGS70D User Guide - Page 39
1 MENU WB/SHUTTER IRIS/MF/VOL/JOG PUSH 1 2 FLASH 4 PHOTO SHOT 4 3 STILL £ß 32 Using the Built-in Flash The Built-in Flash enables you to record still pictures in a dark place. The Flash lights twice to detect the surrounding luminosity and to light properly. 1 Set [CAMERA FUNCTIONS] >> [ - Panasonic PVGS70D | PVGS70D User Guide - Page 40
Mode 5) [STROBE] Strobe Mode ≥Records images with a stroboscopic effect. 6) [GAIN UP] Gain up Mode ≥Brightens images electronically. ≥Adjust focus manually when using this Mode. (l 37) 7) [TRAIL] Trailing Effect Mode ≥Records images with a trailing effect. 8) [MOSAIC] Mosaic Mode ≥Produces a mosaic - Panasonic PVGS70D | PVGS70D User Guide - Page 41
1, 2 MENU WB/SHUTTER IRIS/MF/VOL/JOG PUSH 3, 4, 5 WIPE WIPE WIPE MIX MIX MIX ª Wipe Mode and Mix Mode Wipe Mode: Like a curtain being pulled, the still picture of the last recorded scene gradually changes to the moving image of a new scene. Mix Mode: While the moving image of a new scene - Panasonic PVGS70D | PVGS70D User Guide - Page 42
the beginning and end than in the middle of the swing strobe period, and it is useful for analyzing swing motion, etc., in sports. When [MANUAL] is selected: ≥You can select a desired scene one at a time up to 9 small pictures. 2 Exit the menu by pressing the [MENU] Button. 3 Press the [MULTI - Panasonic PVGS70D | PVGS70D User Guide - Page 43
WB/SHUTTER 4 IRIS/MF/VOL/JOG PUSH 1 CAMERA VCR CARD PB OFF ON MODE 1 2 3 SEARCH BACK LIGHT 2 FADE 3 VCR Mode Playing Back The recorded scene can be played back immediately after recording. 1 Rotate the [OFF/ON/MODE] Switch and set the Palmcorder in the VCR Mode. ≥The [VCR] Lamp lights up. 1 2 - Panasonic PVGS70D | PVGS70D User Guide - Page 44
2 WB/SHUTTER IRIS/MF/VOL/JOG PUSH 21 1 SEARCH BACK SEARCH LIGHT A B C D R 3 START/ DATE/ PHOTO STOP OSD TIME SHOT COUNTER RESET TITLE MULTI/ P-IN-P ¥REC A.DUB ZOOM T sVOL r V/REW PLAY FF/W W 61 5 STILL ADV PAUSE STILL ADV E ; D INDEX STOP INDEX K ∫ L SELECT VAR. SEARCH P.B. ZOOM - Panasonic PVGS70D | PVGS70D User Guide - Page 45
Slow Motion Playback This Palmcorder can play back at a slow speed. START/ DATE/ PHOTO STOP OSD TIME SHOT 1 Press the [1] Button. 2 Press the [E] Button or the [D] Button on the Remote COUNTER RESET TITLE MULTI/ P-IN-P ¥REC A.DUB ZOOM T Controller. ≥When the [E] Button is pressed, Slow Motion - Panasonic PVGS70D | PVGS70D User Guide - Page 46
1 MENU WB/SHUTTER IRIS/MF/VOL/JOG PUSH 1 BLANK Finding the End of a Recording (Blank Search Function) The Blank Search Function helps you to locate the end of a recording on the Cassette quickly. 1 Set [VCR FUNCTIONS] >> [PLAYBACK FUNCTIONS] >> [BLANK SEARCH] >> [YES]. ≥The [BLANK] Indication 1 - Panasonic PVGS70D | PVGS70D User Guide - Page 47
1 MENU WB/SHUTTER IRIS/MF/VOL/JOG PUSH 1 2 START/ DATE/ PHOTO STOP OSD TIME SHOT COUNTER RESET TITLE MULTI/ P-IN-P ¥REC A.DUB ZOOM T sVOL r V/REW PLAY FF/W W 61 5 STILL ADV PAUSE STILL ADV E ; D INDEX STOP INDEX K ∫ L SELECT VAR. SEARCH P.B. ZOOM STORE MENU OFF/ON SET P.B. - Panasonic PVGS70D | PVGS70D User Guide - Page 48
1 2 1 START/ DATE/ PHOTO STOP OSD TIME SHOT COUNTER RESET TITLE MULTI/ P-IN-P ¥REC A.DUB ZOOM T sVOL r V/REW PLAY FF/W W 61 5 STILL ADV PAUSE STILL ADV E ; D INDEX STOP INDEX K ∫ L SELECT VAR. SEARCH P.B. ZOOM STORE MENU OFF/ON SET P.B.DIGITAL ITEM START/ DATE/ PHOTO STOP OSD - Panasonic PVGS70D | PVGS70D User Guide - Page 49
tape. 4 Press the [MULTI] Button. ≥If [STROBE] is selected: 9 screens are automatically captured from the point at which the Button is pressed. ≥If [MANUAL] is selected: press the [MULTI] Button at each scene you want to capture. When 9 screens are captured, the tape will stop. ≥If [PHOTO] or - Panasonic PVGS70D | PVGS70D User Guide - Page 50
To Delete Multi-Pictures one by one (When Pictures have been captured in Manual Mode) When the [MULTI] Button is pressed for 1 second or longer proper input on your TV. (If necessary, consult your TV's operating instructions.) ≥If you play back a Cassette recorded with copyright protection signals, - Panasonic PVGS70D | PVGS70D User Guide - Page 51
Audio Dubbing 1, 2 MENU WB/SHUTTER IRIS/MF/VOL/JOG PUSH You can add music or narration to the recorded Cassette. ≥If you perform audio dubbing onto a tape that was recorded with [AUDIO REC] on the [RECORDING SETUP] Sub-Menu of the [CAMERA FUNCTIONS] Main-Menu set to [16bit], the original sound is - Panasonic PVGS70D | PVGS70D User Guide - Page 52
SD Memory Card or MultiMediaCard can be used to record files or play back files. ≥Use a genuine SD Memory Card or MultiMediaCard manufactured by Panasonic only. ª Inserting a Memory Card OPEN 1 Before inserting a Memory Card, be sure to turn off the Palmcorder. 1 Slide the [OPEN] Lever to open the - Panasonic PVGS70D | PVGS70D User Guide - Page 53
4, 4 PHOTO SHOT 1, 2 1, 2 TAPE CARD CARD MODE MENU 3, 3 WB/SHUTTER IRIS/MF/VOL/JOG PUSH F 7 640 PICTURE 1 ª Card PhotoShot Still pictures can be recorded on the Memory Card from the Palmcorder lens as well as from scenes that have already been recorded on a cassette. The size of images that are - Panasonic PVGS70D | PVGS70D User Guide - Page 54
4 PHOTO SHOT 2, 3 TAPE CARD CARD MODE MENU 1, 1 WB/SHUTTER IRIS/MF/VOL/JOG PUSH PHOTO 3 SHOT TAPE CARD CARD 1 MODE 2 MENU WB/SHUTTER IRIS/MF/VOL/JOG PUSH 1H ª Card PhotoShot (continued) Recording from other equipment (CAMERA Mode) 1 Set [CAMERA FUNCTIONS] or [VCR FUNCTIONS] >> [CARD SETUP - Panasonic PVGS70D | PVGS70D User Guide - Page 55
2 MENU WB/SHUTTER IRIS/MF/VOL/JOG PUSH 1 STILL 1 ; TAPE%CARD NOW WRITING ª Automatically copying still pictures recorded on a cassette (VCR Mode) The Palmcorder copies images automatically, referring to Photo Index signals. After setting the Palmcorder to the VCR Mode (l 43)..... 1 Set the - Panasonic PVGS70D | PVGS70D User Guide - Page 56
when making an MPEG4 recording. This is done in order to optimize the image quality in MPEG4 recordings, and does not reflect that there is a problem with the software or hardware. ≥For other notes, see page 91. 56 - Panasonic PVGS70D | PVGS70D User Guide - Page 57
2 TAPE CARD CARD MODE CAMERA VCR CARD PB OFF ON MODE 1 3 SEARCH BACK SEARCH LIGHT FADE STILL 1 CARD CONTENTS PICTURE MPEG4 VOICE Playing Back Files from the Memory Card You can play back files recorded on a Card. ≥When you set the Palmcorder to Card Playback Mode, the card contents 1 are displayed - Panasonic PVGS70D | PVGS70D User Guide - Page 58
SEARCH BACK SEARCH LIGHT FADE STILL 1 100-0012 2 3 1 MPEG4 MOL001.ASF 2 0h00m00s No.1 N 3 VOICE 2 3 ª Playing back Voice recordings 1: Playing back 5: (Stop Mode) To the beginning of the next file (Playback Mode) To the beginning of the next file and start playback (Pause Mode) To the - Panasonic PVGS70D | PVGS70D User Guide - Page 59
4, 5, 1, 2 MENU WB/SHUTTER IRIS/MF/VOL/JOG PUSH 1, 2 TAPE CARD CARD MODE 3, 5 MULTI/ P-IN-P 1 PICTURE 640 640 640 5 640 2 640 No.25 3 640 100-0012 4 FILE SEARCH PUSH MENU TO RETURN ª To Select a Desired File and Play it Back After setting the Palmcorder to the Card Playback Mode (l - Panasonic PVGS70D | PVGS70D User Guide - Page 60
PHOTO 3 SHOT TAPE CARD CARD 1 MODE 2 MENU WB/SHUTTER IRIS/MF/VOL/JOG PUSH 1 REC NOW RECORDING Copying Pictures from a Memory Card to a Cassette After setting the Palmcorder to the Card Playback Mode (l 57)..... To Copy One Picture 1 Slide the [TAPE/CARD/CARD MODE] Selector to [TAPE]. 2 - Panasonic PVGS70D | PVGS70D User Guide - Page 61
1, 2, 3, 4, 5, 6, 7 1, 2, 3 MENU WB/SHUTTER IRIS/MF/VOL/JOG PUSH 8 BACK LIGHT EDIT 3 No.5 9SEC PUSH MENU TO RETURN 1 2 4 M.SLIDE 5 SLIDE 6 SLIDE Slide Show The recorded still pictures in the Card can be played back like a Slide Show. You can set up a Slide Show or change the content. To - Panasonic PVGS70D | PVGS70D User Guide - Page 62
2, 4, 5, 6, 7 MENU WB/SHUTTER IRIS/MF/VOL/JOG PUSH TAPE CARD CARD 1 MODE 3 PHOTO SHOT 1) 2) 3) 4) Creating a Title You can create a title and record on a Memory Card. 1 Camera Mode: Slide the [TAPE/CARD/CARD MODE] Selector to [CARD MODE] until the [PICTURE] Indication appears. Set the Lens to - Panasonic PVGS70D | PVGS70D User Guide - Page 63
PHOTO SHOT 6 1 TITLE 2, 4 MULTI/ P-IN-P 3, 4 WB/SHUTTER IRIS/MF/VOL/JOG PUSH TAPE CARD CARD 5 MODE Inserting a Title You can select one of your original titles and display it. (It can be displayed in Camera Mode, VCR Mode, and Card Playback Mode.) 1 Press the [TITLE] Button. ≥The title that - Panasonic PVGS70D | PVGS70D User Guide - Page 64
1, 2, 3 MENU WB/SHUTTER IRIS/MF/VOL/JOG PUSH 1 FILE LOCK 640 640 640 640 640 640 PUSH MENU TO EXIT 2 Protecting the Files on a Memory Card from Accidental Erasure (File Lock) Precious files recorded on a Memory Card can be locked to prevent accidental erasure. (Even if files are - Panasonic PVGS70D | PVGS70D User Guide - Page 65
1, 2, 4 1, 2 WB/SHUTTER IRIS/MF/VOL/JOG MENU PHOTO PUSH SHOT 3 Deleting the Files Recorded on a Memory Card Using the Palmcorder, you can delete the still picture files and titles recorded on a Memory Card. After the file is deleted, it cannot be restored. At first, slide the [TAPE/CARD/CARD - Panasonic PVGS70D | PVGS70D User Guide - Page 66
Format, and since printing data can be added to images on the Memory Card, the Memory Card can be used with any printers that support DPOF. After setting the Palmcorder to Card Playback Mode (l 57)..... 1 Set [CARD FUNCTIONS] >> [CARD EDITING] >> [DPOF SETTING] >> [YES]. 2 Rotate the [PUSH] Dial to - Panasonic PVGS70D | PVGS70D User Guide - Page 67
with an erasure prevention tab. ≥If various settings (such as external input, tape speed, etc.) are required, please refer to the operating instructions of your VCR. [Palmcorder] 3 Press the [1] Button to start playback. [VCR] 4 Start recording. 5 Press the Pause or Stop Button to stop recording - Panasonic PVGS70D | PVGS70D User Guide - Page 68
A 1, 3 1 B 2 DV START/ DATE/ PHOTO STOP OSD TIME SHOT COUNTER RESET TITLE MULTI/ P-IN-P ¥REC A.DUB ZOOM T sVOL r 4 V/REW PLAY FF/W W 61 5 STILL ADV PAUSE STILL ADV E ; D INDEX STOP INDEX K ∫ L SELECT VAR. SEARCH P.B. ZOOM STORE MENU OFF/ON SET P.B.DIGITAL ITEM Using your - Panasonic PVGS70D | PVGS70D User Guide - Page 69
3.0 and PhotoPrinter 4.0 are included. 4 Follow the instructions on the computer screen until the installation is complete. "OK". ("D" applies when the CD-ROM drive is drive D.) Using USB Driver ª Operating environment ≥Despite having the operating environment indicated, it may not be possible - Panasonic PVGS70D | PVGS70D User Guide - Page 70
between versions may be displayed during the installation. This will not cause a problem. Simply click [Yes] to proceed with the installation. 1 ≥Depending on the environment of the personal computer. Install the USB Driver as instructed below. Otherwise, it won't be installed correctly. 1 The - Panasonic PVGS70D | PVGS70D User Guide - Page 71
. ≥When using the USB Connection Kit, it is recommended that you use the AC Adaptor as the power supply of the Palmcorder. ≥After the USB Driver is installed and USB Connection Cable is connected to the Palmcorder, open [My computer] or [Windows Explorer] to check that the drive is displayed as - Panasonic PVGS70D | PVGS70D User Guide - Page 72
be used on operating systems using other languages. ª Connecting the Palmcorder to Personal Computer (For Using as a Web Camera) 1 Install the USB Driver. (l 70) 2 Set the Palmcorder to Camera Mode. 3 Connect the Palmcorder to Personal Computer with auxiliary USB Connection Cable. 4 Set [CAMERA - Panasonic PVGS70D | PVGS70D User Guide - Page 73
read the displayed contents, and then proceed. ≥Please refer to the instruction manual of your personal computer for how to configure the audio and the set up, if [Primary video capture device] selection screen is displayed, [Panasonic DVC Web Camera] is selected. ≥Send the sound by using the - Panasonic PVGS70D | PVGS70D User Guide - Page 74
. ≥When connected to the keyboard USB terminal, normal function may not be possible. ≥This instruction manual describes only the procedures for 4 installation, connection and start-up. Please read the PDF-based instructions for how to use the DV STUDIO 3.1E-SE. ≥To view the installed operating - Panasonic PVGS70D | PVGS70D User Guide - Page 75
Connection Cable. 3 Select [Start] >> [All Programs (Programs)] >> [Panasonic] >> [DV Studio3]>> [DV Studio3]. ≥If a shortcut icon has been up. ≥Quit all Windows applications. 3 Install it by following the instructions on the screen. ≥Carefully read the license agreement on the [Software License - Panasonic PVGS70D | PVGS70D User Guide - Page 76
of 800k600 dots or more RAM: 64 MB or more (128 MB or more is recommended) Free hard disk space: At least 300 MB ≥This instruction manual describes only the procedures for installation, connection and start-up. Please read the Help messages of your software for how to use the ArcSoft Software - Panasonic PVGS70D | PVGS70D User Guide - Page 77
4 Double click the software to be installed from [ArcSoft]. 5 Follow the instructions on the computer screen until 5 the installation is complete. ª To start software 510-440-1270 Web Site: www.arcsoft.com E-mail: [email protected] Refer to Help information about application operations and - Panasonic PVGS70D | PVGS70D User Guide - Page 78
Playback Mode:) 3 [Panasonic DVC USB Driver] or [Panasonic DV DISK Port Driver] Windows Me: [Panasonic DVC Port Driver Version 2.0] ≥Some you no longer need software or driver 1 (Uninstall) The screens may vary with the type of the OS. (In this manual, explanation is offered with Windows Me - Panasonic PVGS70D | PVGS70D User Guide - Page 79
data in transfer. Please refer to the user manual of Palmcorder. ≥We recommend using the AC Panasonic DVC USB Driver] (or [Panasonic DVC USB Driver Version 2.0]) (If you use Windows Me/98SE, also delete [Panasonic DVC Port Driver names in the operating instructions are trademarks or registered - Panasonic PVGS70D | PVGS70D User Guide - Page 80
ª About the compatibility of the card files Data files recorded on an "SD Memory Card" or a "MultiMediaCard" by this Palmcorder conform with DCF (Design rule for Camera File system) established by JEITA (Japan Electronics and Information Technology Industries Association). ≥If you attempt to play - Panasonic PVGS70D | PVGS70D User Guide - Page 81
6) 7) 8) 1) r SP 0h00m00s REC 2) R0:45 INDEX 5 t W T 9) 3) CINEMA 4) D.ZOOM 5) P-IN-P NEGA Others Indications Various functions and Palmcorder conditions are displayed on the screen. 1) Remaining Battery Power [r] ≥When the battery power becomes low, the indication changes. When - Panasonic PVGS70D | PVGS70D User Guide - Page 82
Mode ≥AUTO: This appears when Mode Selector ≥MNL: Switch is set to [AUTO]. (l 28) This appears when Mode Selector Switch is set to [MANUAL]. (l 35, 36, 37) Electronic Image Stabilizer [EIS] (l 33) Audio Dubbing Input Display [MIC/AV IN] (l 51) Audio Recording Mode [12bit/16bit] (l 27) 14 - Panasonic PVGS70D | PVGS70D User Guide - Page 83
) Card File Indications 1 (CARD PB Mode) ≥SLIDE!: ≥SLIDE;: Slide Show Playback (l 61) Slide Show Playback Pause (l 61) ≥M.SLIDE!: Manual Slide Show Playback (l 61) ≥M.SLIDE;: Manual Slide Show Playback Pause (l 61) 24) Card File Indications 2 (CARD PB Mode) ≥Image size [ 640 / 1280 ] (l 58 - Panasonic PVGS70D | PVGS70D User Guide - Page 84
ª Changing the Counter Display Mode By changing [C.DISPLAY] on the [DISPLAY SETUP] Sub-Menu, you can change the Counter Display Mode to Tape Counter Indication (0:00.00), Memory Counter Indication (M0:00.00), and Time Code Indication (0h00m00s00f). ≥You can also press the [COUNTER] Button of the - Panasonic PVGS70D | PVGS70D User Guide - Page 85
mechanism is detected. Press the [RESET] Button.This may solve the problem. You are attempting to record to a Memory Card formatted with other Memory Card with this equipment. NEEDS TO BE SERVICED: Disconnect the power supply and request service. CONNECT USB CABLE: The [WEB CAMERA] on - Panasonic PVGS70D | PVGS70D User Guide - Page 86
ª Camera Search (l 28) ≥In Camera Search Mode, images may contain mosaic-like noise patterns. This is a phenomenon that is characteristic of digital video and not a malfunction. ≥If the recording speed Modes (SP/LP) of previous recording and new recording are different, playback images may be - Panasonic PVGS70D | PVGS70D User Guide - Page 87
to fit the TV screen format. Please refer to the TV's operating instructions for details. ≥When images are displayed on a TV screen, the Date picture is presented in a time-lapse-like manner. ≥Focusing must be adjusted manually. ≥Use this function only in situations where there is limited light. Do - Panasonic PVGS70D | PVGS70D User Guide - Page 88
turn out to be washed out. Surf & Snow Mode ≥If the subject is extremely bright, its recorded image may turn out to be washed out. ª Manual Shutter Speed Adjustment (l 36) ≥You may see vertical lines of light in the playback image of a brightly shining subject or highly reflective subject. ≥During - Panasonic PVGS70D | PVGS70D User Guide - Page 89
] on the [DIGITAL EFFECT] Sub-Menu. ≥If you set [EFFECT1] on the [DIGITAL EFFECT] Sub-Menu to [GAIN UP], you need to adjust the focus manually. However, you cannot adjust the shutter speed and cannot select White Balance. ≥You cannot use Sports Mode, Portrait Mode or Low Light Mode with Gain - Panasonic PVGS70D | PVGS70D User Guide - Page 90
≥When the color of the screen changes or blurs, adjust the shutter speed manually to 1/60 or 1/100. ≥Mega-pixel images cannot be recorded on a We recommend that you use this equipment to format it. ≥The file format supported by this Palmcorder is JPEG. (Not all the JPEG formatted files will be - Panasonic PVGS70D | PVGS70D User Guide - Page 91
as [R:99h59m]. Recording Moving Pictures (MPEG4) (l 56) ≥The file format supported by this Palmcorder is ASF. (Not all the ASF formatted files will ≥When the color of the screen changes or blurs, adjust the shutter speed manually to 1/60 or 1/100. ≥The picture size of the moving picture (MPEG4 - Panasonic PVGS70D | PVGS70D User Guide - Page 92
ª Card Playback (l 57) ≥If a blank (nothing recorded) Card is played, the screen becomes white and the [NO PICTURE], [NO MPEG4 DATA] or [NO VOICE DATA] Indication appears depending on the mode selected. ≥If you attempt to play back if file recorded in a different format or if file data is defective, - Panasonic PVGS70D | PVGS70D User Guide - Page 93
digital dubbing in some cases. ≥Date or other information to be displayed cannot be displayed if the software of the connected equipment does not support the display function. ª Using a Card in a Personal Computer ≥To erase pictures that you recorded on the Card by using the Palmcorder, be sure to - Panasonic PVGS70D | PVGS70D User Guide - Page 94
≥If the Palmcorder is affected by magnetically charged equipment and does not function properly, turn off the Palmcorder power and detach the Battery or AC Adaptor and then connect the Battery or AC Adaptor again. Thereafter, turn on the Palmcorder power. Do not use your Palmcorder near radio - Panasonic PVGS70D | PVGS70D User Guide - Page 95
heads cannot be cleaned with the head cleaner, the Palmcorder needs to be cleaned at a service center. Please consult a distributor or Panasonic Servicenter. ≥Video head cleaners can be purchased from service centers. ≥Head cleaning due to dirty heads is not considered a malfunction of the product - Panasonic PVGS70D | PVGS70D User Guide - Page 96
ª Cautions for Storage Before storing the Palmcorder, take the Cassette out and detach the Battery. Store all the components in a dry place with a relatively stable temperature. ≥Recommended Temperature: 59oF to 77oF (15oC to 25oC), Recommended Humidity: 40% to 60% Palmcorder ≥Wrap it with a soft - Panasonic PVGS70D | PVGS70D User Guide - Page 97
may become dark (vignetting). For details, please refer to the operating instructions for your accessories. ≥Be sure to keep the Lens Hood attached following subjects or under the following recording conditions. Please use the Manual Focus Mode instead. 1) Recording a subject whose one end is - Panasonic PVGS70D | PVGS70D User Guide - Page 98
ª White Balance Adjustment Depending on the type of light source, the colors recorded by the Palmcorder may be affected. In some cases, images may be recorded with a bluish or reddish hue. To minimize the effect of light on the subject's color, White Balance Adjustment becomes necessary. White - Panasonic PVGS70D | PVGS70D User Guide - Page 99
316 mV, 10 kohm or more Mic sensitivity -50 dB (0 dB = 1 V/Pa, 1 kHz) (Stereo mini jack) Card reader/writer function, (No copyright protection support) USB 2.0 compliant (max. 12 Mbps) DV Input/Output Terminal (IEEE1394, 4-pin) 2.80 (W) k3.03 (H) k5.20 (D) inch 71 (W) k77 (H) k132 (D) mm 1.08 lbs - Panasonic PVGS70D | PVGS70D User Guide - Page 100
Palmcorder Accessory System Accessory# Figure PV-DAC13 Description AC Adaptor with AC Cable and DC Cable *CGA-DU07 *CGA-DU14 *CGA-DU21 PV-DDC9 (For USA) PV-DDC9-K (For Canada) PV-DRC9 (For USA) PV-DRC9-K (For Canada) RP-SD064BPPA RP-SD032BPPA RP-SD016BPPA BN-SDCAPE/1B (For USA) BN-SDCAPU/1B ( - Panasonic PVGS70D | PVGS70D User Guide - Page 101
ACCESSORIES YOU CAN DO ANY OF THE FOLLOWING: VISIT YOUR LOCAL PANASONIC DEALER OR CALL PANASONIC'S ACCESSORY ORDER LINE AT 1-800-332-5368 [6 AM-5 PM M-F, 6 AM-10:30 AM SAT, PACIFIC TIME] OR MAIL THIS ORDER TO: PANASONIC SERVICES COMPANY ACCESSORY ORDER OFFICE 20421 84th Avenue South Kent, WA. 98032 - Panasonic PVGS70D | PVGS70D User Guide - Page 102
Before Requesting Service (Problems and Solutions) If you are experiencing one of the following problems with your Digital Palmcorder, it may be something you can correct yourself. Check the list below for Problems and Solutions. Problems Solutions The Palmcorder power cannot be turned on. The - Panasonic PVGS70D | PVGS70D User Guide - Page 103
you can correct yourself. Check the list below for Problems and Solutions. Problems Solutions Audio dubbing cannot be performed. ≥Is the accidental . Have you selected Video Input on the TV? Please read the operating instructions of your TV and select the input that matches the input jacks used - Panasonic PVGS70D | PVGS70D User Guide - Page 104
it may be something you can correct yourself. Check the list below for Problems and Solutions. Problems Solutions The original sound was erased when audio dubbing was performed. Sounds cannot a possibility of damage to either the Palmcorder or the Card. Please contact Panasonic Call Centre. 104 - Panasonic PVGS70D | PVGS70D User Guide - Page 105
what wrong with the unit and any symptom it is exhibiting. Mail this completed form and your Proof of Purchase along with your unit to: Panasonic Services Company 1705 N. Randall Road Elgin, IL. 60123-7847 Attn: Camcorder Repair Please write the displayed above Self Diagnostic number here. 105 - Panasonic PVGS70D | PVGS70D User Guide - Page 106
visit Panasonic Web Site: http://www.panasonic.com For assistance in Puerto Rico call Panasonic Sales Company (787)-750-4300 or fax (787)-768-2910. In-Home service, which vary from state to state. If a problem with this product develops during or after the warranty period, you may contact your dealer - Panasonic PVGS70D | PVGS70D User Guide - Page 107
visiting our Web Site. Accessory Purchases: 1-800-332-5368 (Customer Orders Only) For hearing or speech impaired TTY users, TTY : 1-866-605-1277 Panasonic Services Company 20421 84th Avenue South, Kent, WA 98032 (Monday-Friday 6 am-5 pm; Saturday 6 am-10:30 am, PST) (Visa, MasterCard, Discover Card - Panasonic PVGS70D | PVGS70D User Guide - Page 108
or other proof of date of original purchase is required before warranty service is performed. THIS EXPRESS, LIMITED WARRANTY IS IN LIEU OF ALL : Telephone #: (905) 624-5505 Fax #: (905) 238-2360 Web: www.panasonic.ca For product repairs, please contact one of the following: ≥Your Dealer who will - Panasonic PVGS70D | PVGS70D User Guide - Page 109
Auto White Balance Adjustment 98 ªB Backlight Compensation 33 Before Requesting Service 102 Black & White Mode 40, 48 Blank Search 46 Function 31 MagicPix Function 34 MagicWire Remote Control with Narration Mic ...16 Manual Focus 37 Memory Card 52 Memory Stop Function 98 Menu Screen 22 - Panasonic PVGS70D | PVGS70D User Guide - Page 110
ªS SD Memory Card 79 Self-Recording 29 Self-timer Recording 30 Sepia Mode 40, 48 Shutter Speed 36 Slide Show 61 Slow Motion Playback 45 Soft Skin Function 34 Solarization Mode 40, 48 Sound Volume 43 SP/LP Mode 27 Sports Mode 35 Spotlight Mode 35 Still Advance Playback 45 Strobe Mode - Panasonic PVGS70D | PVGS70D User Guide - Page 111
1 2 4 2 3 PUSH 2 CAMERA VCR CARD PB OFF ON MODE 1 1 OPEN / EJECT CAMERA VCR CARD PB OFF ON MODE 1 3 REC Spanish Quick Use Guide/Guía española para el uso rápido ª Para iniciar 1 Una la batería al adaptador de CA y cárguela. ≥Dado que la batería no se cargará cuando - Panasonic PVGS70D | PVGS70D User Guide - Page 112
ª Utilización de la tarjeta 23 OPEN 1 1 2 PHOTO 3 SHOT 1, 2 TAPE CARD CARD MODE Antes de insertar la tarjeta, asegúrese de apagar la videocámara. 1 Desplace la palanca [OPEN] para abrir la tapa del compartimento de tarjeta. 2 Manteniendo la tarjeta de memoria con su ángulo cortado hacia la - Panasonic PVGS70D | PVGS70D User Guide - Page 113
113 - Panasonic PVGS70D | PVGS70D User Guide - Page 114
Electric Corporation of America Executive Office: One Panasonic Way, Secaucus, NJ 07094 (201) 348-7000 Panasonic Company East: 6749 Baymeadow Drive, Glen Burnie, MD 21060 Panasonic Company Central: 1707 North Randall Road, Elgin, IL 60123 Panasonic Company West: 6550 Katella Avenue, Cypress, CA
-
 1
1 -
 2
2 -
 3
3 -
 4
4 -
 5
5 -
 6
6 -
 7
7 -
8
-
9
-
10
-
11
-
12
-
13
-
14
-
15
-
16
-
17
-
18
-
19
-
20
-
21
-
22
-
23
-
24
-
25
-
26
-
27
-
28
-
29
-
30
-
31
-
32
-
33
-
34
-
35
-
36
-
37
-
38
-
39
-
40
-
41
-
42
-
43
-
44
-
45
-
46
-
47
-
48
-
49
-
50
-
51
-
52
-
53
-
54
-
55
-
56
-
57
-
58
-
59
-
60
-
61
-
62
-
63
-
64
-
65
-
66
-
67
-
68
-
69
-
70
-
71
-
72
-
73
-
74
-
75
-
76
-
77
-
78
-
79
-
80
-
81
-
82
-
83
-
84
-
85
-
86
-
87
-
88
-
89
-
90
-
91
-
92
-
93
-
94
-
95
-
96
-
97
-
98
-
99
-
100
-
101
-
102
-
103
-
104
-
105
-
106
-
107
-
108
-
109
-
110
-
111
-
112
-
113
-
114
 |
 |
R
Spanish Quick Use Guide is included.
Guía para rápida consulta en español está incluida.
LSQT0693A
For USA assistance, please call: 1-800-211-PANA(7262) or send e-mail to : [email protected]
For Canadian assistance, please call: 1-800-561-5505 or visit us at www.panasonic.ca
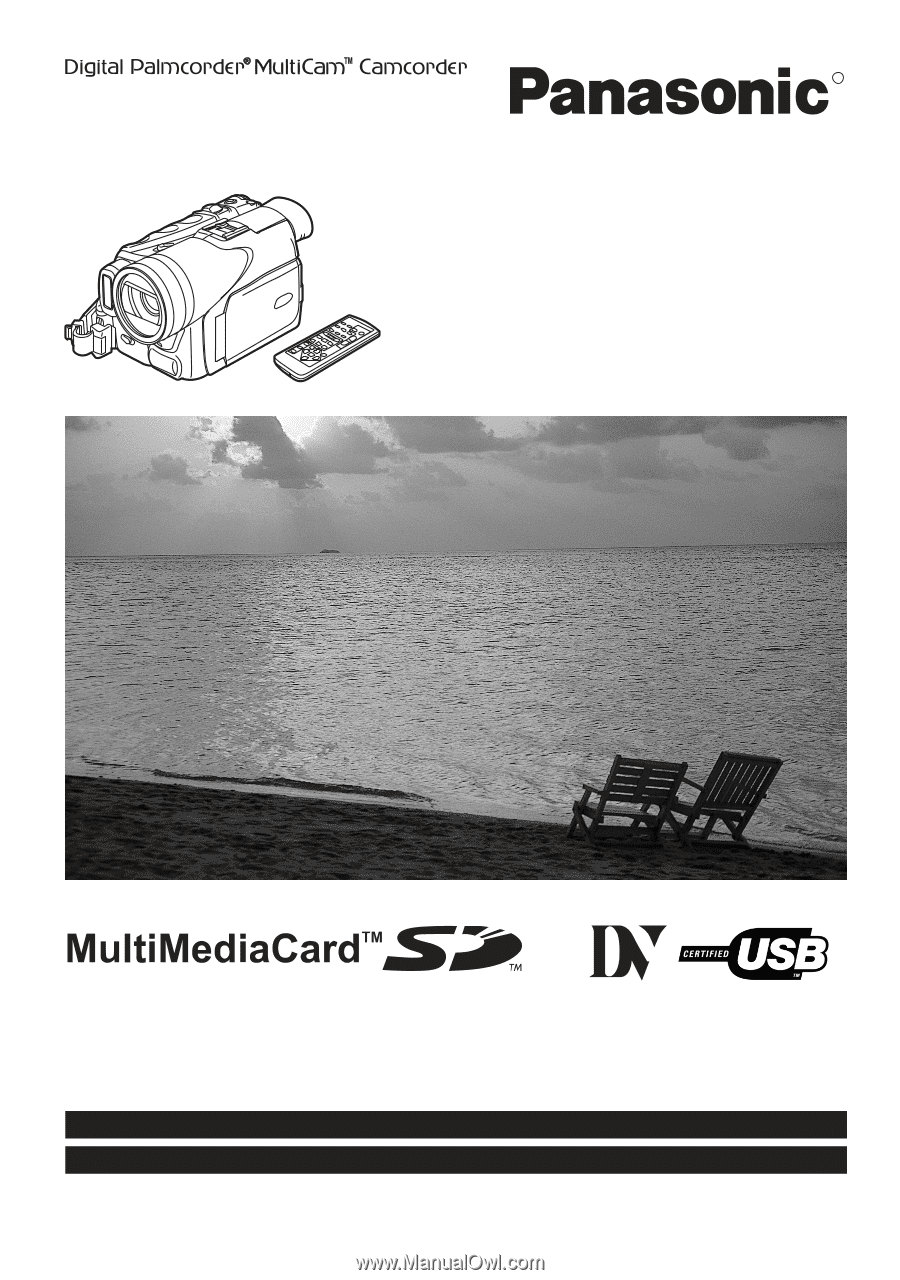
Digital Video Camcorder
Operating Instructions
Model No.
PV-GS70
Mini
Before attempting to connect, operate or adjust this product,
please read these instructions thoroughly.