Ricoh R4 User Guide - Page 143
Installing the Software on Your Computer - caplio software download
 |
View all Ricoh R4 manuals
Add to My Manuals
Save this manual to your list of manuals |
Page 143 highlights
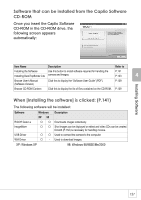
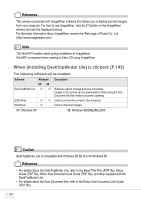
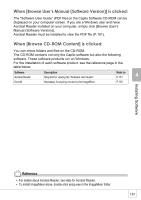
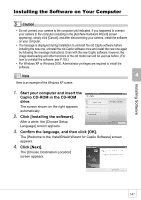
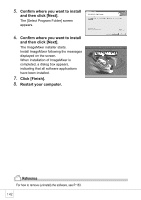
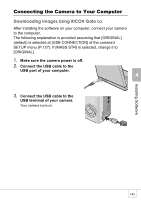
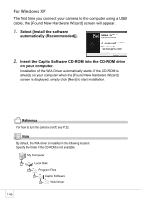
Installing Software Installing the Software on Your Computer Caution • Do not connect your camera to the computer until indicated. If you happened to connect your camera to the computer (resulting in the [Add New Hardware Wizard] screen appearing), simply click [Cancel], and after disconnecting your camera, install the software on your computer. • If a message is displayed during installation to uninstall the old Caplio software before installing the new one, uninstall the old Caplio software once and install the new one again by following the message instructions. Even with the new Caplio software, however, the image downloading and other functions of the old model can still be used as before. (For how to uninstall the software, see P.153.) • For Windows XP or Windows 2000, Administrator privileges are required to install the software. Note Here is an example of the Windows XP screen. 1. Start your computer and insert the Caplio CD-ROM in the CD-ROM drive. The screen shown on the right appears automatically. 2. Click [Installing the software]. After a while, the [Choose Setup Language] screen appears. 3. Confirm the language, and then click [OK]. The [Welcome to the InstallShield Wizard for Caplio Software] screen appears. 4. Click [Next]. The [Choose Destination Location] screen appears. 141
-
 1
1 -
2
-
3
-
4
-
5
-
6
-
7
-
8
-
9
-
10
-
11
-
12
-
13
-
14
-
15
-
16
-
17
-
18
-
19
-
20
-
21
-
22
-
23
-
24
-
25
-
26
-
27
-
28
-
29
-
30
-
31
-
32
-
33
-
34
-
35
-
36
-
37
-
38
-
39
-
40
-
41
-
42
-
43
-
44
-
45
-
46
-
47
-
48
-
49
-
50
-
51
-
52
-
53
-
54
-
55
-
56
-
57
-
58
-
59
-
60
-
61
-
62
-
63
-
64
-
65
-
66
-
67
-
68
-
69
-
70
-
71
-
72
-
73
-
74
-
75
-
76
-
77
-
78
-
79
-
80
-
81
-
82
-
83
-
84
-
85
-
86
-
87
-
88
-
89
-
90
-
91
-
92
-
93
-
94
-
95
-
96
-
97
-
98
-
99
-
100
-
101
-
102
-
103
-
104
-
105
-
106
-
107
-
108
-
109
-
110
-
111
-
112
-
113
-
114
-
115
-
116
-
117
-
118
-
119
-
120
-
121
-
122
-
123
-
124
-
125
-
126
-
127
-
128
-
129
-
130
-
131
-
132
-
133
-
134
-
135
-
136
-
137
-
 138
138 -
 139
139 -
 140
140 -
 141
141 -
 142
142 -
 143
143 -
 144
144 -
 145
145 -
 146
146 -
 147
147 -
 148
148 -
149
-
150
-
151
-
152
-
153
-
154
-
155
-
156
-
157
-
158
-
159
-
160
-
161
-
162
-
163
-
164
-
165
-
166
-
167
-
168
-
169
-
170
-
171
-
172
-
173
-
174
-
175
-
176
-
177
-
178
-
179
-
180
-
181
-
182
-
183
-
184
-
185
-
186
-
187
-
188
 |
 |
