Ricoh R4 User Guide - Page 59
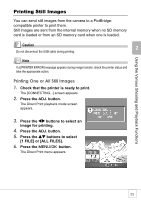
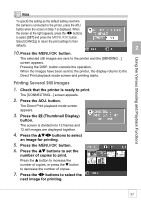
Printing Several Still Images
 |
View all Ricoh R4 manuals
Add to My Manuals
Save this manual to your list of manuals |
Page 59 highlights
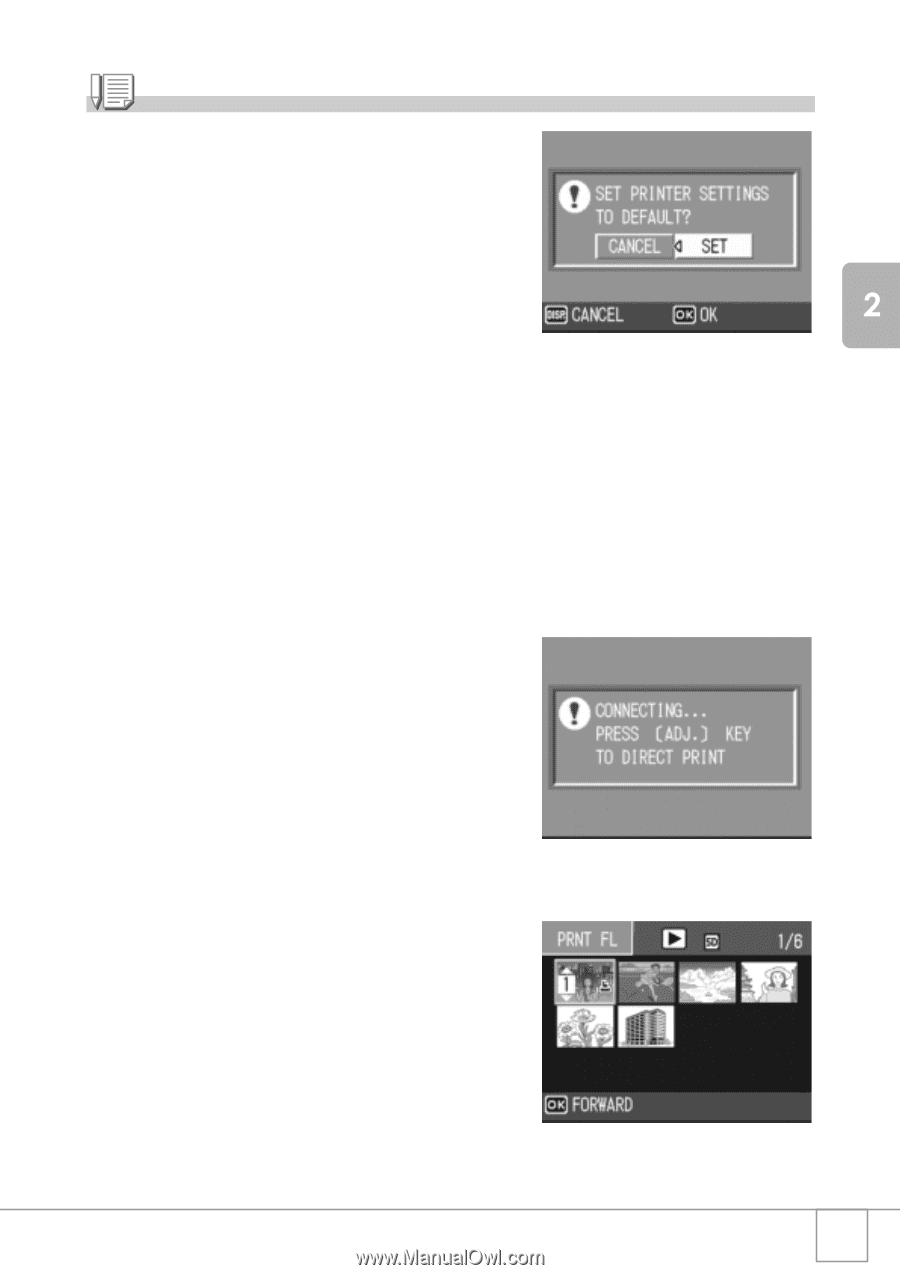
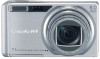
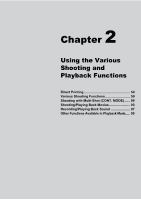
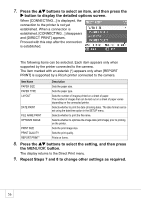
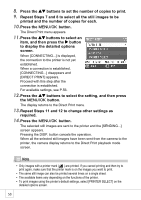
Using the Various Shooting and Playback Functions Note To specify the setting as the default setting next time the camera is connected to the printer, press the ADJ. button when the screen in Step 7 is displayed. When the screen at the right appears, press the #$ buttons to select [SET] and press the M/O button. Select [CANCEL] to return the print settings to their defaults. 10.Press the C/D button. The selected still images are sent to the printer and the [SENDING...] screen appears. Pressing the DISP. button cancels the operation. When the images have been sent to the printer, the display returns to the Direct Print playback mode screen and printing starts. Printing Several Still Images 1. Check that the printer is ready to print. The [CONNECTING...] screen appears. 2. Press the ADJ. button. The Direct Print playback mode screen appears. 3. Press the 9 (Thumbnail Display) button. The screen is divided into 12 frames and 12 still images are displayed together. 4. Press the !"#$ buttons to select an image for printing. 5. Press the C/D button. 6. Press the !" buttons to set the number of copies to print. Press the ! button to increase the number of copies, or press the " button to decrease the number of copies. 7. Press the #$ buttons to select the next image for printing. 57
-
 1
1 -
2
-
3
-
4
-
5
-
6
-
7
-
8
-
9
-
10
-
11
-
12
-
13
-
14
-
15
-
16
-
17
-
18
-
19
-
20
-
21
-
22
-
23
-
24
-
25
-
26
-
27
-
28
-
29
-
30
-
31
-
32
-
33
-
34
-
35
-
36
-
37
-
38
-
39
-
40
-
41
-
42
-
43
-
44
-
45
-
46
-
47
-
48
-
49
-
50
-
51
-
52
-
53
-
 54
54 -
 55
55 -
 56
56 -
 57
57 -
 58
58 -
 59
59 -
 60
60 -
 61
61 -
 62
62 -
 63
63 -
 64
64 -
65
-
66
-
67
-
68
-
69
-
70
-
71
-
72
-
73
-
74
-
75
-
76
-
77
-
78
-
79
-
80
-
81
-
82
-
83
-
84
-
85
-
86
-
87
-
88
-
89
-
90
-
91
-
92
-
93
-
94
-
95
-
96
-
97
-
98
-
99
-
100
-
101
-
102
-
103
-
104
-
105
-
106
-
107
-
108
-
109
-
110
-
111
-
112
-
113
-
114
-
115
-
116
-
117
-
118
-
119
-
120
-
121
-
122
-
123
-
124
-
125
-
126
-
127
-
128
-
129
-
130
-
131
-
132
-
133
-
134
-
135
-
136
-
137
-
138
-
139
-
140
-
141
-
142
-
143
-
144
-
145
-
146
-
147
-
148
-
149
-
150
-
151
-
152
-
153
-
154
-
155
-
156
-
157
-
158
-
159
-
160
-
161
-
162
-
163
-
164
-
165
-
166
-
167
-
168
-
169
-
170
-
171
-
172
-
173
-
174
-
175
-
176
-
177
-
178
-
179
-
180
-
181
-
182
-
183
-
184
-
185
-
186
-
187
-
188
 |
 |