Sony Ericsson T68i User Guide - Page 55
WAP profiles, Show pictures
 |
View all Sony Ericsson T68i manuals
Add to My Manuals
Save this manual to your list of manuals |
Page 55 highlights
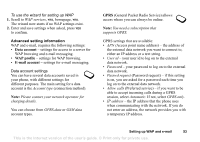
Note: To see the status of GPRS coverage and connection, slide the volume key up or down from standby to enter the Status menu and then scroll down to GPRS. WAP profile settings The WAP settings are stored in a WAP profile. In most cases you only need to use one profile to access the Internet. You set up and use additional WAP profiles, for example, when accessing secure Internet sites, such as a banking site or a corporate intranet. You then simply switch between profiles when you need to change the network connection. To enter WAP profile settings manually 1. Make sure you have a data account set up between your phone and the Internet server, as described in "Data account settings" on page 53. 2. Scroll to WAP services, YES, Options, YES, WAP profiles, YES. 3. Select Add profile? to add a new profile or select an existing profile that you want to edit, YES. • When selecting Add profile? enter a name for the profile, YES, Connect using:, YES, select the data account to be used, YES and enter the IP address:, YES. A list appears. Scroll to Save?, YES. • When selecting an existing profile, you can Edit, Rename or Delete. 4. Select Edit and press YES. 5. You can now do the following: • Chg homepage - Enter the address of the WAP site you want as the homepage. • Connect using - Select data account. • IP address - WAP gateway server address. • User id - Enter your user id for the WAP gateway. • Password - Enter your WAP gateway password. • Data mode - Select a data connection mode. • Security - See WAP security settings. • Show pictures - View pictures while browsing. • Second account - Select an alternative (if set up) on connection failure with the default data account. • Response timer - Set a time limit in seconds after which a download attempt will stop. Setting up WAP and e-mail 55 This is the Internet version of the user's guide. © Print only for private use.
-
 1
1 -
2
-
3
-
4
-
5
-
6
-
7
-
8
-
9
-
10
-
11
-
12
-
13
-
14
-
15
-
16
-
17
-
18
-
19
-
20
-
21
-
22
-
23
-
24
-
25
-
26
-
27
-
28
-
29
-
30
-
31
-
32
-
33
-
34
-
35
-
36
-
37
-
38
-
39
-
40
-
41
-
42
-
43
-
44
-
45
-
46
-
47
-
48
-
49
-
 50
50 -
 51
51 -
 52
52 -
 53
53 -
 54
54 -
 55
55 -
 56
56 -
 57
57 -
 58
58 -
 59
59 -
 60
60 -
61
-
62
-
63
-
64
-
65
-
66
-
67
-
68
-
69
-
70
-
71
-
72
-
73
-
74
-
75
-
76
-
77
-
78
-
79
-
80
-
81
-
82
-
83
-
84
-
85
-
86
-
87
-
88
-
89
-
90
-
91
-
92
-
93
-
94
-
95
-
96
-
97
-
98
-
99
-
100
-
101
-
102
-
103
-
104
-
105
-
106
-
107
 |
 |