Sony DCR-PC9 Operating Instructions - Page 149
Viewing images using your computer
 |
View all Sony DCR-PC9 manuals
Add to My Manuals
Save this manual to your list of manuals |
Page 149 highlights
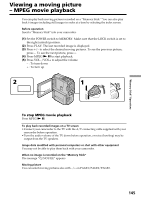
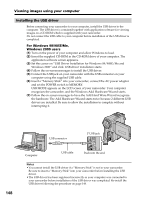
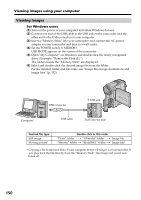
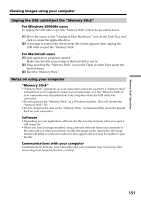
"Memory Stick" Operations Viewing images using your computer Image data cannot be transferred by the USB connection The USB driver has been registered incorrectly as your computer was connected to your camcorder before installation of the USB driver was completed. Perform the following procedure to correctly install the USB driver. Step 1 Uninstall the incorrect USB driver 1 Turn on the power and allow Windows to load. 2 Connect the USB jack on your computer to the USB jack on your camcorder using the USB cable supplied with your camcorder. 3 Insert a "Memory Stick" into your camcorder, connect the AC power adapter, and set the POWER switch to MEMORY. 4 Open your computer's "Device Manager." Windows 2000 Professional: Open "My Computer" t "Control Panel" t "Hardware" tab, and click the "Device Manager" button. Other OS: Select "My Computer" t "Control Panel" t "System,", and click "Device Manager". 5 Select "Other devices". Select the device prefixed with the "?" mark and delete. Ex: (?)Sony Handycam 6 Turn the power OFF (CHARGE), and then disconnect the USB cable. 7 Reboot your computer. Step 2 Install the USB driver on the CD-ROM Perform the entire procedure listed in "Installing the USB Driver" on the page 148. For Mac OS 8.5.1/8.6/9.0 users (1) Turn on the power of your computer and allow the Mac OS to load. (2) Insert the supplied CD-ROM in the CD-ROM drive of your computer. (3) Double-click the CD-ROM drive icon to open the window. (4) Double-click the icon of the hard disk containing the OS to open the window. (5) Move the following 2 files from the window opened in step 3 to the System Folder icon in the window opened in step 4 (drag and drop). •Sony Camcorder USB Driver •Sony Camcorder USB Shim (6) When "Put these items into the Extensions folder?" appears, click OK. (7) Restart your computer. For Mac OS 9.1 The USB driver need not be installed. Your Mac is automatically recognized as a driver just by connecting your Mac using the USB cable. 149
-
 1
1 -
2
-
3
-
4
-
5
-
6
-
7
-
8
-
9
-
10
-
11
-
12
-
13
-
14
-
15
-
16
-
17
-
18
-
19
-
20
-
21
-
22
-
23
-
24
-
25
-
26
-
27
-
28
-
29
-
30
-
31
-
32
-
33
-
34
-
35
-
36
-
37
-
38
-
39
-
40
-
41
-
42
-
43
-
44
-
45
-
46
-
47
-
48
-
49
-
50
-
51
-
52
-
53
-
54
-
55
-
56
-
57
-
58
-
59
-
60
-
61
-
62
-
63
-
64
-
65
-
66
-
67
-
68
-
69
-
70
-
71
-
72
-
73
-
74
-
75
-
76
-
77
-
78
-
79
-
80
-
81
-
82
-
83
-
84
-
85
-
86
-
87
-
88
-
89
-
90
-
91
-
92
-
93
-
94
-
95
-
96
-
97
-
98
-
99
-
100
-
101
-
102
-
103
-
104
-
105
-
106
-
107
-
108
-
109
-
110
-
111
-
112
-
113
-
114
-
115
-
116
-
117
-
118
-
119
-
120
-
121
-
122
-
123
-
124
-
125
-
126
-
127
-
128
-
129
-
130
-
131
-
132
-
133
-
134
-
135
-
136
-
137
-
138
-
139
-
140
-
141
-
142
-
143
-
 144
144 -
 145
145 -
 146
146 -
 147
147 -
 148
148 -
 149
149 -
 150
150 -
 151
151 -
 152
152 -
 153
153 -
 154
154 -
155
-
156
-
157
-
158
-
159
-
160
-
161
-
162
-
163
-
164
-
165
-
166
-
167
-
168
-
169
-
170
-
171
-
172
-
173
-
174
-
175
-
176
-
177
-
178
-
179
-
180
-
181
-
182
-
183
-
184
-
185
-
186
-
187
-
188
-
189
-
190
-
191
-
192
 |
 |