Sony DCR-PC9 Operating Instructions - Page 19
Step 3, Inserting a cassette
 |
View all Sony DCR-PC9 manuals
Add to My Manuals
Save this manual to your list of manuals |
Page 19 highlights
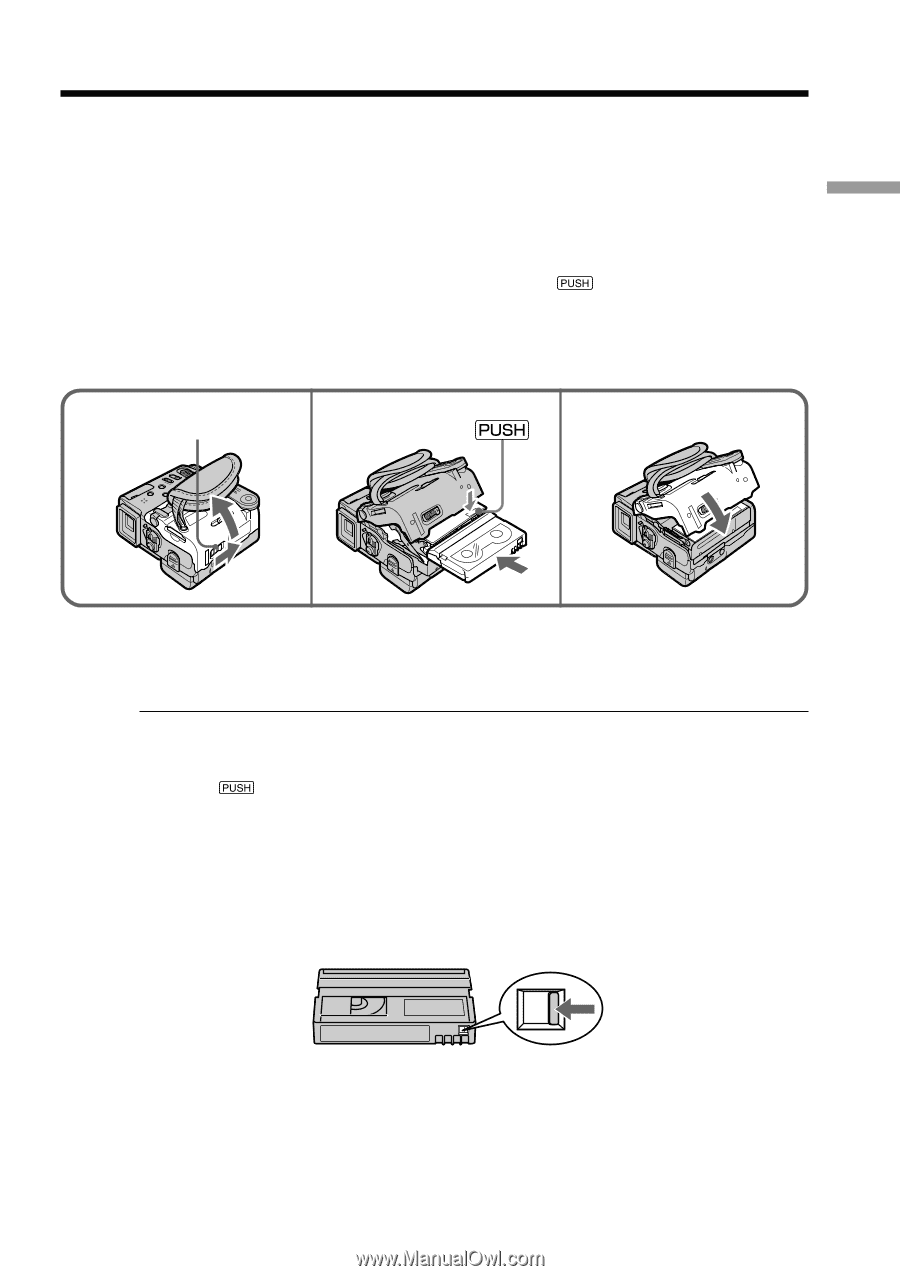
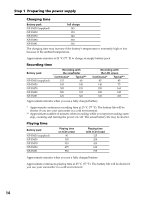
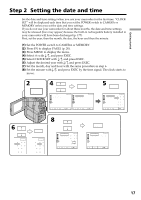
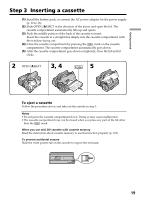
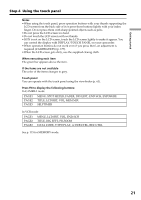
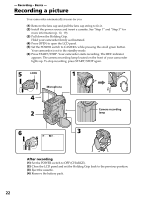
Getting started Step 3 Inserting a cassette (1) Install the battery pack, or connect the AC power adaptor for the power supply (p. 12 to 16). (2) Slide OPEN/ZEJECT in the direction of the arrow and open the lid. The cassette compartment automatically lifts up and opens. (3) Push the middle portion of the back of the cassette to insert. Insert the cassette in a straight line deeply into the cassette compartment with the window facing out. (4) Close the cassette compartment by pressing the mark on the cassette compartment. The cassette compartment automatically goes down. (5) After the cassette compartment goes down completely, close the lid until it clicks. 2 OPEN/ZEJECT 3, 4 5 To eject a cassette Follow the procedure above, and take out the cassette in step 3. Notes •Do not press the cassette compartment down. Doing so may cause malfunction. •The cassette compartment may not be closed when you press any part of the lid other than the mark. When you use mini DV cassette with cassette memory Read the instruction about cassette memory to use this function properly (p. 169). To prevent accidental erasure Slide the write-protect tab on the cassette to expose the red mark. 19
-
 1
1 -
2
-
3
-
4
-
5
-
6
-
7
-
8
-
9
-
10
-
11
-
12
-
13
-
 14
14 -
 15
15 -
 16
16 -
 17
17 -
 18
18 -
 19
19 -
 20
20 -
 21
21 -
 22
22 -
 23
23 -
 24
24 -
25
-
26
-
27
-
28
-
29
-
30
-
31
-
32
-
33
-
34
-
35
-
36
-
37
-
38
-
39
-
40
-
41
-
42
-
43
-
44
-
45
-
46
-
47
-
48
-
49
-
50
-
51
-
52
-
53
-
54
-
55
-
56
-
57
-
58
-
59
-
60
-
61
-
62
-
63
-
64
-
65
-
66
-
67
-
68
-
69
-
70
-
71
-
72
-
73
-
74
-
75
-
76
-
77
-
78
-
79
-
80
-
81
-
82
-
83
-
84
-
85
-
86
-
87
-
88
-
89
-
90
-
91
-
92
-
93
-
94
-
95
-
96
-
97
-
98
-
99
-
100
-
101
-
102
-
103
-
104
-
105
-
106
-
107
-
108
-
109
-
110
-
111
-
112
-
113
-
114
-
115
-
116
-
117
-
118
-
119
-
120
-
121
-
122
-
123
-
124
-
125
-
126
-
127
-
128
-
129
-
130
-
131
-
132
-
133
-
134
-
135
-
136
-
137
-
138
-
139
-
140
-
141
-
142
-
143
-
144
-
145
-
146
-
147
-
148
-
149
-
150
-
151
-
152
-
153
-
154
-
155
-
156
-
157
-
158
-
159
-
160
-
161
-
162
-
163
-
164
-
165
-
166
-
167
-
168
-
169
-
170
-
171
-
172
-
173
-
174
-
175
-
176
-
177
-
178
-
179
-
180
-
181
-
182
-
183
-
184
-
185
-
186
-
187
-
188
-
189
-
190
-
191
-
192
 |
 |