Sony DCR-PC9 Operating Instructions - Page 176
Maintenance information, Removing dust from inside the viewfinder, Maintenance information
 |
View all Sony DCR-PC9 manuals
Add to My Manuals
Save this manual to your list of manuals |
Page 176 highlights
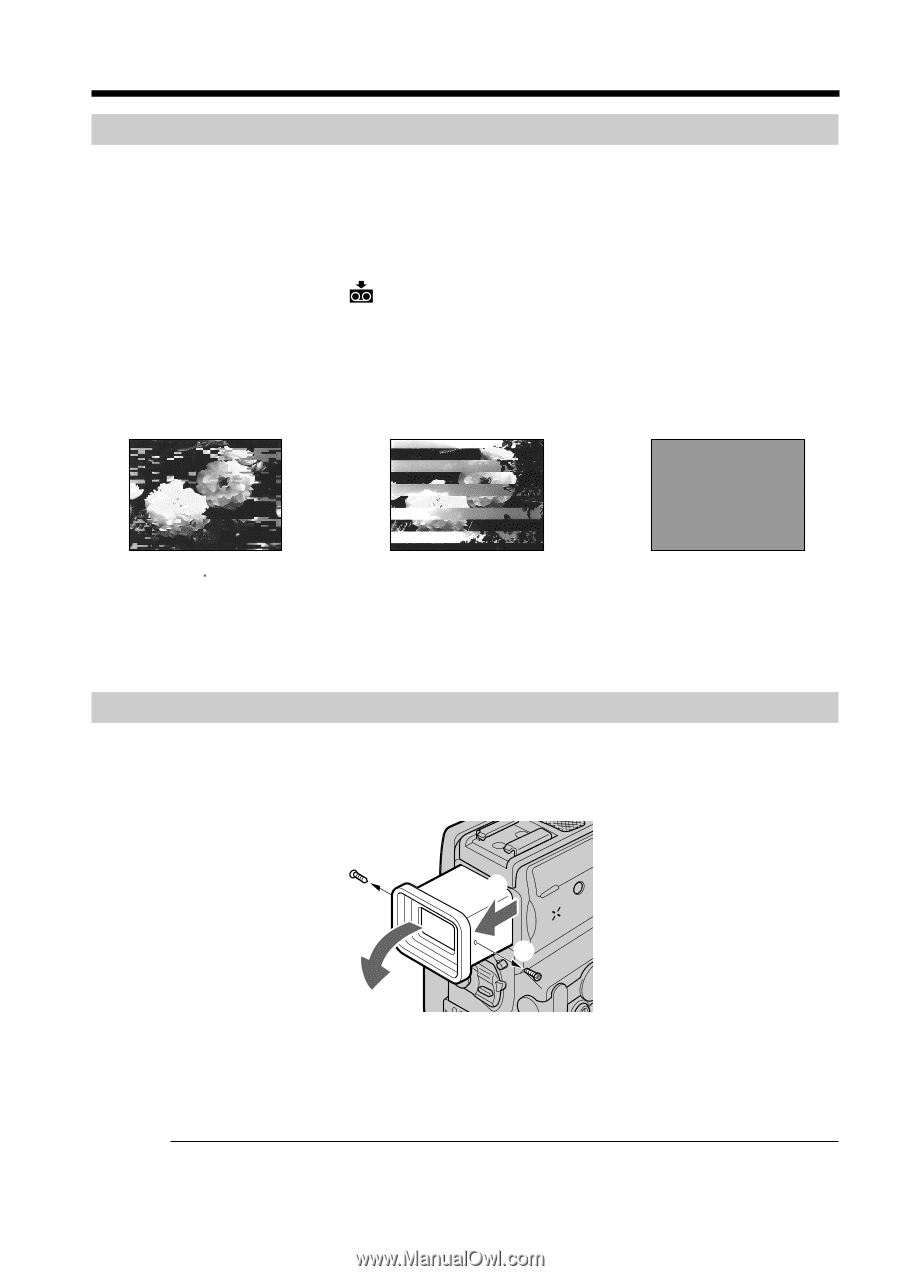
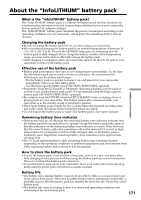
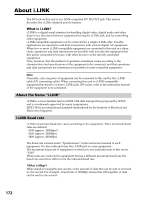
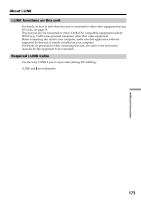
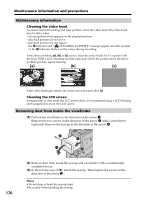
Maintenance information and precautions Maintenance information Cleaning the video head To ensure normal recording and clear pictures, clean the video head. The video head may be dirty when: - mosaic-pattern noise appears on the playback picture. - playback pictures do not move. - playback pictures do not appear. - the x indicator and " CLEANING CASSETTE" message appear one after another or the x indicator flashes on the screen during recording. If the above problem, [a], [b] or [c] occurs, clean the video heads for 10 seconds with the Sony DVM-12CLD cleaning cassette (optional). Check the picture and if the above problem persists, repeat cleaning. [a] [b] [c] If the video heads gets dirtier, the entire screen becomes blue [c]. Cleaning the LCD screen If fingerprints or dust make the LCD screen dirty, we recommend using a LCD cleaning cloth (supplied) to clean the LCD screen. Removing dust from inside the viewfinder (1) Pull out the viewfinder in the direction of the arrow 1. Remove the two screws in the direction of the arrow 2 with a screwdriver (optional). Remove the eyecup in the direction of the arrow 3. 2 3 1 2 176 (2) Remove dust from inside the eyecup and viewfinder with a commercially available blower. (3) In the reverse way of (1), attach the eyecup. Then replace the screws in the direction of the arrow 2. Notes •Do not drop or bend the eyecup shaft. •Be careful when handling the eyecup.
-
 1
1 -
2
-
3
-
4
-
5
-
6
-
7
-
8
-
9
-
10
-
11
-
12
-
13
-
14
-
15
-
16
-
17
-
18
-
19
-
20
-
21
-
22
-
23
-
24
-
25
-
26
-
27
-
28
-
29
-
30
-
31
-
32
-
33
-
34
-
35
-
36
-
37
-
38
-
39
-
40
-
41
-
42
-
43
-
44
-
45
-
46
-
47
-
48
-
49
-
50
-
51
-
52
-
53
-
54
-
55
-
56
-
57
-
58
-
59
-
60
-
61
-
62
-
63
-
64
-
65
-
66
-
67
-
68
-
69
-
70
-
71
-
72
-
73
-
74
-
75
-
76
-
77
-
78
-
79
-
80
-
81
-
82
-
83
-
84
-
85
-
86
-
87
-
88
-
89
-
90
-
91
-
92
-
93
-
94
-
95
-
96
-
97
-
98
-
99
-
100
-
101
-
102
-
103
-
104
-
105
-
106
-
107
-
108
-
109
-
110
-
111
-
112
-
113
-
114
-
115
-
116
-
117
-
118
-
119
-
120
-
121
-
122
-
123
-
124
-
125
-
126
-
127
-
128
-
129
-
130
-
131
-
132
-
133
-
134
-
135
-
136
-
137
-
138
-
139
-
140
-
141
-
142
-
143
-
144
-
145
-
146
-
147
-
148
-
149
-
150
-
151
-
152
-
153
-
154
-
155
-
156
-
157
-
158
-
159
-
160
-
161
-
162
-
163
-
164
-
165
-
166
-
167
-
168
-
169
-
170
-
 171
171 -
 172
172 -
 173
173 -
 174
174 -
 175
175 -
 176
176 -
 177
177 -
 178
178 -
 179
179 -
 180
180 -
 181
181 -
182
-
183
-
184
-
185
-
186
-
187
-
188
-
189
-
190
-
191
-
192
 |
 |