Sony DCR-PC9 Operating Instructions - Page 62
Frame by frame recording - Cut recording
 |
View all Sony DCR-PC9 manuals
Add to My Manuals
Save this manual to your list of manuals |
Page 62 highlights
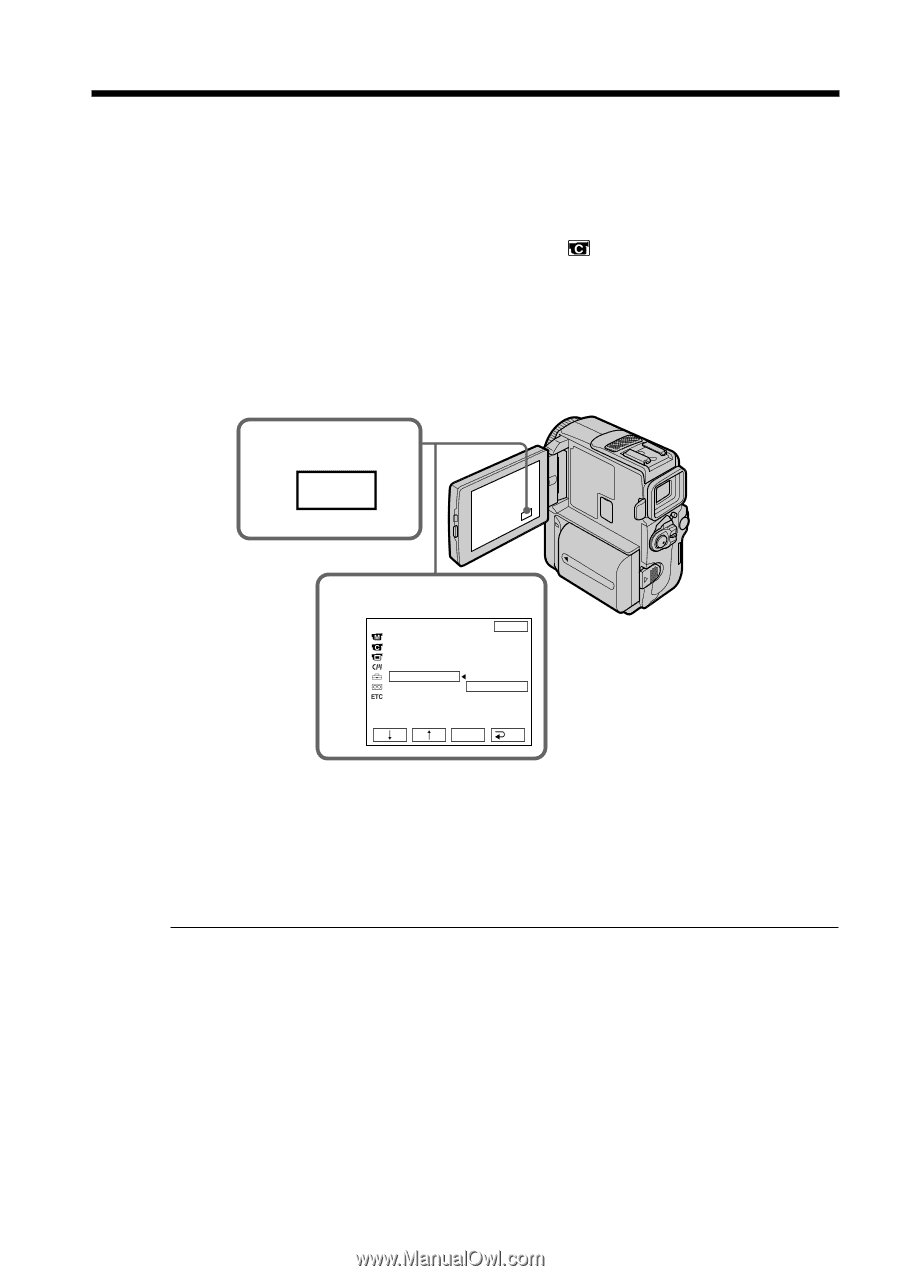
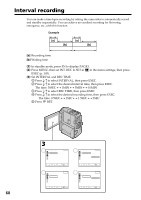
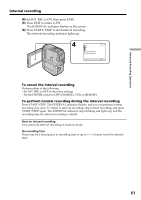
Frame by frame recording - Cut recording You can make a recording with a stop-motion animated effect using cut recording. To create this effect, alternately move the subject a little and make a cut recording. We recommend that you use a tripod, and operate the camcorder using the Remote Commander after step 4. (1) In standby mode, press FN to display PAGE1. (2) Press MENU, then set FRAME REC to ON in in the menu setting (p. 105). (3) Press EXIT to return to FN. The FRAME REC indicator lights up. (4) Press START/STOP to start cut recording. The camcorder makes a recording for about six frames, and returns to recording standby. (5) Move the subject, and repeat step 4. 1 FN 2 CAMERA SET STBY EXIT D ZOOM 16 : 9WIDE STEADYSHOT N. S. LIGHT FRAME REC OFF INT. REC ON EDITSEARCH EXEC RET. To cancel the cut recording Perform either of the following: - Set FRAME REC to OFF in the menu settings. - Set the POWER switch to other than CAMERA mode. Note The proper remaining tape time is not indicated if you use this function continuously. When using the cut recording function The last recorded cut is longer than other cuts. 62
-
 1
1 -
2
-
3
-
4
-
5
-
6
-
7
-
8
-
9
-
10
-
11
-
12
-
13
-
14
-
15
-
16
-
17
-
18
-
19
-
20
-
21
-
22
-
23
-
24
-
25
-
26
-
27
-
28
-
29
-
30
-
31
-
32
-
33
-
34
-
35
-
36
-
37
-
38
-
39
-
40
-
41
-
42
-
43
-
44
-
45
-
46
-
47
-
48
-
49
-
50
-
51
-
52
-
53
-
54
-
55
-
56
-
 57
57 -
 58
58 -
 59
59 -
 60
60 -
 61
61 -
 62
62 -
 63
63 -
 64
64 -
 65
65 -
 66
66 -
 67
67 -
68
-
69
-
70
-
71
-
72
-
73
-
74
-
75
-
76
-
77
-
78
-
79
-
80
-
81
-
82
-
83
-
84
-
85
-
86
-
87
-
88
-
89
-
90
-
91
-
92
-
93
-
94
-
95
-
96
-
97
-
98
-
99
-
100
-
101
-
102
-
103
-
104
-
105
-
106
-
107
-
108
-
109
-
110
-
111
-
112
-
113
-
114
-
115
-
116
-
117
-
118
-
119
-
120
-
121
-
122
-
123
-
124
-
125
-
126
-
127
-
128
-
129
-
130
-
131
-
132
-
133
-
134
-
135
-
136
-
137
-
138
-
139
-
140
-
141
-
142
-
143
-
144
-
145
-
146
-
147
-
148
-
149
-
150
-
151
-
152
-
153
-
154
-
155
-
156
-
157
-
158
-
159
-
160
-
161
-
162
-
163
-
164
-
165
-
166
-
167
-
168
-
169
-
170
-
171
-
172
-
173
-
174
-
175
-
176
-
177
-
178
-
179
-
180
-
181
-
182
-
183
-
184
-
185
-
186
-
187
-
188
-
189
-
190
-
191
-
192
 |
 |