Yamaha RX-V3900BL Owner's Manual - Page 123
Controlling Zone 2 or Zone 3, Using TRIGGER OUT jacks for Zone 2 and Zone 3, Basic operation
 |
UPC - 705105565903
View all Yamaha RX-V3900BL manuals
Add to My Manuals
Save this manual to your list of manuals |
Page 123 highlights
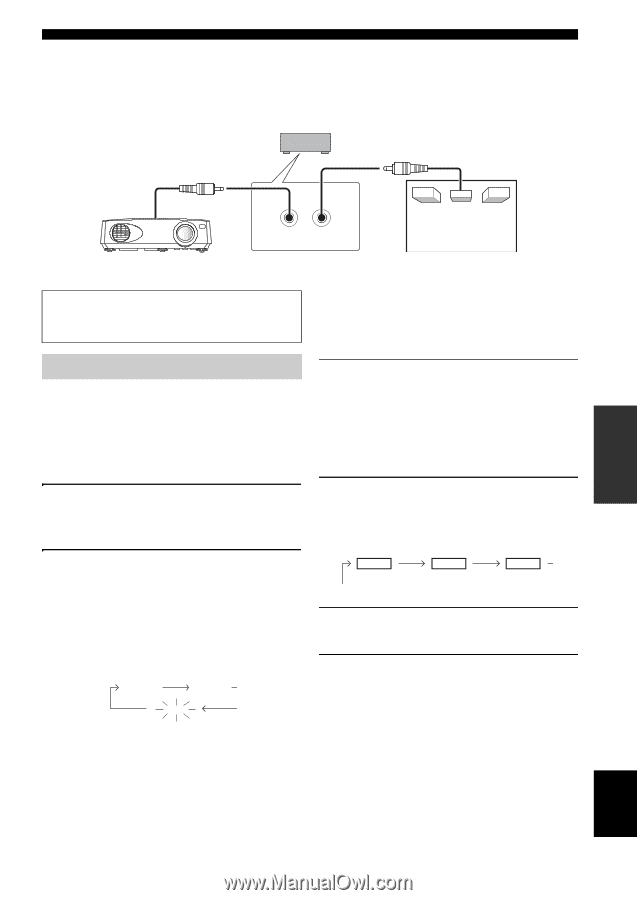
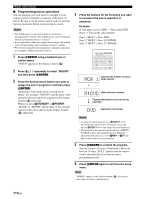
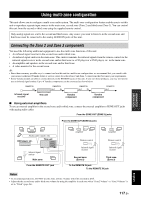
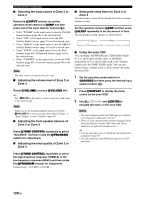
Using multi-zone configuration ■ Using TRIGGER OUT jacks for Zone 2 and Zone 3 This unit is equipped with two TRIGGER OUT jacks. You can turn on and off the component corresponding to the selection of the input source of the desired zone or turning on and off the desired zone by configuring the "Trigger Output" settings (page 100). This unit ADVANCED OPERATION Trigger in Trigger in 1 2 TRIGGER OUT Power amplifier (etc.) Zone 2 (etc.) Projector (etc.) in the main zone After the connections, turn on this unit and set the speaker terminal assignments with "Zone SP Assign" (page 96). Controlling Zone 2 or Zone 3 You can select the zone you want to control by using the control buttons on the front panel or on the remote control. ■ Basic operation Front panel operations 1 Press OZONE 2 or OZONE 3 on the front panel to individually turn on or off Zone 2 or Zone 3. y You must complete this step within 10 seconds while the selected zone flashes in the front panel display. Otherwise, the currently selected zone mode is automatically canceled. 3 Perform the desired operation in the selected zone (page 120). y To turn off the desired zone, press OZONE 2 or OZONE 3 again. Remote control operations 1 Press HZONE repeatedly to select the zone you want to control. "MAIN", "ZONE 2", or "ZONE 3" indicator appears in the display window (4) on the remote control. 2 Press OZONE CONTROLS on the front panel repeatedly to select the zone you want to control. Each time you press OZONE CONTROLS, the front panel display changes as shown below, and the indicator for the currently selected zone flashes for approximately 10 seconds. However, no indicator flashes when the main zone is selected. ZONE2 ZONE3 No indicator flashes when the main zone is selected. ZONE 2 (Zone 2) ZONE 3 (Zone 3) MAIN (Main zone) 2 Press EPOWER to turn on the selected zone. 3 Perform the desired operation in the selected zone (page 120). y To turn off the desired zone, press DSTANDBY. ZONE2 Controls the Zone 2 amplifier or tuner functions. ZONE3 Controls the Zone 3 amplifier or tuner functions. English 119 En
-
 1
1 -
2
-
3
-
4
-
5
-
6
-
7
-
8
-
9
-
10
-
11
-
12
-
13
-
14
-
15
-
16
-
17
-
18
-
19
-
20
-
21
-
22
-
23
-
24
-
25
-
26
-
27
-
28
-
29
-
30
-
31
-
32
-
33
-
34
-
35
-
36
-
37
-
38
-
39
-
40
-
41
-
42
-
43
-
44
-
45
-
46
-
47
-
48
-
49
-
50
-
51
-
52
-
53
-
54
-
55
-
56
-
57
-
58
-
59
-
60
-
61
-
62
-
63
-
64
-
65
-
66
-
67
-
68
-
69
-
70
-
71
-
72
-
73
-
74
-
75
-
76
-
77
-
78
-
79
-
80
-
81
-
82
-
83
-
84
-
85
-
86
-
87
-
88
-
89
-
90
-
91
-
92
-
93
-
94
-
95
-
96
-
97
-
98
-
99
-
100
-
101
-
102
-
103
-
104
-
105
-
106
-
107
-
108
-
109
-
110
-
111
-
112
-
113
-
114
-
115
-
116
-
117
-
 118
118 -
 119
119 -
 120
120 -
 121
121 -
 122
122 -
 123
123 -
 124
124 -
 125
125 -
 126
126 -
 127
127 -
 128
128 -
129
-
130
-
131
-
132
-
133
-
134
-
135
-
136
-
137
-
138
-
139
-
140
-
141
-
142
-
143
-
144
-
145
-
146
-
147
-
148
-
149
-
150
-
151
-
152
-
153
-
154
-
155
-
156
-
157
-
158
-
159
-
160
-
161
-
162
-
163
-
164
-
165
-
166
-
167
-
168
-
169
 |
 |