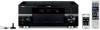
Yamaha RX-V3900BL Owner's Manual - Page 99
Setup Network, Audio Output HDMI audio output, Control Monitor Control monitor
 |
UPC - 705105565903
View all Yamaha RX-V3900BL manuals
Add to My Manuals
Save this manual to your list of manuals |
Page 99 highlights
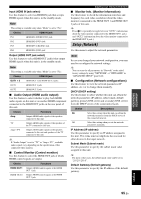
Input (HDMI IN jack select) Use this feature to select an HDMI IN jack that accepts HDMI signals when this unit is in the standby mode. Note This setting is available only when "Mode" is set to "Fix". Choice HDMI IN jack IN1 HDMI IN1 (BD/HD DVD) jack IN2 HDMI IN2 (DVD) jack IN3 HDMI IN3 (CBL/SAT) jack IN4 HDMI IN4 (DVR) jack Output (HDMI OUT jack select) Use this feature to select HDMI OUT jack(s) that output HDMI signals when this unit is in the standby mode. Note This setting is available only when "Mode" is set to "Fix". Choice OUT1 + 2 OUT1 OUT2 HDMI IN jack HDMI OUT 1 and HDMI OUT 2 jacks HDMI OUT 1 jack HDMI OUT 2 jack ■ Audio Output (HDMI audio output) Use this feature to select whether to play back HDMI audio signals on this unit or on another HDMI component connected to the HDMI OUT jacks on the rear panel of this unit. Choice Functions Amp Outputs HDMI audio signals at the speakers connected to this unit. TV Outputs HDMI audio signals at the speakers of the TV connected to this unit. Amp + TV Outputs HDMI audio signals at the speakers connected to this unit and speakers of the TV connected to this unit. y If "Audio Output" is set to "TV" or "Amp + TV", available audio signals vary depending on the specification of the connected video monitor. ■ Control Monitor (Control monitor) Use this feature to select the HDMI OUT jack at which HDMI control signals are output. Choice HDMI OUT1 HDMI OUT2 Functions Outputs HDMI control signals at the HDMI OUT 1 jack. Outputs HDMI control signals at the HDMI OUT 2 jack. Graphical user interface (GUI) menu ■ Monitor Info. (Monitor information) Use this feature to check the information (interface and frequency for each video resolution) about the video monitors connected to the HDMI OUT 1 and HDMI OUT 2 jacks of this unit. y Press 9h repeatedly to toggle between "OUT1" (information about the video monitor connected to the HDMI OUT 1 jack ) and "OUT2" (information about the video monitor connected to the HDMI OUT 2 jack ). Setup (Network) Use this menu to adjust the network parameters. Note In case you changed your network configuration, you may need to reconfigure the network settings. y You can reset the all parameters in "Network" to the initial factory settings by using "NETWORK" of "INITIALIZE" in "ADVANCED SETUP" (page 122). ■ Configuration (Network configurations) Use this feature to view the network parameters (IP address, etc.) or to change them manually. DHCP (DHCP setting) Use this feature to select whether this unit can obtain the network parameters (IP address, subnet mask, default gateway, primary DNS server and secondary DNS server) from the DHCP server of the connected network. Choice Descriptions On Select this setting when this unit can obtain the network parameters from the DHCP server of the connected network. Off Select this setting when you set the network parameters manually. IP Address (IP address) Use this parameter to specify an IP address assigned to this unit. This value must not duplicate the one used for other devices in the target network. Subnet Mask (Subnet mask) Use this parameter to specify the subnet mask value assigned to this unit. y For most of the cases, the subnet mask value can be set as "255.255.255.0". Default Gateway (Default gateway) Use this parameter to specify the IP address of the default gateway. ADVANCED OPERATION English 95 En
-
 1
1 -
2
-
3
-
4
-
5
-
6
-
7
-
8
-
9
-
10
-
11
-
12
-
13
-
14
-
15
-
16
-
17
-
18
-
19
-
20
-
21
-
22
-
23
-
24
-
25
-
26
-
27
-
28
-
29
-
30
-
31
-
32
-
33
-
34
-
35
-
36
-
37
-
38
-
39
-
40
-
41
-
42
-
43
-
44
-
45
-
46
-
47
-
48
-
49
-
50
-
51
-
52
-
53
-
54
-
55
-
56
-
57
-
58
-
59
-
60
-
61
-
62
-
63
-
64
-
65
-
66
-
67
-
68
-
69
-
70
-
71
-
72
-
73
-
74
-
75
-
76
-
77
-
78
-
79
-
80
-
81
-
82
-
83
-
84
-
85
-
86
-
87
-
88
-
89
-
90
-
91
-
92
-
93
-
 94
94 -
 95
95 -
 96
96 -
 97
97 -
 98
98 -
 99
99 -
 100
100 -
 101
101 -
 102
102 -
 103
103 -
 104
104 -
105
-
106
-
107
-
108
-
109
-
110
-
111
-
112
-
113
-
114
-
115
-
116
-
117
-
118
-
119
-
120
-
121
-
122
-
123
-
124
-
125
-
126
-
127
-
128
-
129
-
130
-
131
-
132
-
133
-
134
-
135
-
136
-
137
-
138
-
139
-
140
-
141
-
142
-
143
-
144
-
145
-
146
-
147
-
148
-
149
-
150
-
151
-
152
-
153
-
154
-
155
-
156
-
157
-
158
-
159
-
160
-
161
-
162
-
163
-
164
-
165
-
166
-
167
-
168
-
169
 |
 |