Yamaha RX-V3900BL Owner's Manual - Page 51
Using audio features, Enjoying pure hi-fi sound, Adjusting the tonal quality
 |
UPC - 705105565903
View all Yamaha RX-V3900BL manuals
Add to My Manuals
Save this manual to your list of manuals |
Page 51 highlights
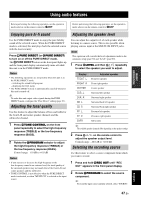
Using audio features BASIC OPERATION Before performing the following operation, set the operation mode selector on the remote control to FAMP. Before performing the following operation, set the operation mode selector on the remote control to FAMP. Enjoying pure hi-fi sound Use the PURE DIRECT mode to enjoy the pure fidelity sound of the selected source. When the PURE DIRECT mode is activated, this unit plays back the selected source with the least circuitry. Press LPURE DIRECT (or NPURE DIRECT) to turn on or off the PURE DIRECT mode. The LPURE DIRECT button on the front panel lights up and the front panel display automatically turns off while this unit is in the PURE DIRECT mode. Notes • The following operations are not possible when this unit is in the PURE DIRECT mode: - switching the sound field program - displaying the GUI menu • The PURE DIRECT mode is automatically canceled whenever this unit is turned off. y To make this unit output video signals during the PURE DIRECT mode, configure the "Pure Direct" setting (page 93). Adjusting the tonal quality Use this feature to adjust the balance of bass and treble for the front L/R and center speaker channels and the subwoofer channel. 1 Press DTONE CONTROL on the front panel repeatedly to select the high-frequency response (TREBLE) or the low-frequency response (BASS). 2 Rotate the MPROGRAM selector to adjust the high-frequency response (TREBLE) or the low-frequency response (BASS). Control range: -6.0 dB to +6.0 dB Notes • If you increase or decrease the high-frequency or the low-frequency sound to an extreme level, the tonal quality of the surround speakers may not match that of the front L/R and center speakers and the subwoofer. • TONE CONTROL is not effective when the PURE DIRECT mode is activated, or when "MULTI CH" is selected as the input source. Adjusting the speaker level You can adjust the output level of each speaker while listening to a music source. This is also possible when playing sources input at the MULTI CH INPUT jacks. Note This operation will override the level adjustments made in the automatic setup (page 30) and "Level" (page 89). 1 Press CLEVEL and then 9k / n repeatedly to select the speaker you want to adjust. Display Adjusted speaker FRONT L Front left speaker FRONT R Front right speaker CENTER Center speaker SUR.L Surround left speaker SUR.R Surround right speaker SB L Surround back left speaker SB R Surround back right speaker FP L Presence left speaker FP R Presence right speaker SWFR Subwoofer y The available speaker channels differ depending on the speaker settings. 2 Press 9l / h on the remote control to adjust the speaker output level. Control range: -10.0 dB to +10.0 dB Selecting the recording source Use this feature to select a source component from which you want to record. 1 Press and hold DREC OUT until "REC OUT" appears in the front panel display. 2 Rotate MPROGRAM to select the source component. y To record the input source currently selected, select "SOURCE". English 47 En
-
 1
1 -
2
-
3
-
4
-
5
-
6
-
7
-
8
-
9
-
10
-
11
-
12
-
13
-
14
-
15
-
16
-
17
-
18
-
19
-
20
-
21
-
22
-
23
-
24
-
25
-
26
-
27
-
28
-
29
-
30
-
31
-
32
-
33
-
34
-
35
-
36
-
37
-
38
-
39
-
40
-
41
-
42
-
43
-
44
-
45
-
 46
46 -
 47
47 -
 48
48 -
 49
49 -
 50
50 -
 51
51 -
 52
52 -
 53
53 -
 54
54 -
 55
55 -
 56
56 -
57
-
58
-
59
-
60
-
61
-
62
-
63
-
64
-
65
-
66
-
67
-
68
-
69
-
70
-
71
-
72
-
73
-
74
-
75
-
76
-
77
-
78
-
79
-
80
-
81
-
82
-
83
-
84
-
85
-
86
-
87
-
88
-
89
-
90
-
91
-
92
-
93
-
94
-
95
-
96
-
97
-
98
-
99
-
100
-
101
-
102
-
103
-
104
-
105
-
106
-
107
-
108
-
109
-
110
-
111
-
112
-
113
-
114
-
115
-
116
-
117
-
118
-
119
-
120
-
121
-
122
-
123
-
124
-
125
-
126
-
127
-
128
-
129
-
130
-
131
-
132
-
133
-
134
-
135
-
136
-
137
-
138
-
139
-
140
-
141
-
142
-
143
-
144
-
145
-
146
-
147
-
148
-
149
-
150
-
151
-
152
-
153
-
154
-
155
-
156
-
157
-
158
-
159
-
160
-
161
-
162
-
163
-
164
-
165
-
166
-
167
-
168
-
169
 |
 |