Yamaha RX-V3900BL Owner's Manual - Page 124
Zone 2 or Zone 3, Adjusting the front speaker balance
 |
UPC - 705105565903
View all Yamaha RX-V3900BL manuals
Add to My Manuals
Save this manual to your list of manuals |
Page 124 highlights
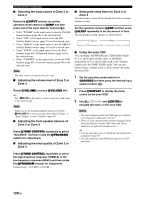
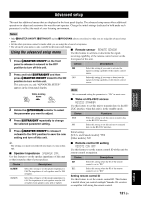
Using multi-zone configuration ■ Selecting the input source of Zone 2 or Zone 3 Rotate the CINPUT selector (or set the operation mode selector to FAMP and then press one of the input selector buttons (3)). • Select "TUNER" as the input source to use the FM/AM tuning features (page 48) in the selected zone. • Select "XM" as the input source to use the XM Satellite Radio features (page 53) in the selected zone. • Select "SIRIUS" as the input source to use the SIRIUS Satellite Radio features (page 58) in the selected zone. • Select "DOCK" as the input source to use the iPod features (page 66) or Bluetooth features (page 64) in the selected zone. • Select "USB/NET" as the input source to use the USB features (page 69) or network features (page 69) in the selected zone. Note The input sources are shared across all zones. ■ Adjusting the volume level of Zone 2 or Zone 3 ■ Setting the sleep timer for Zone 2 or Zone 3 Use this feature to turn of the desired zone after a certain amount of time. Set the operation mode to FAMP and then press CSLEEP repeatedly to set the amount of time. The sleep timer setting changes as shown below. 120min. 90min. OFF 30min. 60min. ■ Using the zone OSD You can display the FM/AM radio, XM Satellite Radio (U.S.A. and Canada models only), or HD Radio information (U.S.A. model only) in the video monitor connected to the ZONE VIDEO jacks. You can also browse music contents (such as iPod contents) by using the zone OSD. 1 Set the operation mode selector to FSOURCE and then press the desired input selector button (3). Rotate PVOLUME (or press JVOLUME +/-) . y Press LMUTE on the remote control to mute the sound output to the selected zone. Note When you use the external amplifiers in Zone 2 or Zone 3, JVOLUME +/- can be used only when "Zone2 Volume" or "Zone3 Volume" is set to "Variable" (page 96). ■ Adjusting the front speaker balance of Zone 2 or Zone 3 Press DTONE CONTROL repeatedly to select "BALANCE" and then rotate the MPROGRAM selector for adjustment. ■ Adjusting the tonal quality of Zone 2 or Zone 3 2 Press KDISPLAY to display the menu screen on the zone OSD. 3 Use 9k / n / l / h and 9ENTER to navigate the menu on the zone OSD. Notes • The menu displayed in the zone OSD appears in English even if Japanese or Russian is selected. • There are some characters that cannot be displayed in the front panel display or in the OSD of this unit. Those characters are replaced with underscores "_". y • You can select the zone(s) of which the operational status is displayed (page 97). • You can operate the zone OSD in the same way as GUI operations. Press DTONE CONTROL repeatedly to select the high-frequency response (TREBLE) or the low-frequency response (BASS) and then rotate the MPROGRAM selector for adjustment. Control range: -10.0 dB to +10.0 dB 120 En
-
 1
1 -
2
-
3
-
4
-
5
-
6
-
7
-
8
-
9
-
10
-
11
-
12
-
13
-
14
-
15
-
16
-
17
-
18
-
19
-
20
-
21
-
22
-
23
-
24
-
25
-
26
-
27
-
28
-
29
-
30
-
31
-
32
-
33
-
34
-
35
-
36
-
37
-
38
-
39
-
40
-
41
-
42
-
43
-
44
-
45
-
46
-
47
-
48
-
49
-
50
-
51
-
52
-
53
-
54
-
55
-
56
-
57
-
58
-
59
-
60
-
61
-
62
-
63
-
64
-
65
-
66
-
67
-
68
-
69
-
70
-
71
-
72
-
73
-
74
-
75
-
76
-
77
-
78
-
79
-
80
-
81
-
82
-
83
-
84
-
85
-
86
-
87
-
88
-
89
-
90
-
91
-
92
-
93
-
94
-
95
-
96
-
97
-
98
-
99
-
100
-
101
-
102
-
103
-
104
-
105
-
106
-
107
-
108
-
109
-
110
-
111
-
112
-
113
-
114
-
115
-
116
-
117
-
118
-
 119
119 -
 120
120 -
 121
121 -
 122
122 -
 123
123 -
 124
124 -
 125
125 -
 126
126 -
 127
127 -
 128
128 -
 129
129 -
130
-
131
-
132
-
133
-
134
-
135
-
136
-
137
-
138
-
139
-
140
-
141
-
142
-
143
-
144
-
145
-
146
-
147
-
148
-
149
-
150
-
151
-
152
-
153
-
154
-
155
-
156
-
157
-
158
-
159
-
160
-
161
-
162
-
163
-
164
-
165
-
166
-
167
-
168
-
169
 |
 |