Yamaha RX-V3900BL Owner's Manual - Page 96
Tone Control Tone control, Lipsync, Audio and video synchronization, Auto Bypass Auto bypass
 |
UPC - 705105565903
View all Yamaha RX-V3900BL manuals
Add to My Manuals
Save this manual to your list of manuals |
Page 96 highlights
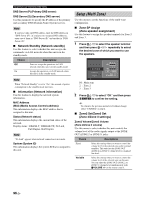
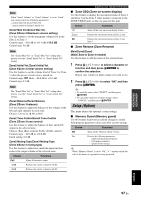
Graphical user interface (GUI) menu 5 Repeat steps 3 and 4 until you are satisfied with the results. y If you want to reset all "Parametric EQ" parameter settings for the selected speaker, select "RESET" and press 9 ENTER. 6 Select "EXIT" and press 9ENTER to exit from the settings window. ■ Tone Control (Tone control) Use this feature to adjust the balance of bass and treble output to your speakers or headphones. Note Tone Control is not effective when: - the PURE DIRECT mode (page 47) is selected. - MULTI CH is selected as the input source. Control (Control mode) Choice Functions Speaker Adjust the bass/treble balance of your speakers. Headphone Adjust the bass/treble balance of your headphones. y "Speaker" and "Headphone" adjustments are stored independently. The adjustments for "Speaker" affects the front left/right, center, presence left/right speaker channels and Subwoofer channel. Bass (Bass control) Use this feature to adjust low-frequencies output to your speakers or headphones. Choices: 125 Hz, 350 Hz, 500 Hz Control range: -6.0 dB to +6.0 dB Initial setting: 0.0 dB Treble (Treble control) Use this feature to adjust high-frequencies output to your speakers or headphones. Choices: 2.5 kHz, 3.5 kHz, 8.0 kHz Control range: -6.0 dB to +6.0 dB Initial setting: 0.0 dB Auto Bypass (Auto bypass) Use this feature to select whether the audio output bypasses the tone control circuitry when "Treble" and "Bass" are set to 0 dB. Choice Auto Off Functions Automatically bypasses the tone control circuitry to provide the purest signal possible when "Treble" and "Bass" are set to 0 dB. Does not bypass the tone control circuitry. ■ Lipsync (Audio and video synchronization) Mode (HDMI automatic lip sync mode) If the video monitor is connected to the HDMI OUT jack of this unit and compatible with the automatic audio and video synchronization function (automatic lip sync), this unit adjusts the audio and video synchronization automatically. Use this feature to activate or deactivate the automatic lip sync. Choice Descriptions Auto Select this setting if the connected video monitor is compatible with the automatic lip sync. Use "Auto" to fine adjust the audio and video synchronization. Manual Select this setting if the video monitor is not compatible with the automatic lip sync or you do not want to use the automatic lip sync. Use "Manual" to adjust the audio and video synchronization. Note When "HDMI OUT SEL" is set to "OUT 1+2" and video monitors are connected to both the HDMI OUT 1 and HDMI OUT 2 jacks, the automatic lip sync function does not work even if "Auto" is selected. Auto (Automatic audio delay adjustment) Use this feature to make fine adjustments of the audio and video synchronization when you set "Mode" to "Auto". Control range: 0 to 240 ms Control step: 1 ms y "Offset" indicates the difference between the value of the audio delay that this unit sets automatically and the value of the audio delay that you set in "Mode". This unit stores the value of "Offset" and applies the value to other automatic lip sync compatible video monitors. Manual (Manual audio delay adjustment) Use this feature to adjust the delay of the sound output manually to synchronize audio with video images when you set "Mode" to "Manual". Control range: 0 to 240 ms Control step: 1 ms 92 En
-
 1
1 -
2
-
3
-
4
-
5
-
6
-
7
-
8
-
9
-
10
-
11
-
12
-
13
-
14
-
15
-
16
-
17
-
18
-
19
-
20
-
21
-
22
-
23
-
24
-
25
-
26
-
27
-
28
-
29
-
30
-
31
-
32
-
33
-
34
-
35
-
36
-
37
-
38
-
39
-
40
-
41
-
42
-
43
-
44
-
45
-
46
-
47
-
48
-
49
-
50
-
51
-
52
-
53
-
54
-
55
-
56
-
57
-
58
-
59
-
60
-
61
-
62
-
63
-
64
-
65
-
66
-
67
-
68
-
69
-
70
-
71
-
72
-
73
-
74
-
75
-
76
-
77
-
78
-
79
-
80
-
81
-
82
-
83
-
84
-
85
-
86
-
87
-
88
-
89
-
90
-
 91
91 -
 92
92 -
 93
93 -
 94
94 -
 95
95 -
 96
96 -
 97
97 -
 98
98 -
 99
99 -
 100
100 -
 101
101 -
102
-
103
-
104
-
105
-
106
-
107
-
108
-
109
-
110
-
111
-
112
-
113
-
114
-
115
-
116
-
117
-
118
-
119
-
120
-
121
-
122
-
123
-
124
-
125
-
126
-
127
-
128
-
129
-
130
-
131
-
132
-
133
-
134
-
135
-
136
-
137
-
138
-
139
-
140
-
141
-
142
-
143
-
144
-
145
-
146
-
147
-
148
-
149
-
150
-
151
-
152
-
153
-
154
-
155
-
156
-
157
-
158
-
159
-
160
-
161
-
162
-
163
-
164
-
165
-
166
-
167
-
168
-
169
 |
 |
