Brother International HL-2600CN Users Manual - English - Page 123
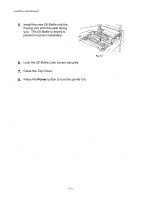
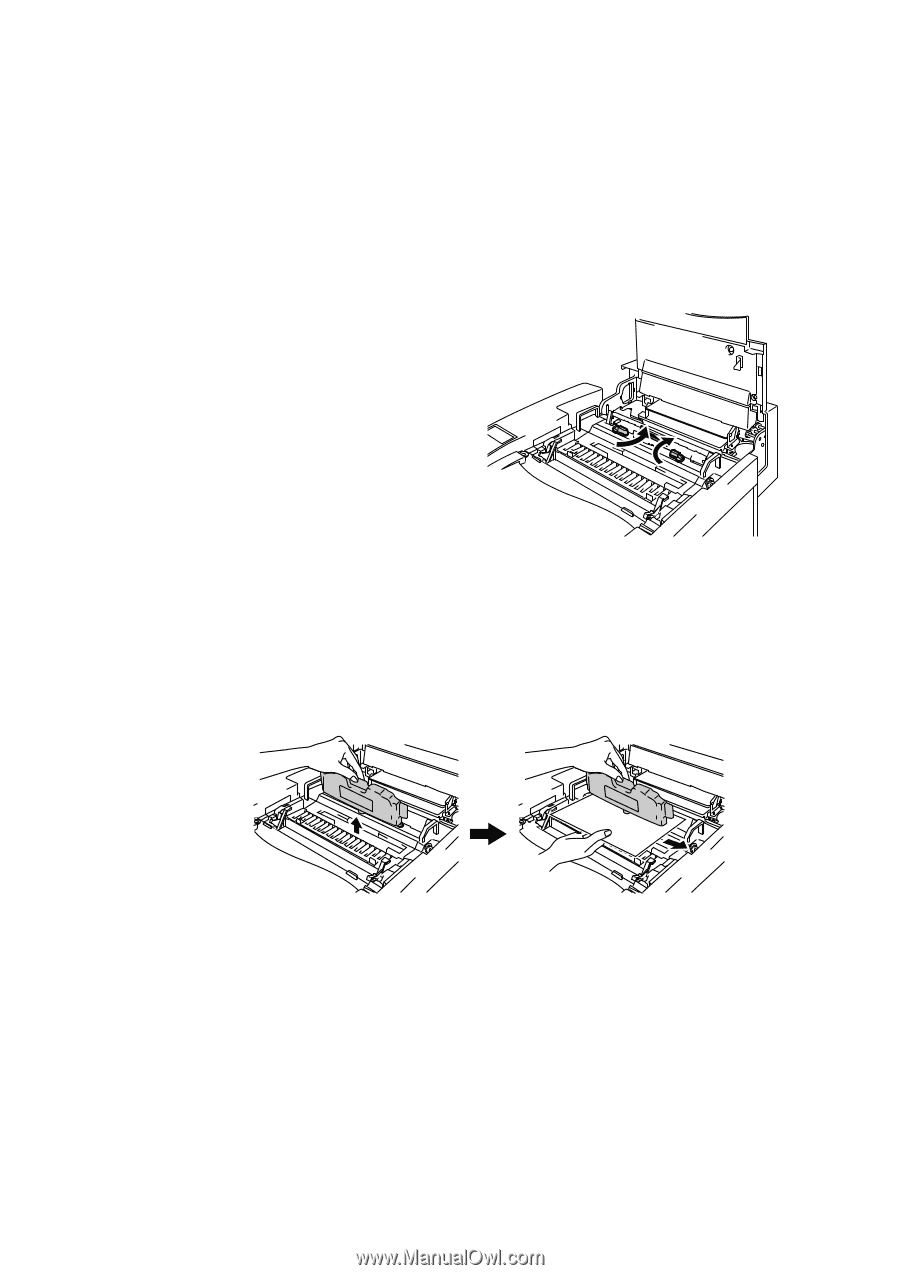
Replacing the Oil Bottle, Remove the empty Oil Bottle from the Fusing Unit.
 |
View all Brother International HL-2600CN manuals
Add to My Manuals
Save this manual to your list of manuals |
Page 123 highlights
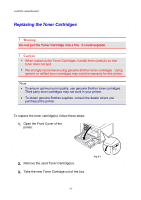
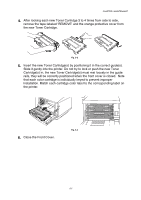
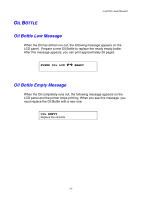
CHAPTER 5 MAINTENANCE Replacing the Oil Bottle 1. Press the Power button to turn off the printer, and then wait until it has cooled down sufficiently. 2. Open the Top Cover. 3. Release the Oil Bottle Lock Levers as shown: Fig. 5-5 4. Remove the empty Oil Bottle from the Fusing Unit. Hold a sheet of paper under the Oil Bottle and lift it out of the Fusing Unit. Move the bottle away from the printer to the right hand side. Be careful not to spill oil inside the printer. It could cause considerable damage to the printer. Fig. 5-6 5-11
-
 1
1 -
2
-
3
-
4
-
5
-
6
-
7
-
8
-
9
-
10
-
11
-
12
-
13
-
14
-
15
-
16
-
17
-
18
-
19
-
20
-
21
-
22
-
23
-
24
-
25
-
26
-
27
-
28
-
29
-
30
-
31
-
32
-
33
-
34
-
35
-
36
-
37
-
38
-
39
-
40
-
41
-
42
-
43
-
44
-
45
-
46
-
47
-
48
-
49
-
50
-
51
-
52
-
53
-
54
-
55
-
56
-
57
-
58
-
59
-
60
-
61
-
62
-
63
-
64
-
65
-
66
-
67
-
68
-
69
-
70
-
71
-
72
-
73
-
74
-
75
-
76
-
77
-
78
-
79
-
80
-
81
-
82
-
83
-
84
-
85
-
86
-
87
-
88
-
89
-
90
-
91
-
92
-
93
-
94
-
95
-
96
-
97
-
98
-
99
-
100
-
101
-
102
-
103
-
104
-
105
-
106
-
107
-
108
-
109
-
110
-
111
-
112
-
113
-
114
-
115
-
116
-
117
-
 118
118 -
 119
119 -
 120
120 -
 121
121 -
 122
122 -
 123
123 -
 124
124 -
 125
125 -
 126
126 -
 127
127 -
 128
128 -
129
-
130
-
131
-
132
-
133
-
134
-
135
-
136
-
137
-
138
-
139
-
140
-
141
-
142
-
143
-
144
-
145
-
146
-
147
-
148
-
149
-
150
-
151
-
152
-
153
-
154
-
155
-
156
-
157
-
158
-
159
-
160
-
161
-
162
-
163
-
164
-
165
-
166
-
167
-
168
-
169
-
170
-
171
-
172
-
173
-
174
-
175
-
176
-
177
-
178
-
179
-
180
-
181
-
182
-
183
-
184
-
185
-
186
-
187
-
188
-
189
-
190
-
191
-
192
-
193
-
194
-
195
-
196
-
197
-
198
-
199
-
200
-
201
-
202
-
203
-
204
-
205
-
206
-
207
-
208
-
209
-
210
-
211
-
212
-
213
-
214
-
215
-
216
-
217
-
218
-
219
-
220
-
221
-
222
-
223
-
224
-
225
 |
 |
CHAPTER 5 MAINTENANCE
5-11
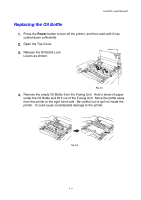
Replacing the Oil Bottle
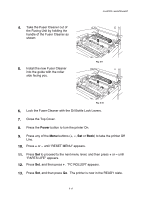
1.
Press the
Power
button to turn off the printer, and then wait until it has
cooled down sufficiently.
2.
Open the Top Cover.
3.
Release the Oil Bottle Lock
Levers as shown:
Fig. 5-5
4.
Remove the empty Oil Bottle from the Fusing Unit.
Hold a sheet of paper
under the Oil Bottle and lift it out of the Fusing Unit.
Move the bottle away
from the printer to the right hand side.
Be careful not to spill oil inside the
printer.
It could cause considerable damage to the printer.
Fig. 5-6