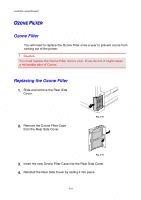
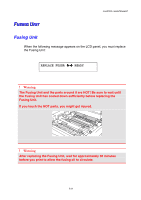
Brother International HL-2600CN Users Manual - English - Page 137
Remove the Oil Bottle and the Fuser Cleaner from the Fusing Unit.
 |
View all Brother International HL-2600CN manuals
Add to My Manuals
Save this manual to your list of manuals |
Page 137 highlights
CHAPTER 5 MAINTENANCE ! Caution When removing the Fusing Unit from the printer, be sure to keep the Fusing Unit flat, so oil will not spill. Considerable damage can occur if oil is spilled inside the printer. 5. Remove the Oil Bottle and the Fuser Cleaner from the Fusing Unit. 6. Install the new Fusing Unit into the printer. Be sure to insert the Fusing Unit completely into the printer. 7. Secure the Fusing Unit with the two long screws. Fig. 5-22 Fig. 5-23 8. Install the Fuser Cleaner and the Oil Bottle into the new Fusing Unit, and then lock the Oil Bottle Lock Levers. Be careful not to spill oil inside the printer. This could damage the printer. 9. Close the Top Cover. 10. Plug the printer into the AC outlet. 5-25
-
 1
1 -
2
-
3
-
4
-
5
-
6
-
7
-
8
-
9
-
10
-
11
-
12
-
13
-
14
-
15
-
16
-
17
-
18
-
19
-
20
-
21
-
22
-
23
-
24
-
25
-
26
-
27
-
28
-
29
-
30
-
31
-
32
-
33
-
34
-
35
-
36
-
37
-
38
-
39
-
40
-
41
-
42
-
43
-
44
-
45
-
46
-
47
-
48
-
49
-
50
-
51
-
52
-
53
-
54
-
55
-
56
-
57
-
58
-
59
-
60
-
61
-
62
-
63
-
64
-
65
-
66
-
67
-
68
-
69
-
70
-
71
-
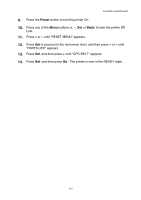
72
-
73
-
74
-
75
-
76
-
77
-
78
-
79
-
80
-
81
-
82
-
83
-
84
-
85
-
86
-
87
-
88
-
89
-
90
-
91
-
92
-
93
-
94
-
95
-
96
-
97
-
98
-
99
-
100
-
101
-
102
-
103
-
104
-
105
-
106
-
107
-
108
-
109
-
110
-
111
-
112
-
113
-
114
-
115
-
116
-
117
-
118
-
119
-
120
-
121
-
122
-
123
-
124
-
125
-
126
-
127
-
128
-
129
-
130
-
131
-
 132
132 -
 133
133 -
 134
134 -
 135
135 -
 136
136 -
 137
137 -
 138
138 -
 139
139 -
 140
140 -
 141
141 -
 142
142 -
143
-
144
-
145
-
146
-
147
-
148
-
149
-
150
-
151
-
152
-
153
-
154
-
155
-
156
-
157
-
158
-
159
-
160
-
161
-
162
-
163
-
164
-
165
-
166
-
167
-
168
-
169
-
170
-
171
-
172
-
173
-
174
-
175
-
176
-
177
-
178
-
179
-
180
-
181
-
182
-
183
-
184
-
185
-
186
-
187
-
188
-
189
-
190
-
191
-
192
-
193
-
194
-
195
-
196
-
197
-
198
-
199
-
200
-
201
-
202
-
203
-
204
-
205
-
206
-
207
-
208
-
209
-
210
-
211
-
212
-
213
-
214
-
215
-
216
-
217
-
218
-
219
-
220
-
221
-
222
-
223
-
224
-
225
 |
 |
CHAPTER 5 MAINTENANCE
5-25
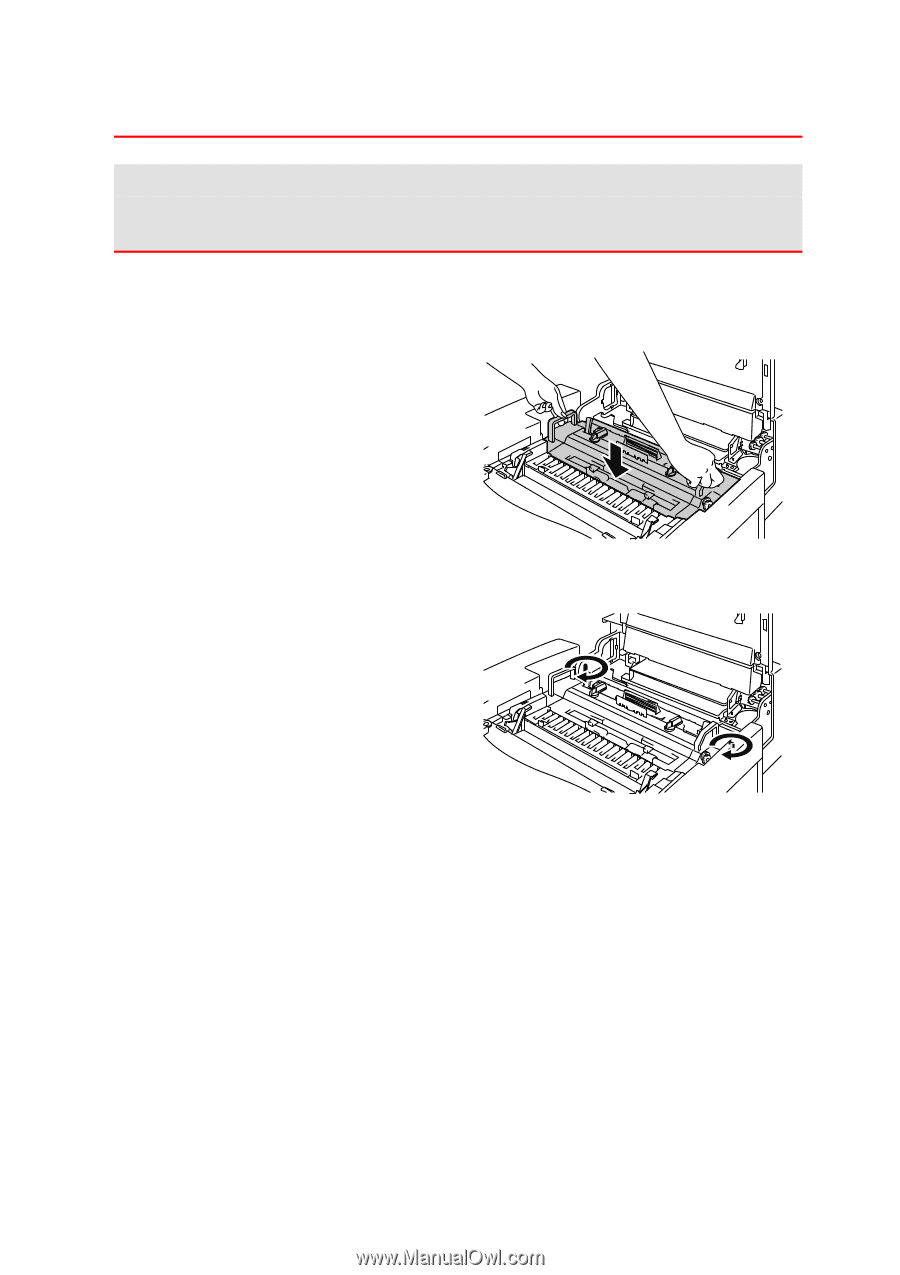
!
Caution
When removing the Fusing Unit from the printer, be sure to keep the Fusing
Unit flat, so oil will not spill. Considerable damage can occur if oil is spilled
inside the printer.
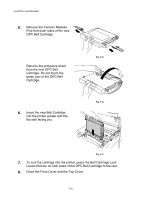
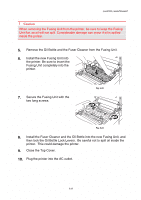
5.
Remove the Oil Bottle and the Fuser Cleaner from the Fusing Unit.
6.
Install the new Fusing Unit into
the printer. Be sure to insert the
Fusing Unit completely into the
printer.
Fig. 5-22
7.
Secure the Fusing Unit with the
two long screws.
Fig. 5-23
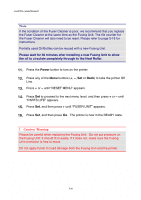
8.
Install the Fuser Cleaner and the Oil Bottle into the new Fusing Unit, and
then lock the Oil Bottle Lock Levers.
Be careful not to spill oil inside the
printer.
This could damage the printer.
9.
Close the Top Cover.
10.
Plug the printer into the AC outlet.