Brother International HL-2600CN Users Manual - English - Page 163
Remove the Rear Caps 2 pieces, the Lower Tray Unit.
 |
View all Brother International HL-2600CN manuals
Add to My Manuals
Save this manual to your list of manuals |
Page 163 highlights
CHAPTER 5 MAINTENANCE 1. Turn the printer off and unplug the power cord from the AC outlet. 2. Remove the Fuser Cover that is located at the rear top of the printer. Remove the Rear Caps (2 pieces) from the fuser unit. We recommend removing those caps with a coin or a screwdriver. 3. Remove the left handside cover of the Lower Tray Unit. Fig. 5-62 4. Remove the Back caps (2 pieces) of the Lower Tray Unit. Push down lightly on the caps and then slide them to the rear of the printer to remove them. Fig. 5-63 Fig. 5-64 5-51
-
 1
1 -
2
-
3
-
4
-
5
-
6
-
7
-
8
-
9
-
10
-
11
-
12
-
13
-
14
-
15
-
16
-
17
-
18
-
19
-
20
-
21
-
22
-
23
-
24
-
25
-
26
-
27
-
28
-
29
-
30
-
31
-
32
-
33
-
34
-
35
-
36
-
37
-
38
-
39
-
40
-
41
-
42
-
43
-
44
-
45
-
46
-
47
-
48
-
49
-
50
-
51
-
52
-
53
-
54
-
55
-
56
-
57
-
58
-
59
-
60
-
61
-
62
-
63
-
64
-
65
-
66
-
67
-
68
-
69
-
70
-
71
-
72
-
73
-
74
-
75
-
76
-
77
-
78
-
79
-
80
-
81
-
82
-
83
-
84
-
85
-
86
-
87
-
88
-
89
-
90
-
91
-
92
-
93
-
94
-
95
-
96
-
97
-
98
-
99
-
100
-
101
-
102
-
103
-
104
-
105
-
106
-
107
-
108
-
109
-
110
-
111
-
112
-
113
-
114
-
115
-
116
-
117
-
118
-
119
-
120
-
121
-
122
-
123
-
124
-
125
-
126
-
127
-
128
-
129
-
130
-
131
-
132
-
133
-
134
-
135
-
136
-
137
-
138
-
139
-
140
-
141
-
142
-
143
-
144
-
145
-
146
-
147
-
148
-
149
-
150
-
151
-
152
-
153
-
154
-
155
-
156
-
157
-
 158
158 -
 159
159 -
 160
160 -
 161
161 -
 162
162 -
 163
163 -
 164
164 -
 165
165 -
 166
166 -
 167
167 -
 168
168 -
169
-
170
-
171
-
172
-
173
-
174
-
175
-
176
-
177
-
178
-
179
-
180
-
181
-
182
-
183
-
184
-
185
-
186
-
187
-
188
-
189
-
190
-
191
-
192
-
193
-
194
-
195
-
196
-
197
-
198
-
199
-
200
-
201
-
202
-
203
-
204
-
205
-
206
-
207
-
208
-
209
-
210
-
211
-
212
-
213
-
214
-
215
-
216
-
217
-
218
-
219
-
220
-
221
-
222
-
223
-
224
-
225
 |
 |
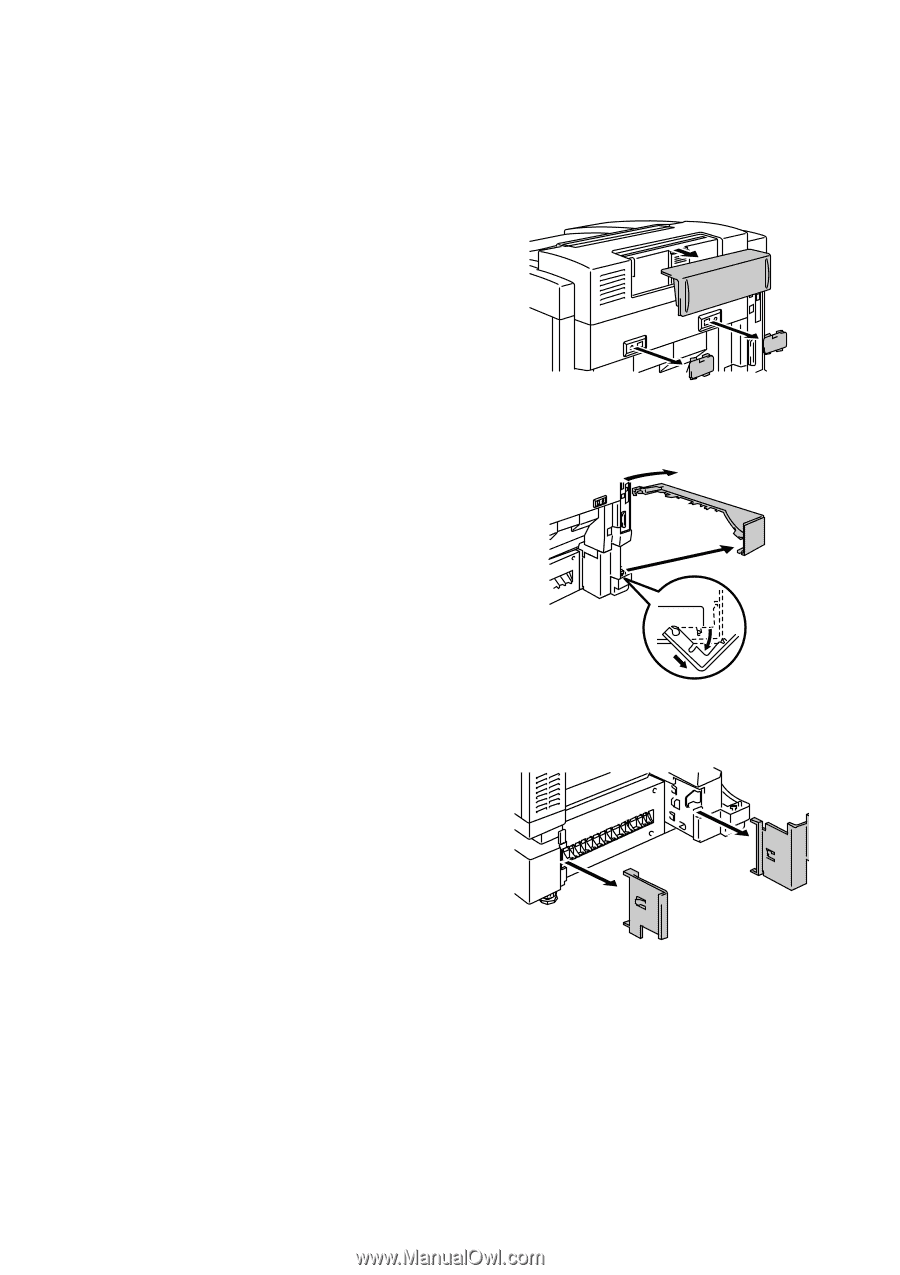
CHAPTER 5 MAINTENANCE
5-51
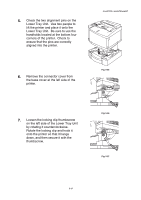
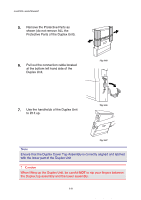
1.
Turn the printer off and unplug the power cord from the AC outlet.
2.
Remove the Fuser Cover that is
located at the rear top of the printer.
Remove the Rear Caps (2 pieces)
from the fuser unit.
We recommend
removing those caps with a coin or a
screwdriver.
Fig. 5-62
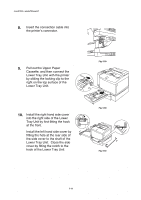
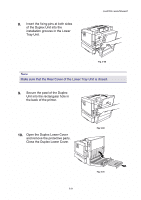
3.
Remove the left handside cover of
the Lower Tray Unit.
Fig. 5-63
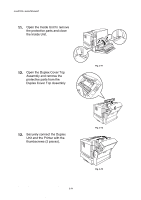
4.
Remove the Back caps (2 pieces) of
the Lower Tray Unit.
Push down
lightly on the caps and then slide
them to the rear of the printer to
remove them.
Fig. 5-64