Brother International HL-2600CN Users Manual - English - Page 158
Lower Tray Unit., Install the Paper Cassette into
 |
View all Brother International HL-2600CN manuals
Add to My Manuals
Save this manual to your list of manuals |
Page 158 highlights
CHAPTER 5 MAINTENANCE 1. Turn the printer off and unplug the power cord from the AC outlet. 2. Place the Lower Tray Unit on a flat table, and then remove the protective parts. 3. Pull out the Paper Cassette from the Lower Tray Unit, and then remove the tapes and the protective parts inside of the Cassette. Install the Paper Cassette into the Lower Tray Unit. 4. Pull out the connection cable located at the left rear side of the Lower Tray Unit. Fig. 5-52 Fig. 5-53 5-46 Fig. 5-54
-
 1
1 -
2
-
3
-
4
-
5
-
6
-
7
-
8
-
9
-
10
-
11
-
12
-
13
-
14
-
15
-
16
-
17
-
18
-
19
-
20
-
21
-
22
-
23
-
24
-
25
-
26
-
27
-
28
-
29
-
30
-
31
-
32
-
33
-
34
-
35
-
36
-
37
-
38
-
39
-
40
-
41
-
42
-
43
-
44
-
45
-
46
-
47
-
48
-
49
-
50
-
51
-
52
-
53
-
54
-
55
-
56
-
57
-
58
-
59
-
60
-
61
-
62
-
63
-
64
-
65
-
66
-
67
-
68
-
69
-
70
-
71
-
72
-
73
-
74
-
75
-
76
-
77
-
78
-
79
-
80
-
81
-
82
-
83
-
84
-
85
-
86
-
87
-
88
-
89
-
90
-
91
-
92
-
93
-
94
-
95
-
96
-
97
-
98
-
99
-
100
-
101
-
102
-
103
-
104
-
105
-
106
-
107
-
108
-
109
-
110
-
111
-
112
-
113
-
114
-
115
-
116
-
117
-
118
-
119
-
120
-
121
-
122
-
123
-
124
-
125
-
126
-
127
-
128
-
129
-
130
-
131
-
132
-
133
-
134
-
135
-
136
-
137
-
138
-
139
-
140
-
141
-
142
-
143
-
144
-
145
-
146
-
147
-
148
-
149
-
150
-
151
-
152
-
 153
153 -
 154
154 -
 155
155 -
 156
156 -
 157
157 -
 158
158 -
 159
159 -
 160
160 -
 161
161 -
 162
162 -
 163
163 -
164
-
165
-
166
-
167
-
168
-
169
-
170
-
171
-
172
-
173
-
174
-
175
-
176
-
177
-
178
-
179
-
180
-
181
-
182
-
183
-
184
-
185
-
186
-
187
-
188
-
189
-
190
-
191
-
192
-
193
-
194
-
195
-
196
-
197
-
198
-
199
-
200
-
201
-
202
-
203
-
204
-
205
-
206
-
207
-
208
-
209
-
210
-
211
-
212
-
213
-
214
-
215
-
216
-
217
-
218
-
219
-
220
-
221
-
222
-
223
-
224
-
225
 |
 |
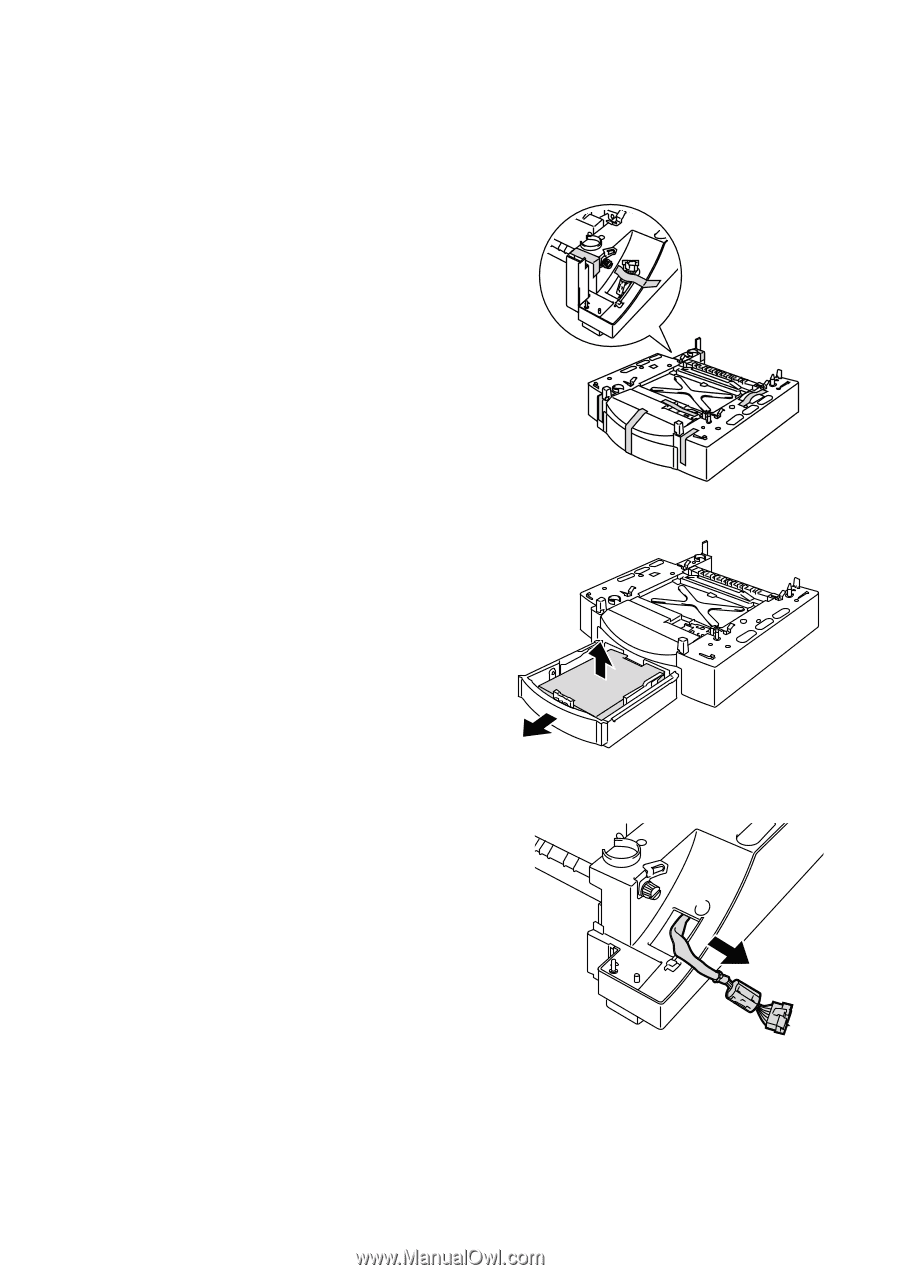
CHAPTER 5 MAINTENANCE
5-46
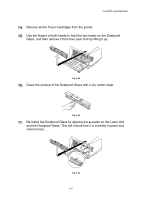
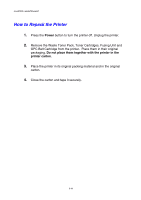
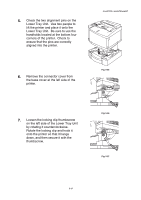
1.
Turn the printer off and unplug the power cord from the AC outlet.
2.
Place the Lower Tray Unit on a flat
table, and then remove the protective
parts.
Fig. 5-52
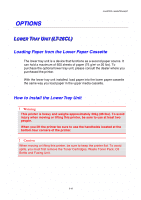
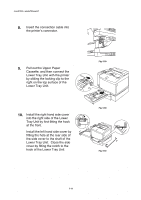
3.
Pull out the Paper Cassette from the
Lower Tray Unit, and then remove
the tapes and the protective parts
inside of the Cassette.
Install the Paper Cassette into the
Lower Tray Unit.
Fig. 5-53
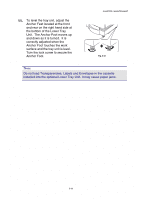
4.
Pull out the connection cable located
at the left rear side of the Lower Tray
Unit.
Fig. 5-54