Brother International HL-2600CN Users Manual - English - Page 140
Drum Cleaner, Replacing the Drum Cleaner, Remove the Drum Cleaner Cover.
 |
View all Brother International HL-2600CN manuals
Add to My Manuals
Save this manual to your list of manuals |
Page 140 highlights
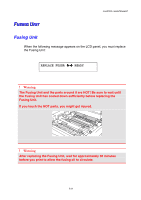
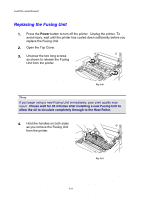
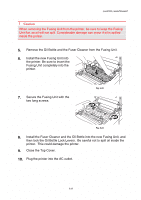
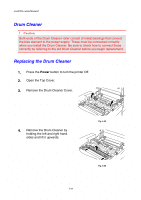
CHAPTER 5 MAINTENANCE Drum Cleaner ! Caution Both ends of the Drum Cleaner roller consist of metal bearings that connect the bias element to the power supply. These must be connected correctly when you install the Drum Cleaner. Be sure to check how to connect these correctly by referring to the old Drum Cleaner before you begin replacement. Replacing the Drum Cleaner 1. Press the Power button to turn the printer Off. 2. Open the Top Cover. 3. Remove the Drum Cleaner Cover. 4. Remove the Drum Cleaner by holding the left and right hand sides and lift it upwards. Fig. 5-24 Fig. 5-25 5-28
-
 1
1 -
2
-
3
-
4
-
5
-
6
-
7
-
8
-
9
-
10
-
11
-
12
-
13
-
14
-
15
-
16
-
17
-
18
-
19
-
20
-
21
-
22
-
23
-
24
-
25
-
26
-
27
-
28
-
29
-
30
-
31
-
32
-
33
-
34
-
35
-
36
-
37
-
38
-
39
-
40
-
41
-
42
-
43
-
44
-
45
-
46
-
47
-
48
-
49
-
50
-
51
-
52
-
53
-
54
-
55
-
56
-
57
-
58
-
59
-
60
-
61
-
62
-
63
-
64
-
65
-
66
-
67
-
68
-
69
-
70
-
71
-
72
-
73
-
74
-
75
-
76
-
77
-
78
-
79
-
80
-
81
-
82
-
83
-
84
-
85
-
86
-
87
-
88
-
89
-
90
-
91
-
92
-
93
-
94
-
95
-
96
-
97
-
98
-
99
-
100
-
101
-
102
-
103
-
104
-
105
-
106
-
107
-
108
-
109
-
110
-
111
-
112
-
113
-
114
-
115
-
116
-
117
-
118
-
119
-
120
-
121
-
122
-
123
-
124
-
125
-
126
-
127
-
128
-
129
-
130
-
131
-
132
-
133
-
134
-
 135
135 -
 136
136 -
 137
137 -
 138
138 -
 139
139 -
 140
140 -
 141
141 -
 142
142 -
 143
143 -
 144
144 -
 145
145 -
146
-
147
-
148
-
149
-
150
-
151
-
152
-
153
-
154
-
155
-
156
-
157
-
158
-
159
-
160
-
161
-
162
-
163
-
164
-
165
-
166
-
167
-
168
-
169
-
170
-
171
-
172
-
173
-
174
-
175
-
176
-
177
-
178
-
179
-
180
-
181
-
182
-
183
-
184
-
185
-
186
-
187
-
188
-
189
-
190
-
191
-
192
-
193
-
194
-
195
-
196
-
197
-
198
-
199
-
200
-
201
-
202
-
203
-
204
-
205
-
206
-
207
-
208
-
209
-
210
-
211
-
212
-
213
-
214
-
215
-
216
-
217
-
218
-
219
-
220
-
221
-
222
-
223
-
224
-
225
 |
 |
CHAPTER 5 MAINTENANCE
5-28
Drum Cleaner
!
Caution
Both ends of the Drum Cleaner roller consist of metal bearings that connect
the bias element to the power supply. These must be connected correctly
when you install the Drum Cleaner. Be sure to check how to connect these
correctly by referring to the old Drum Cleaner before you begin replacement.
Replacing the Drum Cleaner
1.
Press the
Power
button to turn the printer Off.
2.
Open the Top Cover.
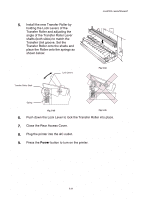
3.
Remove the Drum Cleaner Cover.
Fig. 5-24
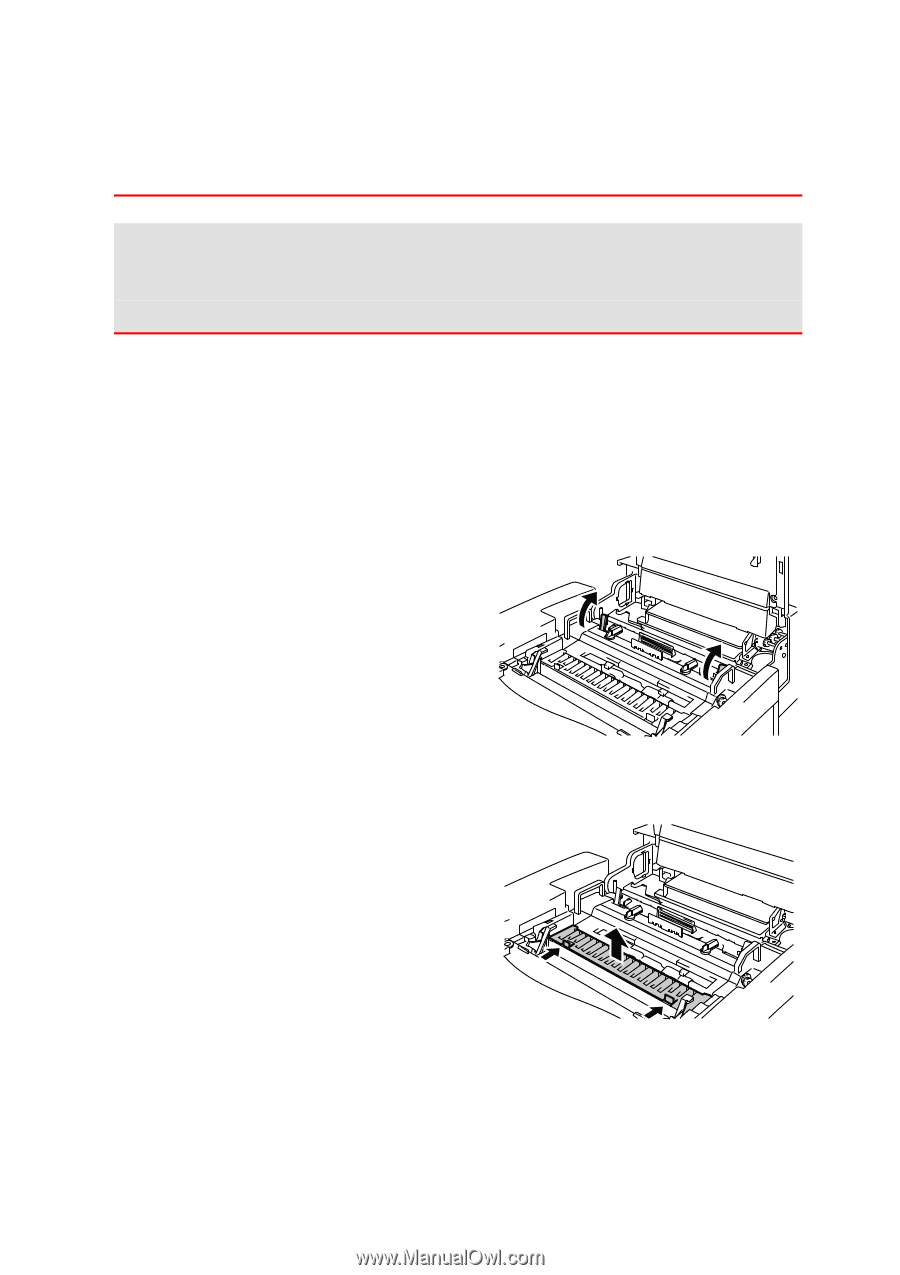
4.
Remove the Drum Cleaner by
holding the left and right hand
sides and lift it upwards.
Fig. 5-25