Brother International HL-2600CN Users Manual - English - Page 179
Troubleshooting, Error Messages, Rr Rr Oo Rr Ee Ss Ss Aa Gg Ee Ss - paper jam a1
 |
View all Brother International HL-2600CN manuals
Add to My Manuals
Save this manual to your list of manuals |
Page 179 highlights
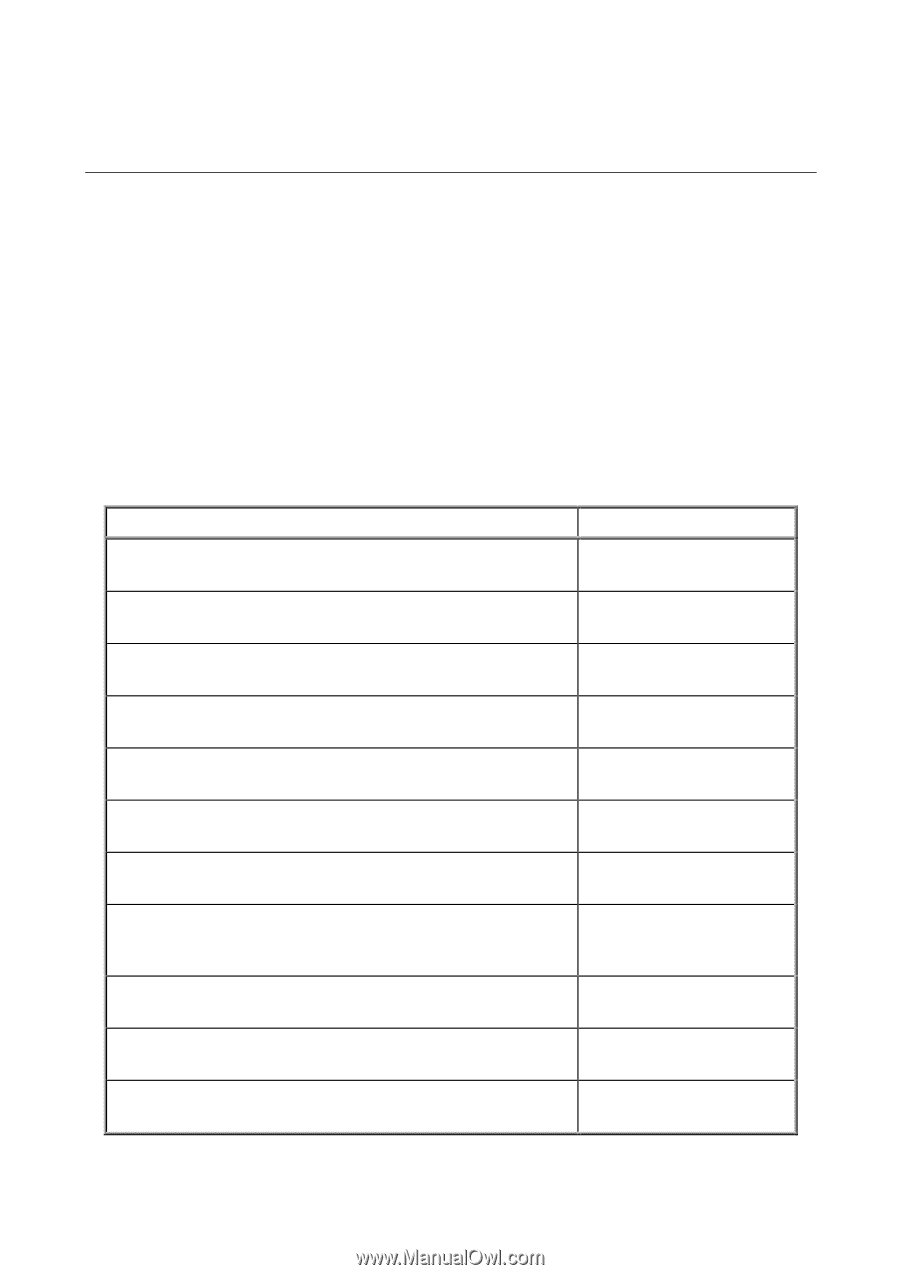
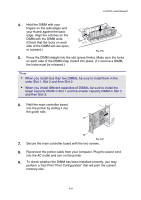
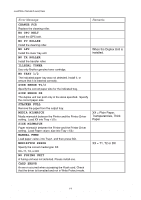
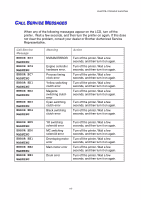
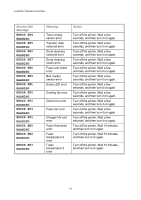
TROUBLESHOOTING CHAPTER 6 TROUBLE SHOOTING If any problems occur, the printer automatically stops printing, diagnoses the problem, and displays the resulting message to alert you. Take the appropriate action, referring to the following tables. If you cannot clear the problem, consult the dealer where you purchased the printer. Inform the dealer of the message number for quick troubleshooting. ERRRROORR MEESSSSAAGGEESS When any one of the following messages appears, the printer will stop operating. Error Message TONER EMPTY X Replace the X toner cartridge NO TONER X Install the X toner cartridge COVER OPEN Close the Front Cover COVER OPEN Close the Top Cover COVER OPEN Close the Rear Access Cover COVER OPEN Close the Lower Feeder Unit Cover COVER OPEN Close the Duplex Unit Cover JAM X Refer to the diagram, and check the location. Remove the jammed paper. NO PAPER T1/2 Load paper into Tray 1/2. WASTE TONER Replace the waste toner pack. OIL EMPTY Replace the oil bottle. Remarks X = C, M, Y, K, X = C, M, Y, K, X = A1, A2, B, C, D, E1, or E2 6-1
-
 1
1 -
2
-
3
-
4
-
5
-
6
-
7
-
8
-
9
-
10
-
11
-
12
-
13
-
14
-
15
-
16
-
17
-
18
-
19
-
20
-
21
-
22
-
23
-
24
-
25
-
26
-
27
-
28
-
29
-
30
-
31
-
32
-
33
-
34
-
35
-
36
-
37
-
38
-
39
-
40
-
41
-
42
-
43
-
44
-
45
-
46
-
47
-
48
-
49
-
50
-
51
-
52
-
53
-
54
-
55
-
56
-
57
-
58
-
59
-
60
-
61
-
62
-
63
-
64
-
65
-
66
-
67
-
68
-
69
-
70
-
71
-
72
-
73
-
74
-
75
-
76
-
77
-
78
-
79
-
80
-
81
-
82
-
83
-
84
-
85
-
86
-
87
-
88
-
89
-
90
-
91
-
92
-
93
-
94
-
95
-
96
-
97
-
98
-
99
-
100
-
101
-
102
-
103
-
104
-
105
-
106
-
107
-
108
-
109
-
110
-
111
-
112
-
113
-
114
-
115
-
116
-
117
-
118
-
119
-
120
-
121
-
122
-
123
-
124
-
125
-
126
-
127
-
128
-
129
-
130
-
131
-
132
-
133
-
134
-
135
-
136
-
137
-
138
-
139
-
140
-
141
-
142
-
143
-
144
-
145
-
146
-
147
-
148
-
149
-
150
-
151
-
152
-
153
-
154
-
155
-
156
-
157
-
158
-
159
-
160
-
161
-
162
-
163
-
164
-
165
-
166
-
167
-
168
-
169
-
170
-
171
-
172
-
173
-
 174
174 -
 175
175 -
 176
176 -
 177
177 -
 178
178 -
 179
179 -
 180
180 -
 181
181 -
 182
182 -
 183
183 -
 184
184 -
185
-
186
-
187
-
188
-
189
-
190
-
191
-
192
-
193
-
194
-
195
-
196
-
197
-
198
-
199
-
200
-
201
-
202
-
203
-
204
-
205
-
206
-
207
-
208
-
209
-
210
-
211
-
212
-
213
-
214
-
215
-
216
-
217
-
218
-
219
-
220
-
221
-
222
-
223
-
224
-
225
 |
 |