Brother International HL-2600CN Users Manual - English - Page 141
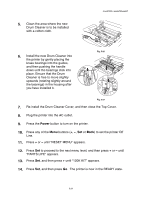
Re-install the Drum Cleaner Cover, and then close the Top Cover., Power
 |
View all Brother International HL-2600CN manuals
Add to My Manuals
Save this manual to your list of manuals |
Page 141 highlights
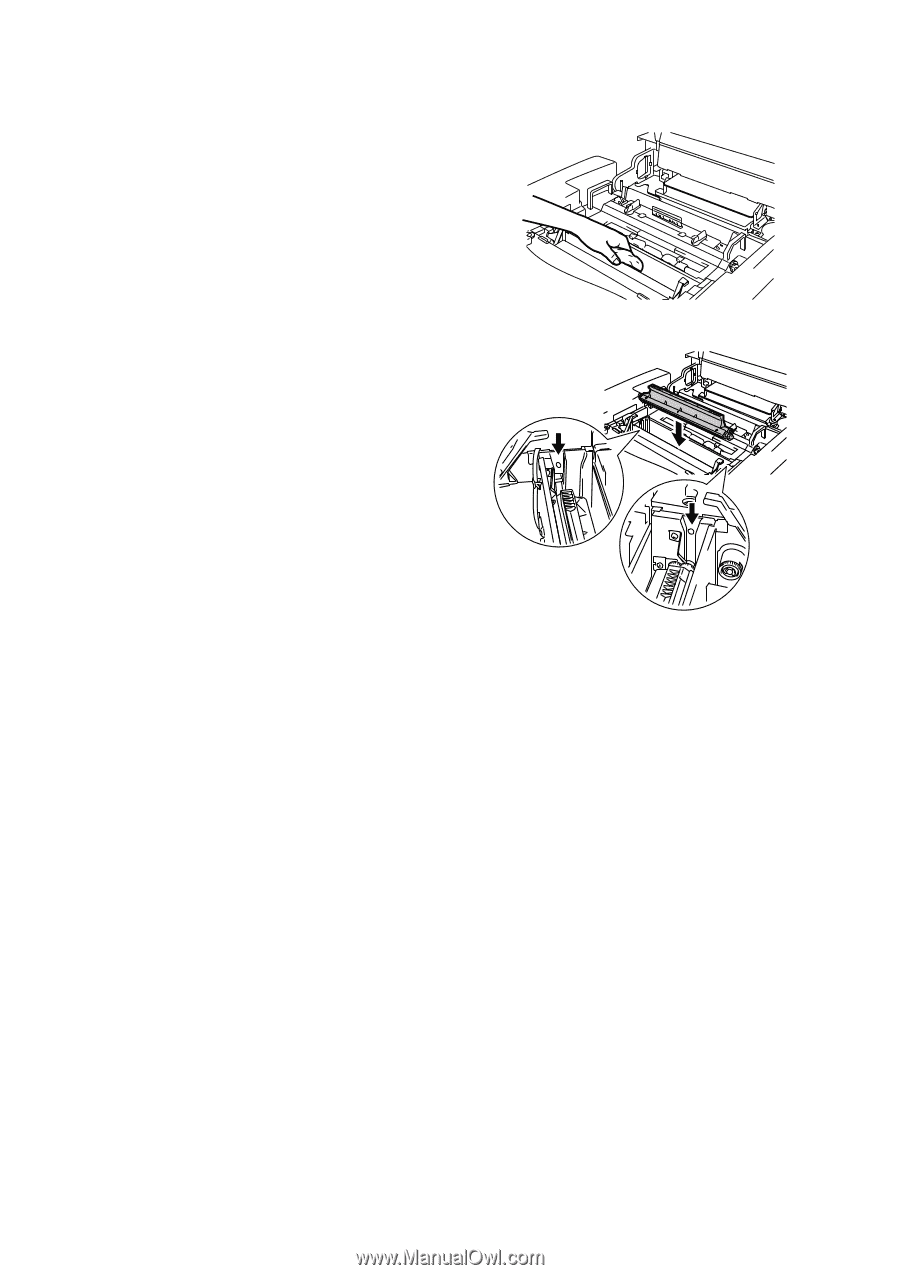
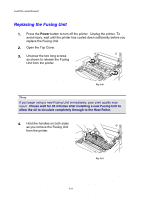
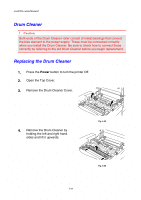
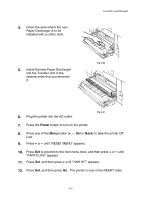
5. Clean the area where the new Drum Cleaner is to be installed with a cotton cloth. CHAPTER 5 MAINTENANCE 6. Install the new Drum Cleaner into the printer by gently placing the brass bearings into the guides, and then pushing the handle down until the bearings click into place. Ensure that the Drum Cleaner is free to move slightly upwards (rotating slightly around the bearings) in the housing after you have installed it. Fig. 5-26 Fig. 5-27 7. Re-install the Drum Cleaner Cover, and then close the Top Cover. 8. Plug the printer into the AC outlet. 9. Press the Power button to turn on the printer. 10. Press any of the Menu buttons (+, - , Set or Back) to set the printer Off Line. 11. Press + or - until "RESET MENU" appears. 12. Press Set to proceed to the next menu level, and then press + or - until "PARTS LIFE" appears. 13. Press Set, and then press + until "120K KIT" appears. 14. Press Set, and then press Go. The printer is now in the READY state. 5-29
-
 1
1 -
2
-
3
-
4
-
5
-
6
-
7
-
8
-
9
-
10
-
11
-
12
-
13
-
14
-
15
-
16
-
17
-
18
-
19
-
20
-
21
-
22
-
23
-
24
-
25
-
26
-
27
-
28
-
29
-
30
-
31
-
32
-
33
-
34
-
35
-
36
-
37
-
38
-
39
-
40
-
41
-
42
-
43
-
44
-
45
-
46
-
47
-
48
-
49
-
50
-
51
-
52
-
53
-
54
-
55
-
56
-
57
-
58
-
59
-
60
-
61
-
62
-
63
-
64
-
65
-
66
-
67
-
68
-
69
-
70
-
71
-
72
-
73
-
74
-
75
-
76
-
77
-
78
-
79
-
80
-
81
-
82
-
83
-
84
-
85
-
86
-
87
-
88
-
89
-
90
-
91
-
92
-
93
-
94
-
95
-
96
-
97
-
98
-
99
-
100
-
101
-
102
-
103
-
104
-
105
-
106
-
107
-
108
-
109
-
110
-
111
-
112
-
113
-
114
-
115
-
116
-
117
-
118
-
119
-
120
-
121
-
122
-
123
-
124
-
125
-
126
-
127
-
128
-
129
-
130
-
131
-
132
-
133
-
134
-
135
-
 136
136 -
 137
137 -
 138
138 -
 139
139 -
 140
140 -
 141
141 -
 142
142 -
 143
143 -
 144
144 -
 145
145 -
 146
146 -
147
-
148
-
149
-
150
-
151
-
152
-
153
-
154
-
155
-
156
-
157
-
158
-
159
-
160
-
161
-
162
-
163
-
164
-
165
-
166
-
167
-
168
-
169
-
170
-
171
-
172
-
173
-
174
-
175
-
176
-
177
-
178
-
179
-
180
-
181
-
182
-
183
-
184
-
185
-
186
-
187
-
188
-
189
-
190
-
191
-
192
-
193
-
194
-
195
-
196
-
197
-
198
-
199
-
200
-
201
-
202
-
203
-
204
-
205
-
206
-
207
-
208
-
209
-
210
-
211
-
212
-
213
-
214
-
215
-
216
-
217
-
218
-
219
-
220
-
221
-
222
-
223
-
224
-
225
 |
 |