Brother International HL 5280DW Network Users Manual - English - Page 36
Changing the print server settings, Using the BRAdmin Professional utility to change the print server settings (for Windows® only) - download
 |
UPC - 012502614456
View all Brother International HL 5280DW manuals
Add to My Manuals
Save this manual to your list of manuals |
Page 36 highlights
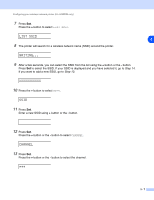
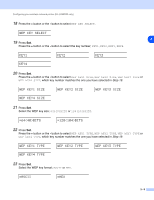
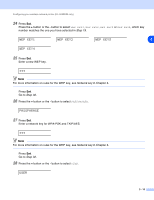
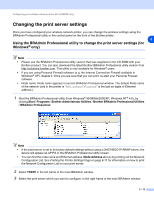
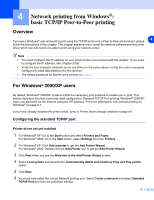
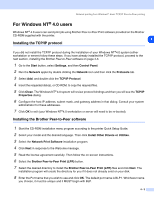
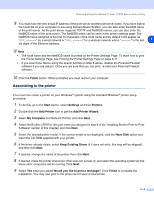
Configuring your wireless network printer (HL-5280DW only) Changing the print server settings Once you have configured your wireless network printer, you can change the wireless settings using the BRAdmin Professional utility or the control panel on the front of the Brother printer. 3 Using the BRAdmin Professional utility to change the print server settings (for Windows® only) Note • Please use the BRAdmin Professional utility version that was supplied on the CD-ROM with your Brother product. You can also download the latest Brother BRAdmin Professional utility version from http://solutions.brother.com. This utility is only available for Windows® users. • If you are using Personal Firewall software (e.g. the Internet Connection Firewall available in Windows® XP), disable it. Once you are sure that you can print, re-start your Personal Firewall software. • Node name: Node name appears in current BRAdmin Professional window. The default Node name of the network card in the printer is "BRW_xxxxxx" ("xxxxxx" is the last six digits of Ethernet address.). 1 Start the BRAdmin Professional utility (from Windows® 95/98/Me/2000/XP, Windows NT® 4.0), by clicking Start / Programs / Brother Administrator Utilities / Brother BRAdmin Professional Utilities / BRAdmin Professional. Note • If the print server is set to its factory default settings without using a DHCP/BOOTP/RARP server, the device will appear as APIPA in the BRAdmin Professional utility screen. • You can find the node name and Ethernet address (Node Address above) by printing out the Network Configuration List. See Printing the Printer Settings Page on page 8-11 for information on how to print the Network Configuration List on your print server. 2 Select TCP/IP in the left frame of the main BRAdmin window. 3 Select the print server which you want to configure, in the right frame of the main BRAdmin window. 3 - 12
-
 1
1 -
2
-
3
-
4
-
5
-
6
-
7
-
8
-
9
-
10
-
11
-
12
-
13
-
14
-
15
-
16
-
17
-
18
-
19
-
20
-
21
-
22
-
23
-
24
-
25
-
26
-
27
-
28
-
29
-
30
-
 31
31 -
 32
32 -
 33
33 -
 34
34 -
 35
35 -
 36
36 -
 37
37 -
 38
38 -
 39
39 -
 40
40 -
 41
41 -
42
-
43
-
44
-
45
-
46
-
47
-
48
-
49
-
50
-
51
-
52
-
53
-
54
-
55
-
56
-
57
-
58
-
59
-
60
-
61
-
62
-
63
-
64
-
65
-
66
-
67
-
68
-
69
-
70
-
71
-
72
-
73
-
74
-
75
-
76
-
77
-
78
-
79
-
80
-
81
-
82
-
83
-
84
-
85
-
86
-
87
-
88
-
89
-
90
-
91
-
92
-
93
-
94
-
95
-
96
-
97
-
98
-
99
-
100
-
101
-
102
-
103
-
104
-
105
-
106
-
107
-
108
-
109
-
110
-
111
-
112
 |
 |