Brother International HL 5280DW Network Users Manual - English - Page 47
Changing the Workgroup/Domain Name using a web browser, NetBIOS, Con NetBIOS
 |
UPC - 012502614456
View all Brother International HL 5280DW manuals
Add to My Manuals
Save this manual to your list of manuals |
Page 47 highlights
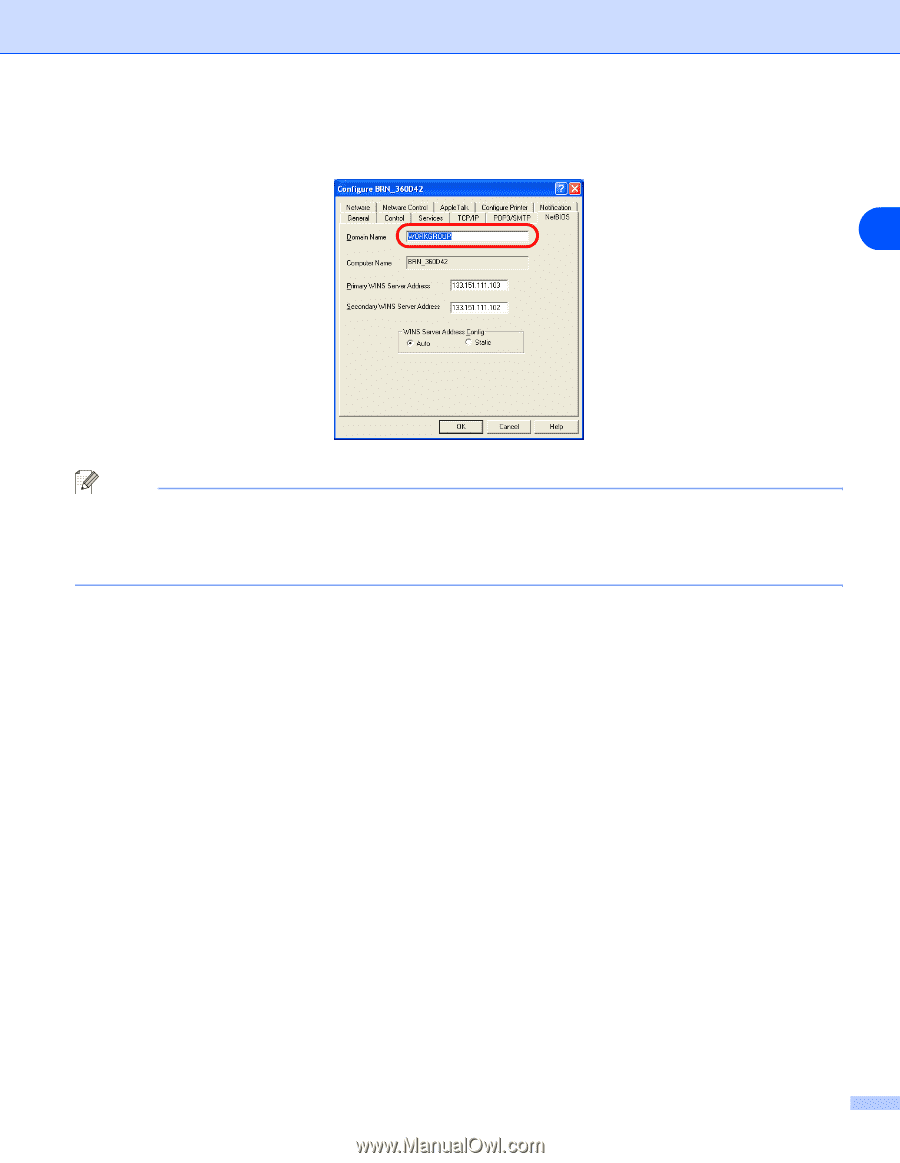
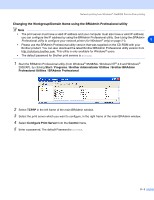
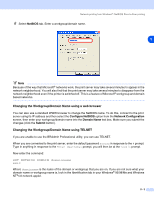
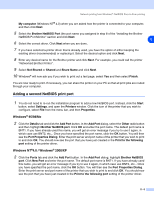
Network printing from Windows®: NetBIOS Peer-to-Peer printing 6 Select NetBIOS tab. Enter a workgroup/domain name. 5 Note Because of the way that Microsoft® networks work, the print server may take several minutes to appear in the network neighborhood. You will also find that the print server may take several minutes to disappear from the network neighborhood even if the printer is switched off. This is a feature of Microsoft® workgroup and domain based networks. Changing the Workgroup/Domain Name using a web browser You can also use a standard WWW browser to change the NetBIOS name. To do this, connect to the print server using its IP address and then select the Configure NetBIOS option from the Network Configuration screen, then enter your workgroup/domain name into the Domain Name text box. Make sure you submit the changes (click the Submit button). Changing the Workgroup/Domain Name using TELNET If you are unable to use the BRAdmin Professional utility, you can use TELNET. When you are connected to the print server, enter the default password access in response to the # prompt. Type in anything in response to the Enter Username> prompt, you will then be at the Local> prompt. Now enter the command: SET NETBIOS DOMAIN domainname EXIT Where domainname is the name of the domain or workgroup that you are on. If you are not sure what your domain name or workgroup name is, look in the Identification tab in your Windows® 95/98/Me and Windows NT®4.0 network applet. 5 - 3
-
 1
1 -
2
-
3
-
4
-
5
-
6
-
7
-
8
-
9
-
10
-
11
-
12
-
13
-
14
-
15
-
16
-
17
-
18
-
19
-
20
-
21
-
22
-
23
-
24
-
25
-
26
-
27
-
28
-
29
-
30
-
31
-
32
-
33
-
34
-
35
-
36
-
37
-
38
-
39
-
40
-
41
-
 42
42 -
 43
43 -
 44
44 -
 45
45 -
 46
46 -
 47
47 -
 48
48 -
 49
49 -
 50
50 -
 51
51 -
 52
52 -
53
-
54
-
55
-
56
-
57
-
58
-
59
-
60
-
61
-
62
-
63
-
64
-
65
-
66
-
67
-
68
-
69
-
70
-
71
-
72
-
73
-
74
-
75
-
76
-
77
-
78
-
79
-
80
-
81
-
82
-
83
-
84
-
85
-
86
-
87
-
88
-
89
-
90
-
91
-
92
-
93
-
94
-
95
-
96
-
97
-
98
-
99
-
100
-
101
-
102
-
103
-
104
-
105
-
106
-
107
-
108
-
109
-
110
-
111
-
112
 |
 |