Brother International MFC 8640D Users Manual - English - Page 180
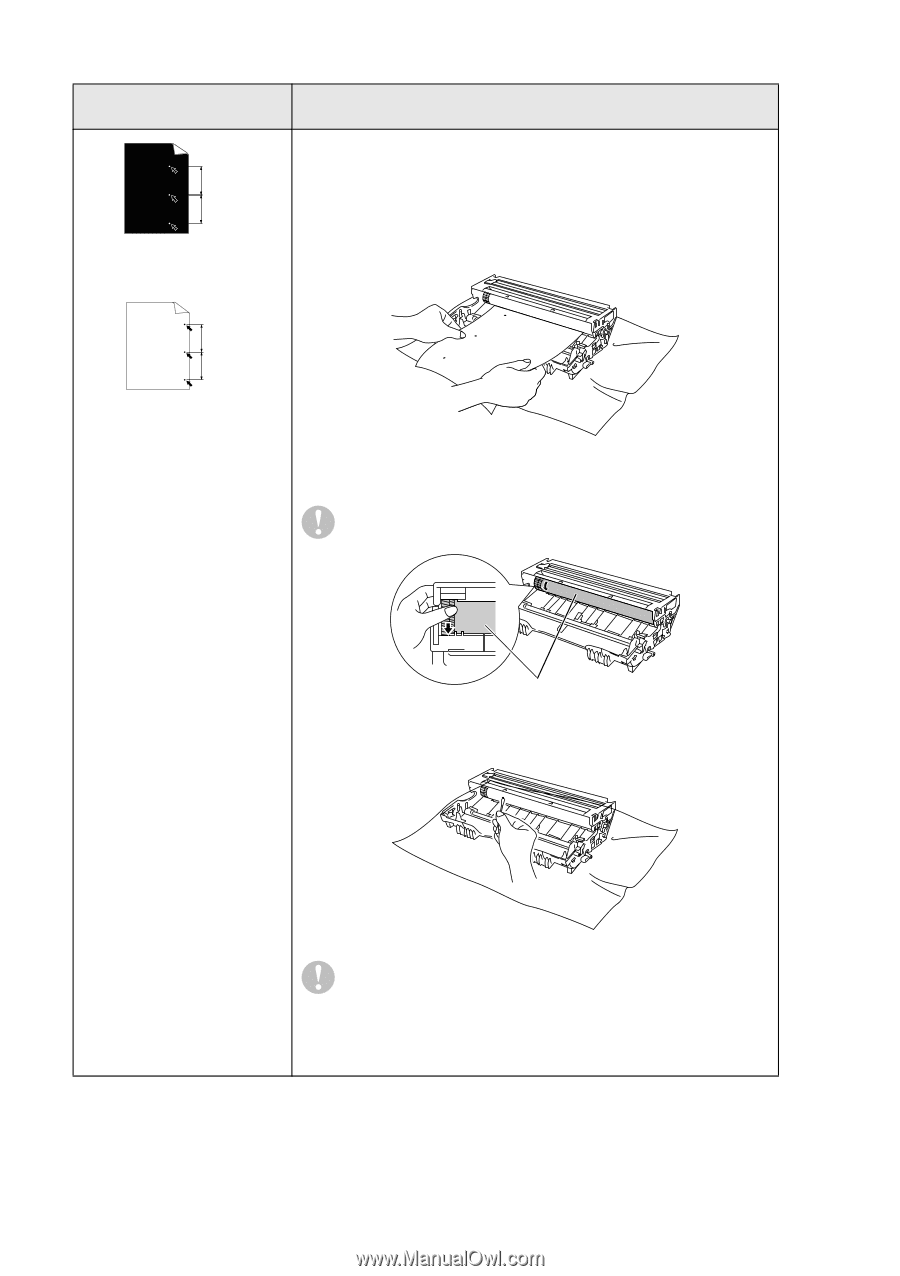
White Spots on black text, and graphics at 3.7 in., mm intervals, Black Spots at 3.7 in.
 |
UPC - 012502615408
View all Brother International MFC 8640D manuals
Add to My Manuals
Save this manual to your list of manuals |
Page 180 highlights
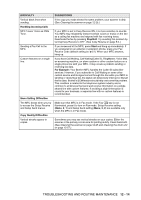
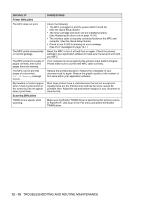
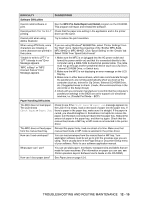
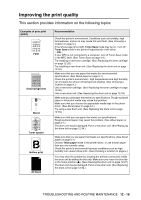
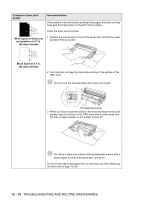
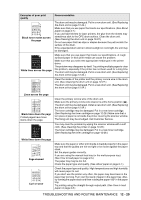
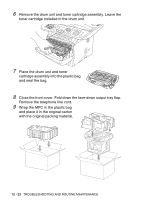
Examples of poor print quality 3.7 in. (94 mm) 3.7 in. (94 mm) White Spots on black text and graphics at 3.7 in. (94 mm) intervals Recommendation If the problem is not solved after printing a few pages, the drum unit may have glue from label stock on the OPC drum surface. Clean the drum unit as follows: 1 Position the print sample in front of the drum unit, and find the exact position of the poor print. 94 mm (3.7 in.) 94 mm (3.7 in.) Black Spots at 3.7 in. (94 mm) intervals 2 Turn the drum unit gear by hand while looking at the surface of the OPC drum. Do not touch the photosensitive drum with your fingers. Photosensitive drum 3 When you have located the mark on the drum that matches the print sample, wipe the surface of the OPC drum with a cotton swab until the dust or paper powder on the surface comes off. Do not try to clean the surface of the photosensitive drum with a sharp object, such as a ball-point pen, and so on. The drum unit may be damaged. Put in a new drum unit. (See Replacing the drum unit on page 12-34.) 12 - 19 TROUBLESHOOTING AND ROUTINE MAINTENANCE
-
 1
1 -
2
-
3
-
4
-
5
-
6
-
7
-
8
-
9
-
10
-
11
-
12
-
13
-
14
-
15
-
16
-
17
-
18
-
19
-
20
-
21
-
22
-
23
-
24
-
25
-
26
-
27
-
28
-
29
-
30
-
31
-
32
-
33
-
34
-
35
-
36
-
37
-
38
-
39
-
40
-
41
-
42
-
43
-
44
-
45
-
46
-
47
-
48
-
49
-
50
-
51
-
52
-
53
-
54
-
55
-
56
-
57
-
58
-
59
-
60
-
61
-
62
-
63
-
64
-
65
-
66
-
67
-
68
-
69
-
70
-
71
-
72
-
73
-
74
-
75
-
76
-
77
-
78
-
79
-
80
-
81
-
82
-
83
-
84
-
85
-
86
-
87
-
88
-
89
-
90
-
91
-
92
-
93
-
94
-
95
-
96
-
97
-
98
-
99
-
100
-
101
-
102
-
103
-
104
-
105
-
106
-
107
-
108
-
109
-
110
-
111
-
112
-
113
-
114
-
115
-
116
-
117
-
118
-
119
-
120
-
121
-
122
-
123
-
124
-
125
-
126
-
127
-
128
-
129
-
130
-
131
-
132
-
133
-
134
-
135
-
136
-
137
-
138
-
139
-
140
-
141
-
142
-
143
-
144
-
145
-
146
-
147
-
148
-
149
-
150
-
151
-
152
-
153
-
154
-
155
-
156
-
157
-
158
-
159
-
160
-
161
-
162
-
163
-
164
-
165
-
166
-
167
-
168
-
169
-
170
-
171
-
172
-
173
-
174
-
 175
175 -
 176
176 -
 177
177 -
 178
178 -
 179
179 -
 180
180 -
 181
181 -
 182
182 -
 183
183 -
 184
184 -
 185
185 -
186
-
187
-
188
-
189
-
190
-
191
-
192
-
193
-
194
-
195
-
196
-
197
-
198
-
199
-
200
-
201
-
202
-
203
-
204
-
205
-
206
-
207
-
208
-
209
-
210
-
211
-
212
-
213
-
214
-
215
-
216
-
217
-
218
-
219
-
220
-
221
-
222
-
223
-
224
-
225
-
226
-
227
-
228
-
229
-
230
-
231
 |
 |