Canon PowerShot SX70 HS Advanced User Guide - Page 195
Registering CANON iMAGE GATEWAY
 |
View all Canon PowerShot SX70 HS manuals
Add to My Manuals
Save this manual to your list of manuals |
Page 195 highlights
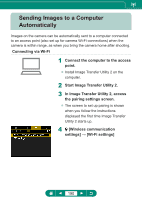
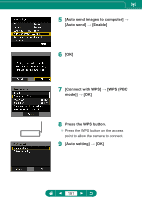
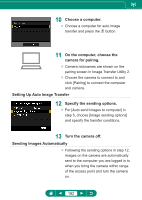
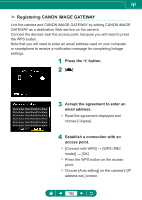
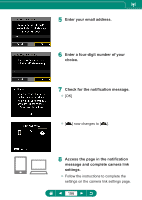
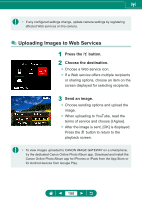
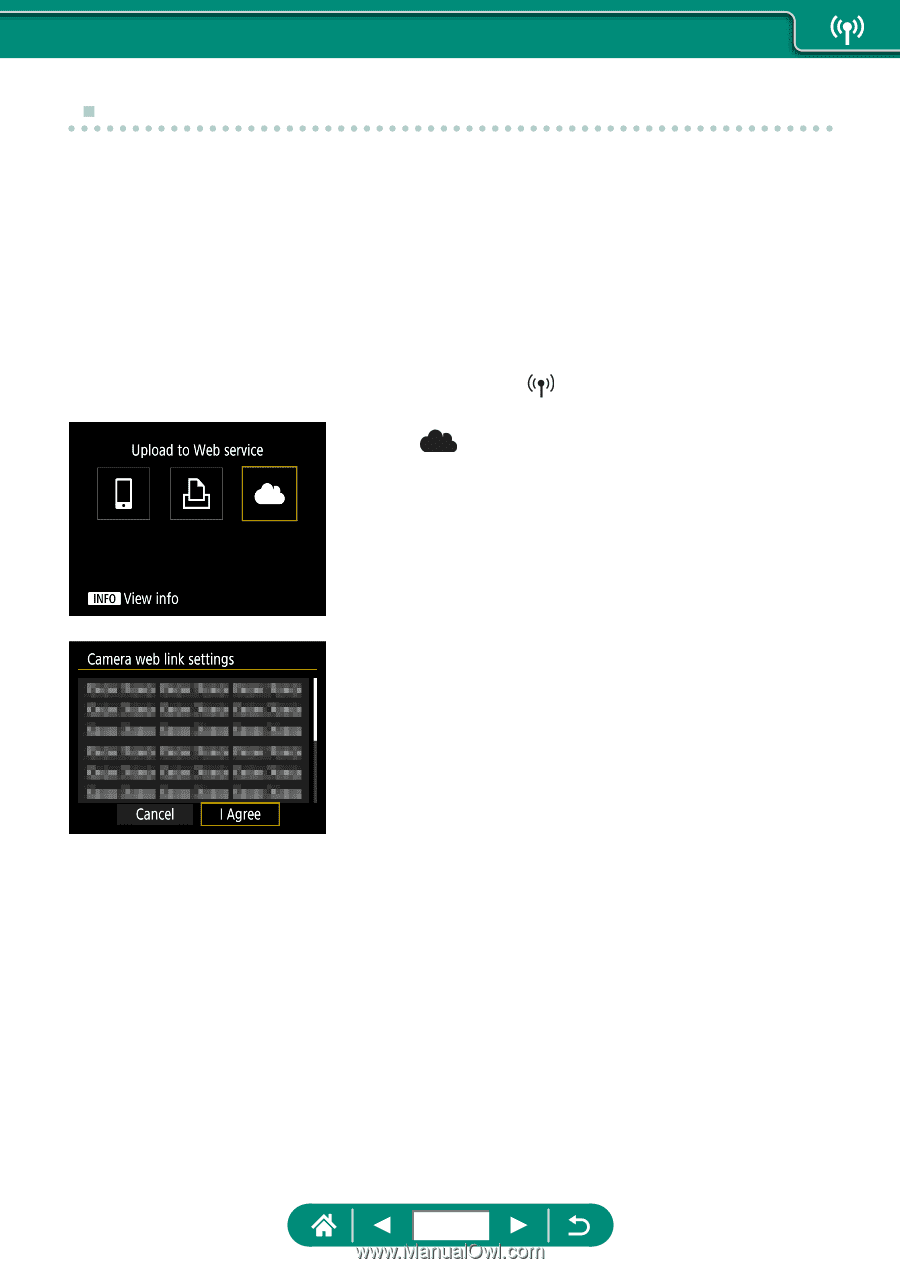
„„ Registering CANON iMAGE GATEWAY Link the camera and CANON iMAGE GATEWAY by adding CANON iMAGE GATEWAY as a destination Web service on the camera. Connect the devices near the access point, because you will need to press the WPS button. Note that you will need to enter an email address used on your computer or smartphone to receive a notification message for completing linkage settings. 1 Press the button. 2[ ] 3 Accept the agreement to enter an email address. zz Read the agreement displayed and choose [I Agree]. 4 Establish a connection with an access point. zz [Connect with WPS] → [WPS (PBC mode)] → [OK] zz Press the WPS button on the access point. zz Choose [Auto setting] on the camera's [IP address set.] screen. 195
-
 1
1 -
2
-
3
-
4
-
5
-
6
-
7
-
8
-
9
-
10
-
11
-
12
-
13
-
14
-
15
-
16
-
17
-
18
-
19
-
20
-
21
-
22
-
23
-
24
-
25
-
26
-
27
-
28
-
29
-
30
-
31
-
32
-
33
-
34
-
35
-
36
-
37
-
38
-
39
-
40
-
41
-
42
-
43
-
44
-
45
-
46
-
47
-
48
-
49
-
50
-
51
-
52
-
53
-
54
-
55
-
56
-
57
-
58
-
59
-
60
-
61
-
62
-
63
-
64
-
65
-
66
-
67
-
68
-
69
-
70
-
71
-
72
-
73
-
74
-
75
-
76
-
77
-
78
-
79
-
80
-
81
-
82
-
83
-
84
-
85
-
86
-
87
-
88
-
89
-
90
-
91
-
92
-
93
-
94
-
95
-
96
-
97
-
98
-
99
-
100
-
101
-
102
-
103
-
104
-
105
-
106
-
107
-
108
-
109
-
110
-
111
-
112
-
113
-
114
-
115
-
116
-
117
-
118
-
119
-
120
-
121
-
122
-
123
-
124
-
125
-
126
-
127
-
128
-
129
-
130
-
131
-
132
-
133
-
134
-
135
-
136
-
137
-
138
-
139
-
140
-
141
-
142
-
143
-
144
-
145
-
146
-
147
-
148
-
149
-
150
-
151
-
152
-
153
-
154
-
155
-
156
-
157
-
158
-
159
-
160
-
161
-
162
-
163
-
164
-
165
-
166
-
167
-
168
-
169
-
170
-
171
-
172
-
173
-
174
-
175
-
176
-
177
-
178
-
179
-
180
-
181
-
182
-
183
-
184
-
185
-
186
-
187
-
188
-
189
-
 190
190 -
 191
191 -
 192
192 -
 193
193 -
 194
194 -
 195
195 -
 196
196 -
 197
197 -
 198
198 -
 199
199 -
 200
200 -
201
-
202
-
203
-
204
-
205
-
206
-
207
-
208
-
209
-
210
-
211
-
212
-
213
-
214
-
215
-
216
-
217
-
218
-
219
-
220
-
221
-
222
-
223
-
224
-
225
-
226
-
227
-
228
-
229
-
230
-
231
-
232
-
233
-
234
-
235
-
236
-
237
-
238
-
239
-
240
-
241
-
242
-
243
-
244
-
245
-
246
-
247
-
248
-
249
-
250
-
251
-
252
-
253
-
254
-
255
-
256
-
257
-
258
-
259
-
260
-
261
-
262
-
263
-
264
-
265
-
266
-
267
-
268
-
269
-
270
-
271
-
272
-
273
-
274
-
275
 |
 |
±
Registering CANON iMAGE GATEWAY
Link the camera and CANON iMAGE GATEWAY by adding CANON iMAGE
GATEWAY as a destination Web service on the camera.
Connect the devices near the access point, because you will need to press
the WPS button.
Note that you will need to enter an email address used on your computer
or smartphone to receive a notification message for completing linkage
settings.
1
Press the
button.
2
[
]
3
Accept the agreement to enter an
email address.
z
Read the agreement displayed and
choose [I Agree].
4
Establish a connection with an
access point.
z
[Connect with WPS] → [WPS (PBC
mode)] → [OK]
z
Press the WPS button on the access
point.
z
Choose [Auto setting] on the camera’s [IP
address set.] screen.
195