Cisco 7962G Administration Guide - Page 162
Performing a Basic Reset, Operation, Performing, Explanation
 |
UPC - 882658140341
View all Cisco 7962G manuals
Add to My Manuals
Save this manual to your list of manuals |
Page 162 highlights
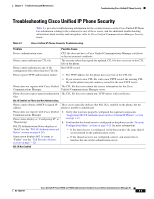
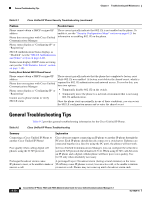
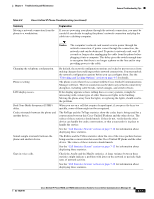
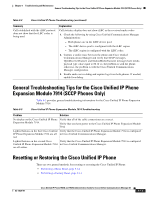
Resetting or Restoring the Cisco Unified IP Phone Chapter 9 Troubleshooting and Maintenance Performing a Basic Reset Performing a basic reset of a Cisco Unified IP Phone provides a way to recover if the phone experiences an error and provides a way to reset or restore various configuration and security settings. Table 9-4 describes the ways to perform a basic reset. You can reset a phone with any of these operations after the phone has started up. Choose the operation that is appropriate for your situation. Table 9-4 Basic Reset Methods Operation Restart phone Erase softkey Performing Explanation Press the Services, Settings, or Directories button and then press **#**. Resets any user and network configuration changes that you have made, but that the phone has not written to its Flash memory, to previously saved settings, then restarts the phone. From the Settings menu, unlock phone options (see the "Unlocking and Locking Options" section on page 4-3). Then press the Erase softkey. Resets user and network configuration settings to their default values, deletes the CTL file from the phone, and restarts the phone. From the Network Configuration menu, unlock phone options (see the "Unlocking and Locking Options" section on page 4-3). Then press the Erase softkey. Resets network configuration settings to their default values and resets the phone. (This method causes DHCP to reconfigure the IP address of the phone.) From the Security Configuration menu, unlock phone options (see the "Unlocking and Locking Options" section on page 4-3). Then press the Erase softkey. Deletes the CTL file from the phone and restarts the phone. Performing a Factory Reset When you perform a factory reset of the Cisco Unified IP Phone, the following information is erased or reset to its default value: • CTL file-Erased • LSC-Erased • User configuration settings-Reset to default values • Network configuration settings-Reset to default values • Call histories-Erased • Locale information-Reset to default values • Phone application-Erased (phone recovers by loading the term62.default.loads file or the term42.default.loads file, depending on the phone model) Before you perform a factory reset, ensure that the following conditions are met: • The phone must be on a DHCP-enabled network. • A valid TFTP server must be set in DHCP option 150 or option 66 on the DHCP server. • The term62.default.loads file or the term42.default.loads and the files specified in that file should be available on the TFTP server that is specified by the DHCP packet. 9-14 Cisco Unified IP Phone 7962G and 7942G Administration Guide for Cisco Unified Communications Manager 6.1 OL-14625-01
-
 1
1 -
2
-
3
-
4
-
5
-
6
-
7
-
8
-
9
-
10
-
11
-
12
-
13
-
14
-
15
-
16
-
17
-
18
-
19
-
20
-
21
-
22
-
23
-
24
-
25
-
26
-
27
-
28
-
29
-
30
-
31
-
32
-
33
-
34
-
35
-
36
-
37
-
38
-
39
-
40
-
41
-
42
-
43
-
44
-
45
-
46
-
47
-
48
-
49
-
50
-
51
-
52
-
53
-
54
-
55
-
56
-
57
-
58
-
59
-
60
-
61
-
62
-
63
-
64
-
65
-
66
-
67
-
68
-
69
-
70
-
71
-
72
-
73
-
74
-
75
-
76
-
77
-
78
-
79
-
80
-
81
-
82
-
83
-
84
-
85
-
86
-
87
-
88
-
89
-
90
-
91
-
92
-
93
-
94
-
95
-
96
-
97
-
98
-
99
-
100
-
101
-
102
-
103
-
104
-
105
-
106
-
107
-
108
-
109
-
110
-
111
-
112
-
113
-
114
-
115
-
116
-
117
-
118
-
119
-
120
-
121
-
122
-
123
-
124
-
125
-
126
-
127
-
128
-
129
-
130
-
131
-
132
-
133
-
134
-
135
-
136
-
137
-
138
-
139
-
140
-
141
-
142
-
143
-
144
-
145
-
146
-
147
-
148
-
149
-
150
-
151
-
152
-
153
-
154
-
155
-
156
-
 157
157 -
 158
158 -
 159
159 -
 160
160 -
 161
161 -
 162
162 -
 163
163 -
 164
164 -
 165
165 -
 166
166 -
 167
167 -
168
-
169
-
170
-
171
-
172
-
173
-
174
-
175
-
176
-
177
-
178
-
179
-
180
-
181
-
182
-
183
-
184
-
185
-
186
-
187
-
188
-
189
-
190
-
191
-
192
-
193
-
194
 |
 |
