Cisco NM-8B-U User Guide - Page 119
Clearing all MAC Address Tables, Configuring Intrachassis Stacking
 |
UPC - 074632001001
View all Cisco NM-8B-U manuals
Add to My Manuals
Save this manual to your list of manuals |
Page 119 highlights
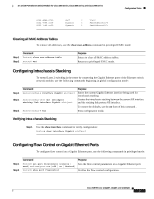
16- and 36-Port Ethernet Switch Module for Cisco 2600 Series, Cisco 3600 Series, and Cisco 3700 Series 0004.ddbb.6700 0002.7e48.cc38 0002.7e48.cc39 Self 2 Vlan2 Dynamic 3 FastEthernet0/4 Dynamic 3 FastEthernet0/5 Configuration Tasks Clearing all MAC Address Tables To remove all addresses, use the clear mac-address command in privileged EXEC mode: Step 1 Step 2 Command Router# clear mac-address-table Router# end Purpose Enters to clear all MAC address tables. Returns to privileged EXEC mode. Configuring Intrachassis Stacking To extend Layer 2 switching in the router by connecting the Gigabit Ethernet ports of the Ethernet switch network module, use the following commands beginning in global configuration mode: Step 1 Step 1 Step 2 Command Router(config)# interface Gigabit slot/port Router(config-if)# [no] switchport stacking-link interface Gigabit slot/port Router(config)# end Purpose Enters the current Gigabit Ethernet interface being used for intrachassis stacking. Creates the intrachassis stacking between the current GE interface and the stacking link partner GE interface. To restore the defaults, use the no form of this command . Exits configuration mode. Verifying Intra-chassis Stacking Step 1 Use the show interface command to verify configuration: Router# show interface Gigabit slot/port Configuring Flow Control on Gigabit Ethernet Ports To configure flow control on a Gigabit Ethernet port, use the following commands in privileged mode: Step 1 Step 2 Command Router# set port flowcontrol {receive | send} mod-num/port-num {off | on | desired} Router# show port flowcontrol Purpose Sets the flow control parameters on a Gigabit Ethernet port. Verifies the flow control configuration. Cisco IOS Release 12.2(2)XT, 12.2(8)T, and 12.2(15)ZJ 119
-
 1
1 -
2
-
3
-
4
-
5
-
6
-
7
-
8
-
9
-
10
-
11
-
12
-
13
-
14
-
15
-
16
-
17
-
18
-
19
-
20
-
21
-
22
-
23
-
24
-
25
-
26
-
27
-
28
-
29
-
30
-
31
-
32
-
33
-
34
-
35
-
36
-
37
-
38
-
39
-
40
-
41
-
42
-
43
-
44
-
45
-
46
-
47
-
48
-
49
-
50
-
51
-
52
-
53
-
54
-
55
-
56
-
57
-
58
-
59
-
60
-
61
-
62
-
63
-
64
-
65
-
66
-
67
-
68
-
69
-
70
-
71
-
72
-
73
-
74
-
75
-
76
-
77
-
78
-
79
-
80
-
81
-
82
-
83
-
84
-
85
-
86
-
87
-
88
-
89
-
90
-
91
-
92
-
93
-
94
-
95
-
96
-
97
-
98
-
99
-
100
-
101
-
102
-
103
-
104
-
105
-
106
-
107
-
108
-
109
-
110
-
111
-
112
-
113
-
 114
114 -
 115
115 -
 116
116 -
 117
117 -
 118
118 -
 119
119 -
 120
120 -
 121
121 -
 122
122 -
 123
123 -
 124
124 -
125
-
126
-
127
-
128
-
129
-
130
-
131
-
132
-
133
-
134
-
135
-
136
-
137
-
138
-
139
-
140
-
141
-
142
-
143
-
144
-
145
-
146
-
147
-
148
-
149
-
150
-
151
-
152
-
153
-
154
-
155
-
156
-
157
-
158
-
159
-
160
-
161
-
162
-
163
-
164
-
165
-
166
-
167
-
168
-
169
-
170
-
171
-
172
-
173
-
174
-
175
-
176
-
177
-
178
-
179
-
180
-
181
-
182
-
183
-
184
-
185
-
186
-
187
-
188
-
189
-
190
-
191
-
192
-
193
-
194
-
195
-
196
-
197
-
198
-
199
-
200
-
201
-
202
-
203
-
204
-
205
-
206
-
207
-
208
-
209
-
210
-
211
-
212
-
213
-
214
-
215
-
216
-
217
-
218
-
219
-
220
-
221
-
222
-
223
-
224
-
225
-
226
-
227
-
228
-
229
-
230
-
231
-
232
-
233
-
234
-
235
-
236
-
237
-
238
-
239
-
240
-
241
-
242
-
243
-
244
-
245
-
246
 |
 |
