Cisco NM-8B-U User Guide - Page 48
Defining a Range Macro, Verifying Configuration of a Range of Interfaces
 |
UPC - 074632001001
View all Cisco NM-8B-U manuals
Add to My Manuals
Save this manual to your list of manuals |
Page 48 highlights
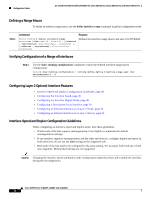
Configuration Tasks 16- and 36-Port Ethernet Switch Module for Cisco 2600 Series, Cisco 3600 Series, and Cisco 3700 Series Defining a Range Macro To define an interface range macro, use the define interface-range command in global configuration mode: Step 1 Command Purpose Router(config)# define interface-range macro-name {vlan vlan-id - vlan-id} | {{ethernet | fastethernet} slot/interface - interface} [, {{ethernet | fastethernet} slot/interface interface}] Defines the interface-range macro and save it in NVRAM. Verifying Configuration of a Range of Interfaces Step 1 Use the show running-configuration command to show the defined interface-range macro configuration: Router# show running-configuration | include define define interface-range enet_list FastEthernet5/1 - 4 Configuring Layer 2 Optional Interface Features • Interface Speed and Duplex Configuration Guidelines, page 48 • Configuring the Interface Speed, page 49 • Configuring the Interface Duplex Mode, page 49 • Configuring a Description for an Interface, page 50 • Configuring an Ethernet Interface as a Layer 2 Trunk, page 50 • Configuring an Ethernet Interface as a Layer 2 Access, page 52 Interface Speed and Duplex Configuration Guidelines When configuring an interface speed and duplex mode, note these guidelines: • If both ends of the line support autonegotiation, Cisco highly recommends the default autonegotiation settings. • If one interface supports autonegotiation and the other end does not, configure duplex and speed on both interfaces; do not use the auto setting on the supported side. • Both ends of the line need to be configured to the same setting. For example, both hard-set or both auto-negotiate. Mismatched settings are not supported. Caution Changing the interface speed and duplex mode configuration might shut down and reenable the interface during the reconfiguration. Cisco IOS Release 12.2(2)XT, 12.2(8)T, and 12.2(15)ZJ 48
-
 1
1 -
2
-
3
-
4
-
5
-
6
-
7
-
8
-
9
-
10
-
11
-
12
-
13
-
14
-
15
-
16
-
17
-
18
-
19
-
20
-
21
-
22
-
23
-
24
-
25
-
26
-
27
-
28
-
29
-
30
-
31
-
32
-
33
-
34
-
35
-
36
-
37
-
38
-
39
-
40
-
41
-
42
-
 43
43 -
 44
44 -
 45
45 -
 46
46 -
 47
47 -
 48
48 -
 49
49 -
 50
50 -
 51
51 -
 52
52 -
 53
53 -
54
-
55
-
56
-
57
-
58
-
59
-
60
-
61
-
62
-
63
-
64
-
65
-
66
-
67
-
68
-
69
-
70
-
71
-
72
-
73
-
74
-
75
-
76
-
77
-
78
-
79
-
80
-
81
-
82
-
83
-
84
-
85
-
86
-
87
-
88
-
89
-
90
-
91
-
92
-
93
-
94
-
95
-
96
-
97
-
98
-
99
-
100
-
101
-
102
-
103
-
104
-
105
-
106
-
107
-
108
-
109
-
110
-
111
-
112
-
113
-
114
-
115
-
116
-
117
-
118
-
119
-
120
-
121
-
122
-
123
-
124
-
125
-
126
-
127
-
128
-
129
-
130
-
131
-
132
-
133
-
134
-
135
-
136
-
137
-
138
-
139
-
140
-
141
-
142
-
143
-
144
-
145
-
146
-
147
-
148
-
149
-
150
-
151
-
152
-
153
-
154
-
155
-
156
-
157
-
158
-
159
-
160
-
161
-
162
-
163
-
164
-
165
-
166
-
167
-
168
-
169
-
170
-
171
-
172
-
173
-
174
-
175
-
176
-
177
-
178
-
179
-
180
-
181
-
182
-
183
-
184
-
185
-
186
-
187
-
188
-
189
-
190
-
191
-
192
-
193
-
194
-
195
-
196
-
197
-
198
-
199
-
200
-
201
-
202
-
203
-
204
-
205
-
206
-
207
-
208
-
209
-
210
-
211
-
212
-
213
-
214
-
215
-
216
-
217
-
218
-
219
-
220
-
221
-
222
-
223
-
224
-
225
-
226
-
227
-
228
-
229
-
230
-
231
-
232
-
233
-
234
-
235
-
236
-
237
-
238
-
239
-
240
-
241
-
242
-
243
-
244
-
245
-
246
 |
 |
