Dell PowerEdge 4300 Dell PowerEdge 4300 Systems User's Guide - Page 30
Create Utility Partition, Welcome, Cancel
 |
View all Dell PowerEdge 4300 manuals
Add to My Manuals
Save this manual to your list of manuals |
Page 30 highlights
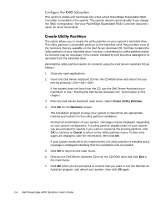
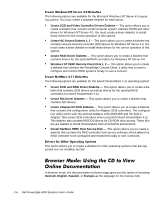
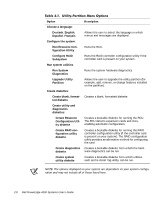
This option is visible and functional only when a Dell PowerEdge Expandable RAID Controller is installed in the system. The system reboots automatically if you change the RAID configuration. See your PowerEdge Expandable RAID Controller documentation for more information. The option allows you to create the utility partition on your system's hard-disk drive. The utility partition is a bootable partition on the hard-disk drive that provides most of the functions that are available on the Dell Server Assistant CD. Dell has installed the utility partition on your hard-disk drive; however, reinstalling the utility partition and/or its contents may be necessary if the version installed by Dell becomes damaged or is removed from the hard-disk drive. Reinstall the utility partition and/or its contents using the Dell Server Assistant CD as follows: 1. Close any open applications. 2. Insert the Dell Server Assistant CD into the CD-ROM drive and reboot the system by pressing . If the system does not boot from the CD, see the Dell Server Assistant documentation or see "Starting the Dell Server Assistant CD" found earlier in this chapter. 3. From the Dell Server Assistant main menu, select Create Utility Partition. 4. Click OK on the Welcome screen. The installation program surveys your system to determine the appropriate method and location for the utility partition installation. During this examination of your system, messages may be displayed, depending on your system configuration. If a utility partition already exists on your system, you are prompted to specify if you want to overwrite the existing partition; click OK to continue or Cancel to return to the utility partition menu. If other messages are displayed, note the information; then click OK. If your system meets all of the requirements, the utility partition is installed and a message is displayed indicating that the installation was successful. 5. Click OK to return to the main menu. 6. Remove the Dell Server Assistant CD from the CD-ROM drive and click Exit in the main menu. 7. Click OK when you are prompted to confirm that you want to exit the Dell Server Assistant program, and reboot your system; then click OK again. 2-4 Dell PowerEdge 4300 Systems User's Guide
-
 1
1 -
2
-
3
-
4
-
5
-
6
-
7
-
8
-
9
-
10
-
11
-
12
-
13
-
14
-
15
-
16
-
17
-
18
-
19
-
20
-
21
-
22
-
23
-
24
-
 25
25 -
 26
26 -
 27
27 -
 28
28 -
 29
29 -
 30
30 -
 31
31 -
 32
32 -
 33
33 -
 34
34 -
 35
35 -
36
-
37
-
38
-
39
-
40
-
41
-
42
-
43
-
44
-
45
-
46
-
47
-
48
-
49
-
50
-
51
-
52
-
53
-
54
-
55
-
56
-
57
-
58
-
59
-
60
-
61
-
62
-
63
-
64
-
65
-
66
-
67
-
68
-
69
-
70
-
71
-
72
-
73
-
74
-
75
-
76
-
77
-
78
-
79
-
80
-
81
-
82
-
83
-
84
-
85
-
86
-
87
-
88
-
89
-
90
-
91
-
92
-
93
-
94
-
95
-
96
-
97
-
98
-
99
-
100
-
101
-
102
-
103
-
104
-
105
-
106
-
107
-
108
-
109
-
110
-
111
-
112
-
113
-
114
-
115
-
116
-
117
-
118
-
119
-
120
-
121
-
122
-
123
-
124
-
125
-
126
-
127
-
128
-
129
-
130
-
131
-
132
-
133
-
134
-
135
-
136
-
137
-
138
-
139
-
140
-
141
-
142
-
143
-
144
-
145
-
146
-
147
-
148
-
149
-
150
-
151
-
152
-
153
-
154
-
155
-
156
-
157
-
158
-
159
-
160
-
161
 |
 |
