Dell PowerEdge 4300 Dell PowerEdge 4300 Systems User's Guide - Page 36
ATI Technologies Inc. 3D Rage Pro
 |
View all Dell PowerEdge 4300 manuals
Add to My Manuals
Save this manual to your list of manuals |
Page 36 highlights
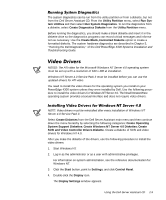
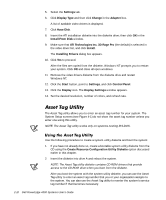
5. Select the Settings tab. 6. Click Display Type and then click Change in the Adapter box. A list of available video drivers is displayed. 7. Click Have Disk. 8. Insert the ATI installation diskette into the diskette drive; then click OK in the Install From Disk window. 9. Make sure that ATI Technologies Inc. 3D Rage Pro (the default) is selected in the video driver list, and click Install. The Installing Drivers dialog box appears. 10. Click Yes to proceed. After the files are copied from the diskette, Windows NT prompts you to restart your system. Click OK and close all open windows. 11. Remove the video drivers diskette from the diskette drive and restart Windows NT. 12. Click the Start button, point to Settings, and click Control Panel. 13. Click the Display icon. The Display Settings window appears. 14. Set the desired resolution, number of colors, and refresh rate. The Asset Tag utility allows you to enter an asset tag number for your system. The System Setup screens (see Figure 4-1) do not show the asset tag number unless you enter one using this utility. NOTE: The Asset Tag utility works only on systems running MS-DOS. Use the following procedure to create a system utility diskette and boot the system: 1. If you have not already done so, create a bootable system utility diskette from the CD using the Create Resource Configuration Utility Diskette option discussed earlier in this chapter. 2. Insert the diskette into drive A and reboot the system. NOTE: The Asset Tag utility diskette contains CD-ROM drivers that provide access to the CD-ROM drive when you boot from the diskette. After you boot the system with the system utility diskette, you can use the Asset Tag utility to enter an asset tag number that you or your organization assigns to the system. You can also use the Asset Tag utility to reenter the system's service tag number if that becomes necessary. 2-10 Dell PowerEdge 4300 Systems User's Guide
-
 1
1 -
2
-
3
-
4
-
5
-
6
-
7
-
8
-
9
-
10
-
11
-
12
-
13
-
14
-
15
-
16
-
17
-
18
-
19
-
20
-
21
-
22
-
23
-
24
-
25
-
26
-
27
-
28
-
29
-
30
-
 31
31 -
 32
32 -
 33
33 -
 34
34 -
 35
35 -
 36
36 -
 37
37 -
 38
38 -
 39
39 -
 40
40 -
 41
41 -
42
-
43
-
44
-
45
-
46
-
47
-
48
-
49
-
50
-
51
-
52
-
53
-
54
-
55
-
56
-
57
-
58
-
59
-
60
-
61
-
62
-
63
-
64
-
65
-
66
-
67
-
68
-
69
-
70
-
71
-
72
-
73
-
74
-
75
-
76
-
77
-
78
-
79
-
80
-
81
-
82
-
83
-
84
-
85
-
86
-
87
-
88
-
89
-
90
-
91
-
92
-
93
-
94
-
95
-
96
-
97
-
98
-
99
-
100
-
101
-
102
-
103
-
104
-
105
-
106
-
107
-
108
-
109
-
110
-
111
-
112
-
113
-
114
-
115
-
116
-
117
-
118
-
119
-
120
-
121
-
122
-
123
-
124
-
125
-
126
-
127
-
128
-
129
-
130
-
131
-
132
-
133
-
134
-
135
-
136
-
137
-
138
-
139
-
140
-
141
-
142
-
143
-
144
-
145
-
146
-
147
-
148
-
149
-
150
-
151
-
152
-
153
-
154
-
155
-
156
-
157
-
158
-
159
-
160
-
161
 |
 |
